I feel like I’ve been in a creative rut lately. Does anyone else ever feel that way? I picked up these fun LUCKY letters a few weeks ago, from The Wood Connection, and I put some paper on them a couple of weeks ago. I ended up not loving the paper that I put on the “K” so I ripped it off, sanded the front of it, and put some different paper on. I like the new paper much better. {I should have taken a picture so you could see, but I didn’t.} When I finally got the paper looking how I wanted it to, I couldn’t figure out how to embellish each letter. I was stumped!
 I had originally wanted to make my letter “U” into a pot of gold, but I just couldn’t figure out how to do it, so I didn’t. Maybe by next year I can figure something out along those lines. 🙂 I finally ended up tying some ribbons around the letters.
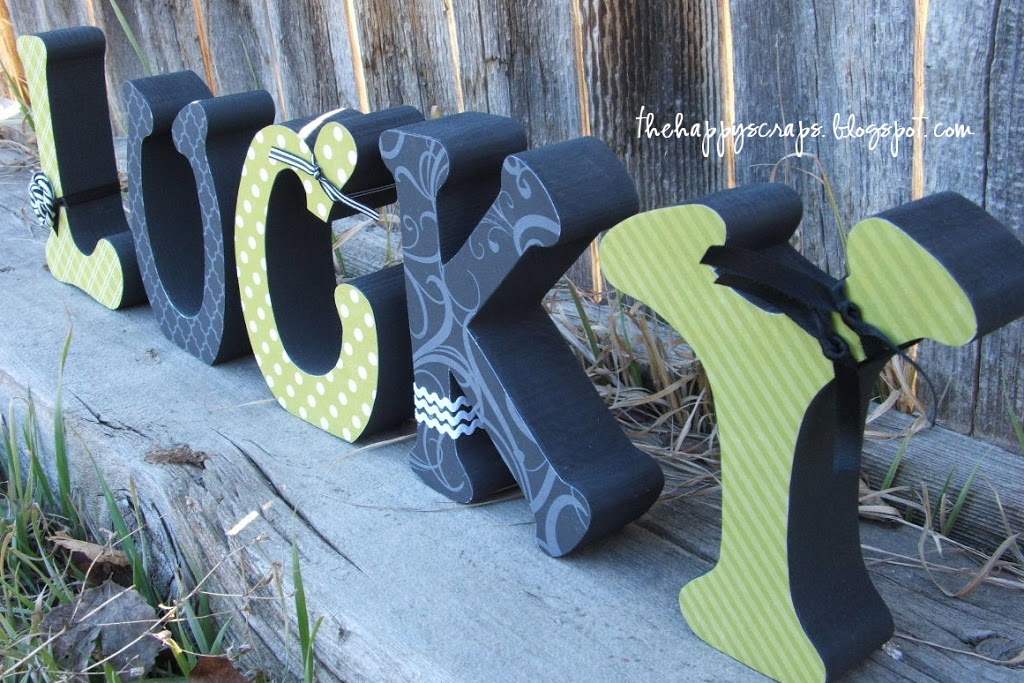 I made this rosette to put on the “L” and it is my favorite embellishment on the letters.
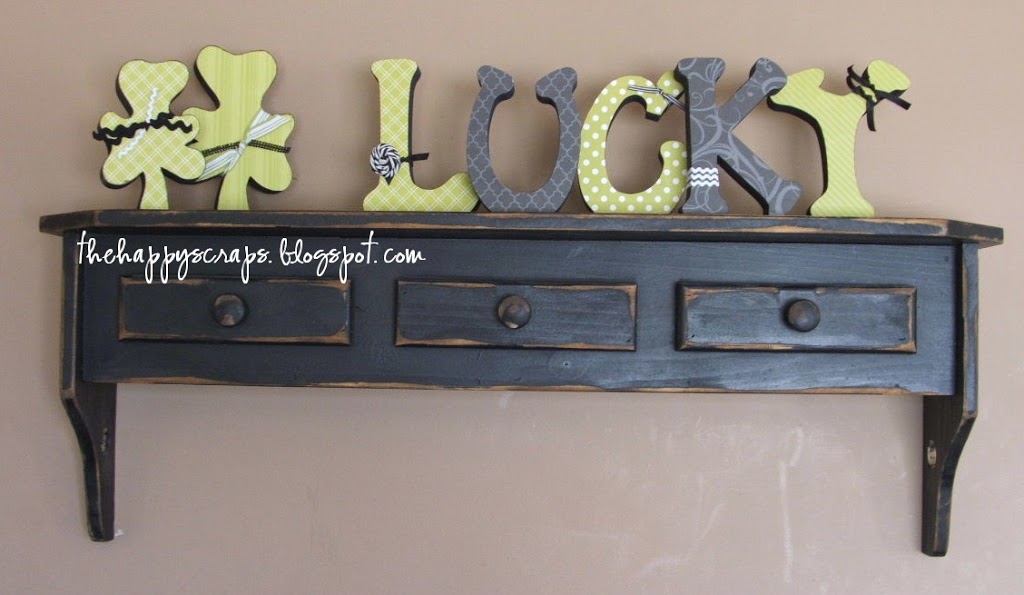
 Since the “LUCKY” looked a little bit lonely up there on my shelf, I decided to head back into The Wood Connection today and I picked up these fun shamrocks, brought them home and finished them to match. After I painted and adhered the paper, I used my ink pad and a q-tip to add some ink to the edges of the paper.
 And here they are all up on my shelf. I decided to stagger the letters to give them a little bit more depth, but you can’t really tell in the picture.


Leave a Reply