Hello, hello! It’s been a hot minute since I’ve been here. To be honest, the break has been kind of nice. However, I am hoping to get back here a little more often than I have been. 🙂 Anyway, did you hear about the new changes to Cricut Design Space? There has been a lot of talk about it this week, but the thing that I am most excited about is OFFSET!!! Hip Hip Hooray! I’ve been waiting forever for this! It was released in Beta yesterday, and I played with it and it is so easy to use, so I thought I’d share with you How to Use Offset in Cricut Design Space!

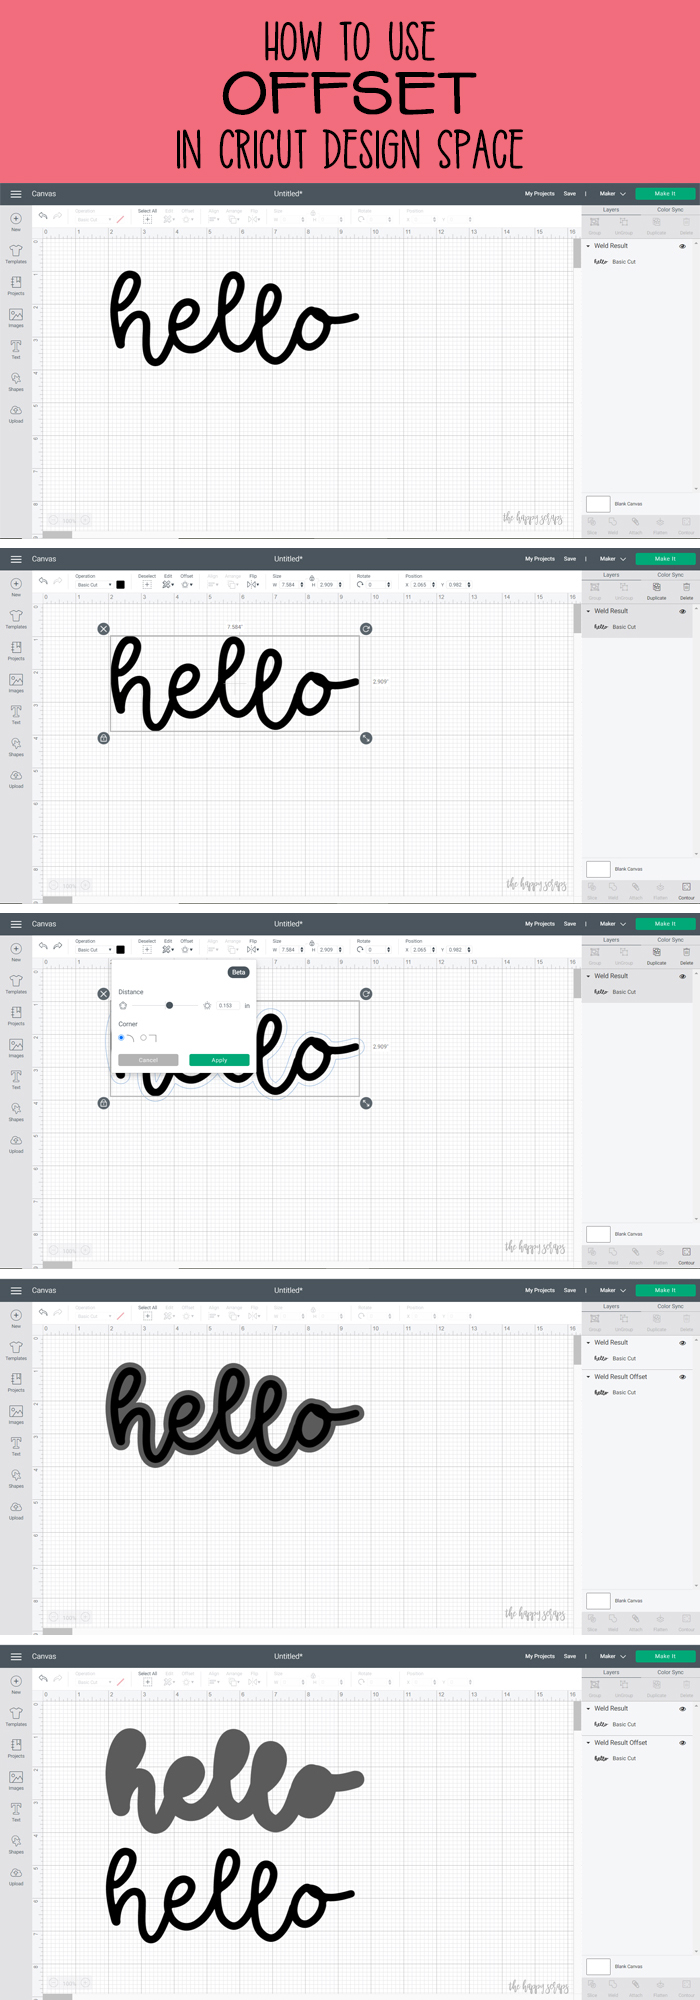
Start by creating your design. This will work with Cricut fonts and system fonts text and as well as images. I wrote out the word hello and then welded it together.
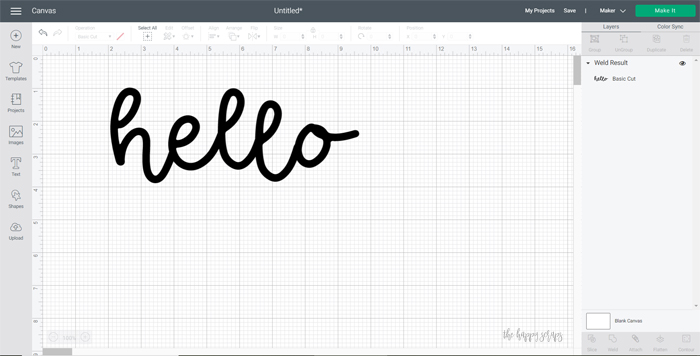
Select your design.
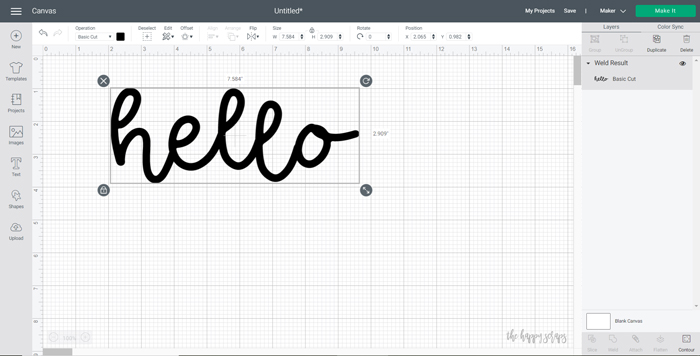
Up at the top, click on offset. Adjust your settings to what you would like it to be.
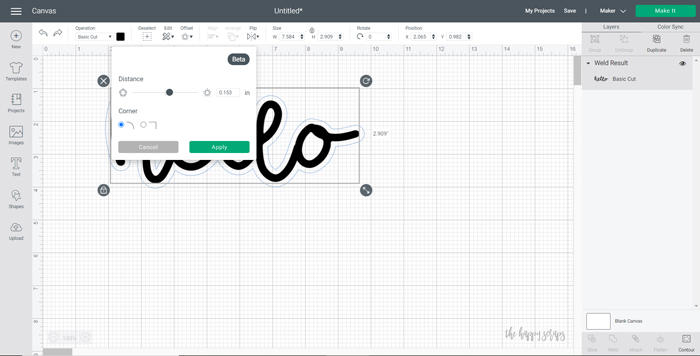
Select apply. It will add the layer behind your design.

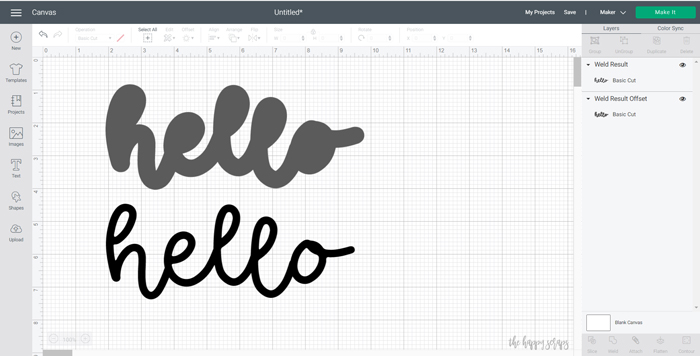
Once you have your offset design ready, you can separate the two layers if you’d like, you could slice it if you are using it for HTV, if you want it sliced. This is just so exciting!!
If you have any questions about How to Use Offset in Cricut Design Space, please let me know! I’d be happy to help you with it! That said, don’t be scared of using it, it really is easy to do!
Thanks for stopping by! I hope you’ll stick around and check out some of my other Cricut tutorials! Have a happy day!

Leave a Reply