Disclosure: I am an affiliate with Cricut, and this post contains affiliate links to their products.
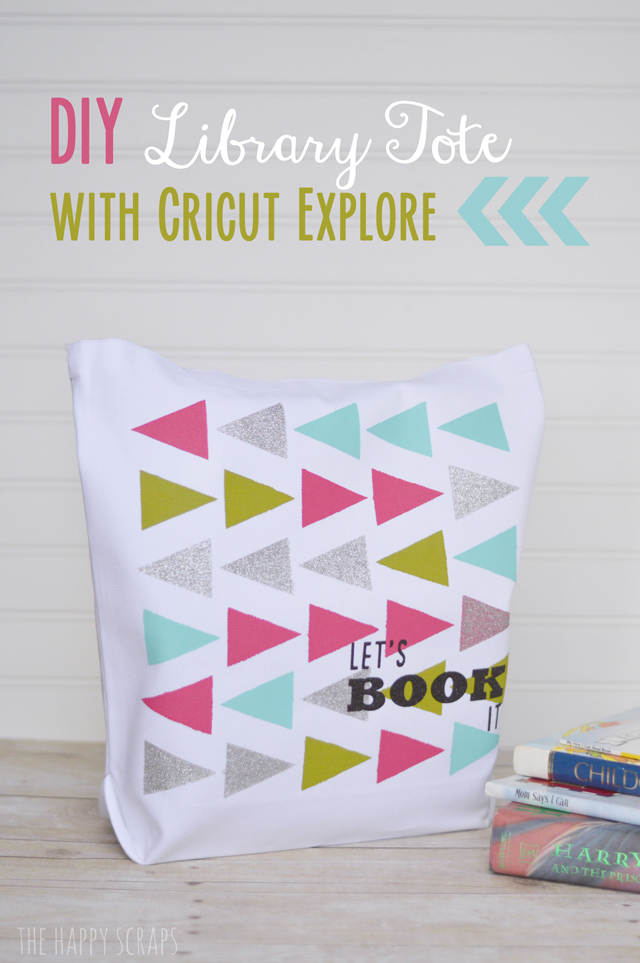
I’m so excited to share with you that I was asked to participate in the Cricut Design Space Star Competition!! There are several groups participating, and each group gets to pick a theme. For this round, Cricut challenged us to create a fashion/gear item and my group chose the theme of Geometric. This was a challenge for me for sure! I like a good challenge, but not necessarily when I’m in a time crunch. 🙂 I got through it though and this DIY Library Tote is what I came up with. For being someone who isn’t really into geometric shape patterns, I’m kind of, really in love with the way this turned out!
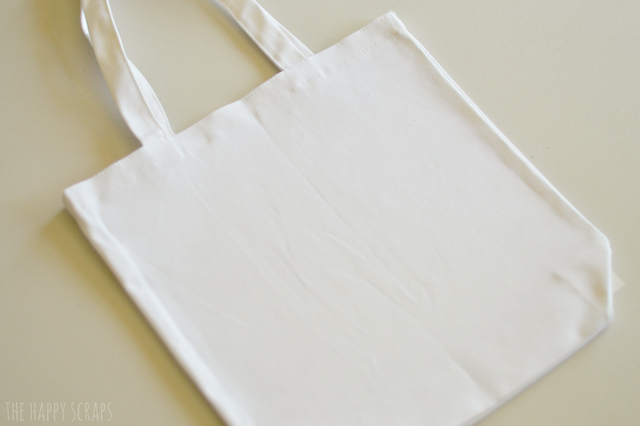
I’ll walk you through how I made this bag. I purchased a plain white tote at Hobby Lobby.
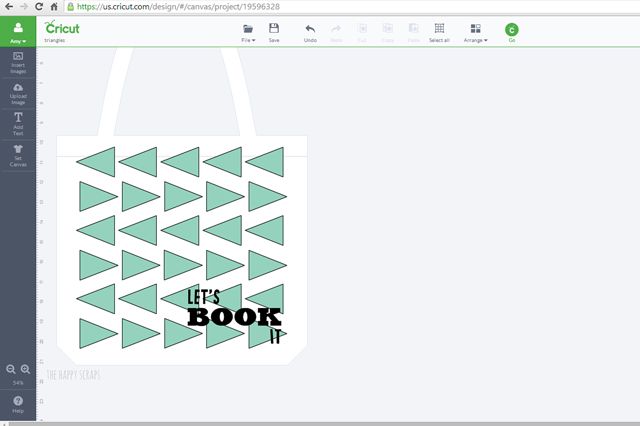
In Cricut Design Space, I found a triangle and I made it the dimensions that I wanted. Then I duplicated it, and lined them all up. Once I had the triangles just how I wanted them, I added the text. The good news is, I already made the file, and you can get it here, so you can make your own tote in no time!
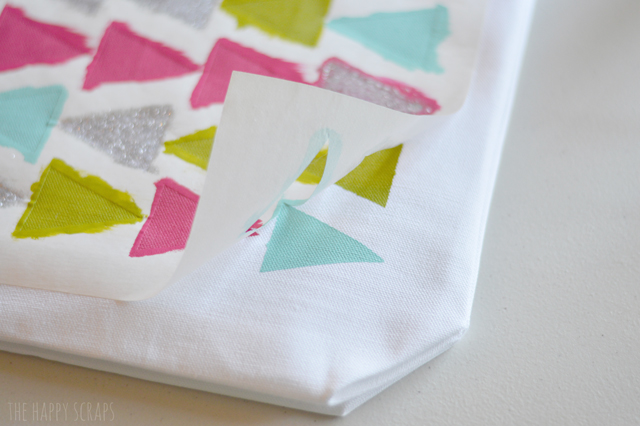
Once I had the file ready, I used a Light Grip Cricut Mat and put some freezer paper, shiny side down, on it. I cut the freezer paper. Because there are so many triangles, it was a little tricky to get off the mat, even on the light grip, but it did come off. Just took a little extra patience and time. Once you have it off the mat, lay it shiny side down again, on your tote. Use your iron to iron it on. This is the first time that I’ve used freezer paper, and it was amazing! I loved it. Just make sure that you get all the edges of the triangles sealed down well when ironing.

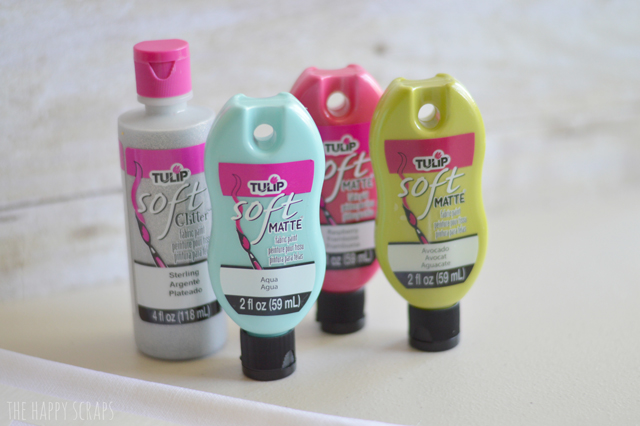
Now you are ready to paint. This is also the first time that I’ve ever used fabric paint. Let’s just say, it won’t be the last! I can’t wait to go crazy with this stuff! These are the colors that I chose for my project. I found this paint at Joann and Hobby Lobby.
I knew I wanted to make the paint pattern random on the bag, so I just started at the top and worked my way across and down. I used a sponge paint brush and tried to dab the paint on rather than paint back and forth.
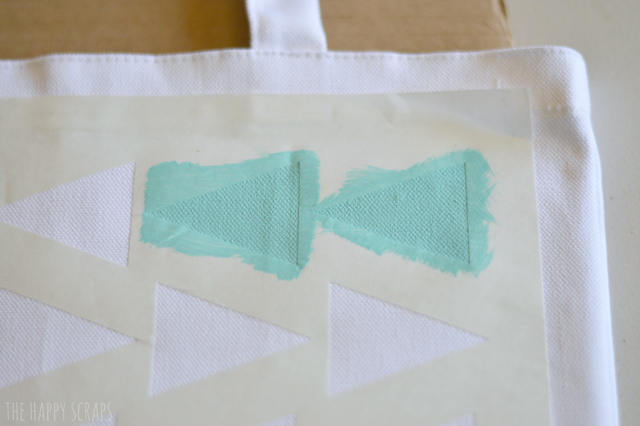
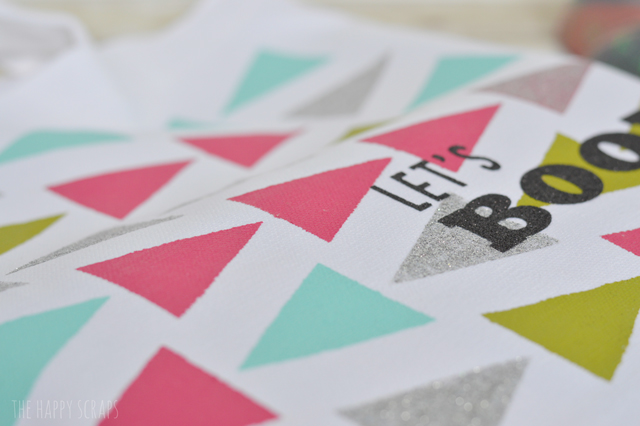
I did two coats of each color, but the glitter paint took several coats. I think I did four or five coats of that. I also decided to try and glitter one of the pink triangles. The pink doesn’t show through as much as I thought it would, but it still looks good.
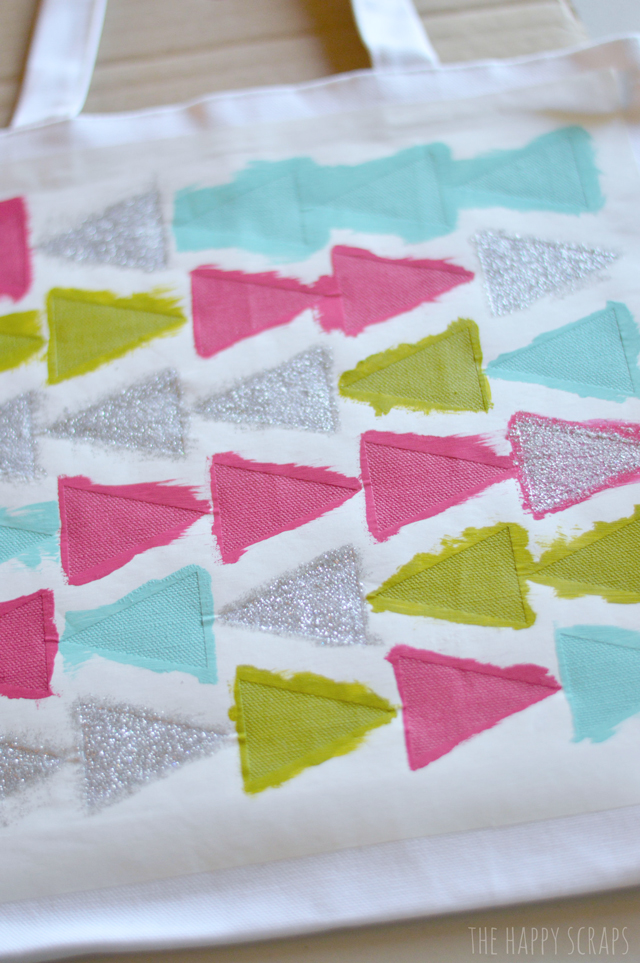
I let the paint dry to the touch, and then I started in the corner and peeled up the freezer paper. This was the really fun part! I was nervous to see if the freezer paper really worked, and kept the paint where I wanted it. It worked better than I thought it would. 🙂 Peeling the freezer paper off the tote took some time as well, so just have patience.
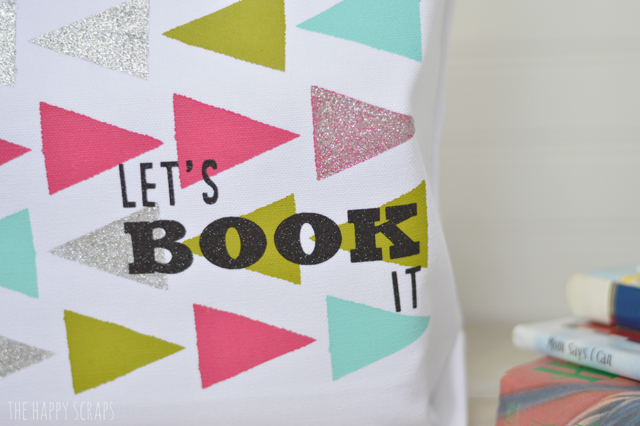
Once the bag was painted and it had time to dry, I used the Cricut Explore again, and cut out the iron on vinyl. I think this is the first time that I’ve cut iron on, and I actually remembered to flip the image, lol. Cricut Design Space makes it so easy though, there is a little box you can just check, right before you cut it. And because I like glitter, I used black glitter iron on vinyl to cut my letters. Following the instructions that came with the vinyl, I ironed it on.

I think it is the perfect final touch to the bag!
Here you can see how well the freezer paper stencil worked. I thought I would have more places that the paint bled, since the canvas is slightly bumpy, but it worked like a charm!
Now we are already to head to the library! You can be too, grab the file and make a bag for yourself! 🙂 You could even cut the triangles out of iron on vinyl as well!
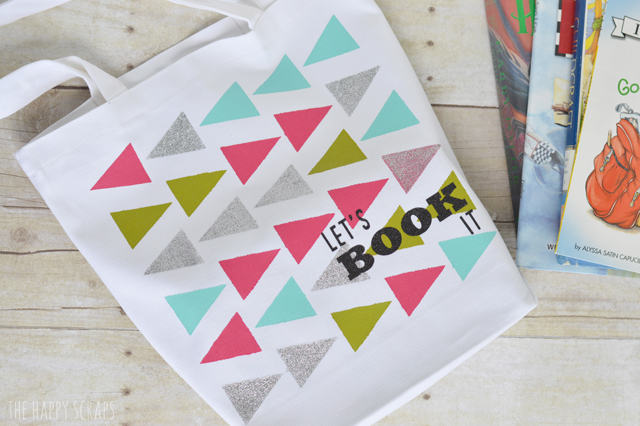
Isn’t this tote the most fun library tote you’ve ever seen?! It going to be pretty “loud” for the library, but oh.so.fun!

I can’t wait to share some of the other projects that my team has created! Prepare to be amazed, they have knocked it out of the park! If you are convinced that you need one of these machines (because everyone does!) click the image below.

Check out my team mates awesome projects!

Starting at the top, left to right.
| The Happy Scraps (you’re already here) | Artzy Creations | Bree Johnson | Ameroonie Designs | Seven Thirty Three | Pencil Shavings Studio | Brewed Together | The Sparrow’s Nest | Pen N’ Paper Flowers |

Leave a Reply