I’m so excited to be sharing my Craft Room with you today. I’ve joined up with several other bloggers to share our craft rooms this week, and now that I’ve gone through mine, decluttered, and organized it, I’m excited to share it with you. Just over two years ago, we moved into our home. At that time, I had this craft room/creative space and put it together as best I could. I had never had a craft room before. I was pregnant, we had just moved, and I was trying to get the whole house put together. So, I just put anything and everything into the craft room that I thought I needed and wanted here. It wasn’t very organized and functional. Two years later, I finally got around to getting it better organized. So today I’m sharing my Cute & Functional Craft Room on a Budget with you. Now, before you think “on a budget?”, for real I’ve been on a really tight budget, and I have several things that I was given, or I’ve bought over the years to have this craft room come together. I for sure wouldn’t haven been able to afford to purchase all of these at the same time, like ever. It might not be overly budget friendly if you went out and bought everything for a craft room like this right now, but over time it is pretty budget friendly. 🙂

This Cute & Functional Craft Room on a Budget post contains affiliate links.
This is what my craft room looked like shortly after we moved in, and I shared all about it here. I honestly really didn’t know what I had and where it was. I knew where some things were, but not everything. Anytime I needed anything, I’d have to hunt for it.
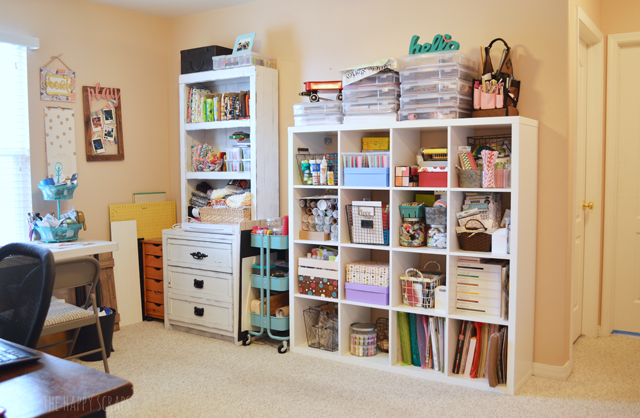
This is what it looks like now, and for the last couple of weeks as I’ve been using it, it’s amazing how much more functional it is and it’s so refreshing to work in a clean space and know where everything is! Working in a clean space also inspires creativity for me. It’s amazing! 🙂
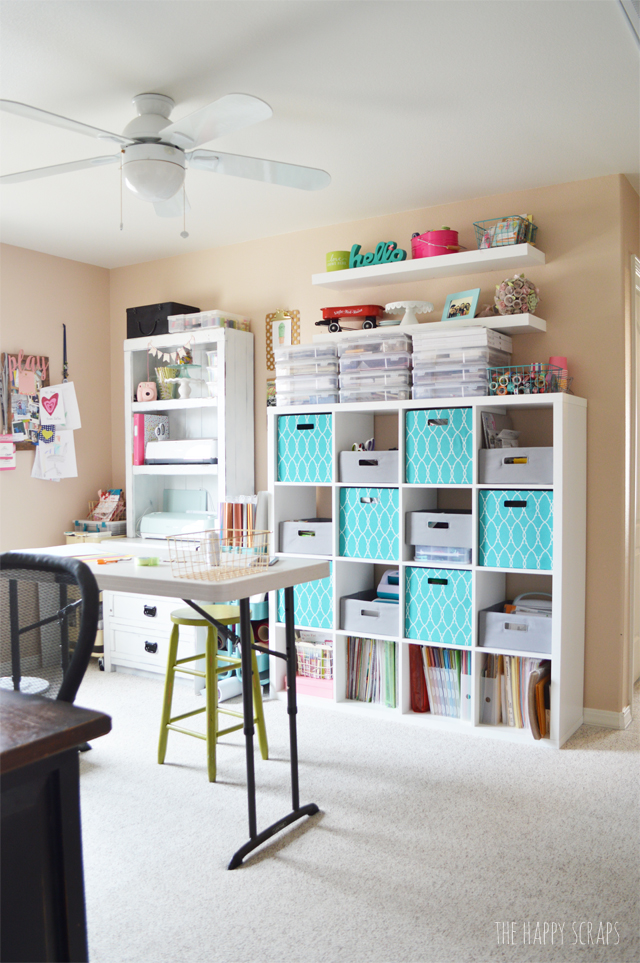
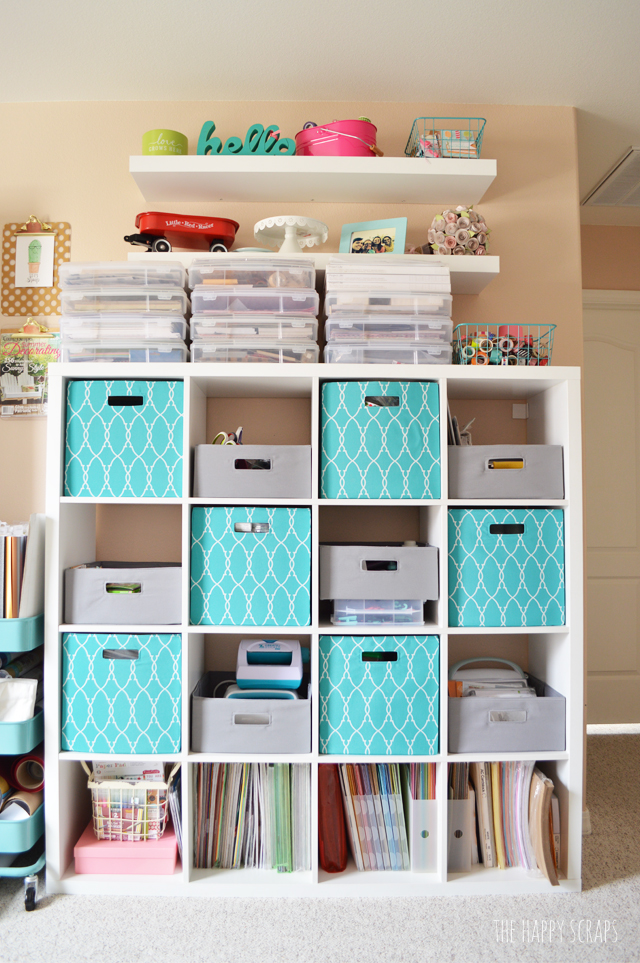
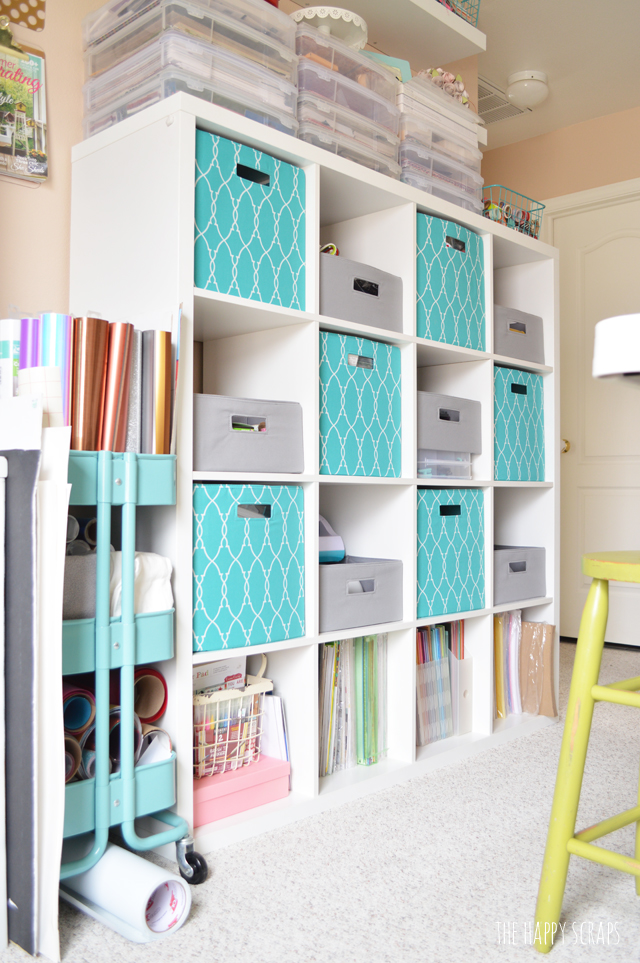
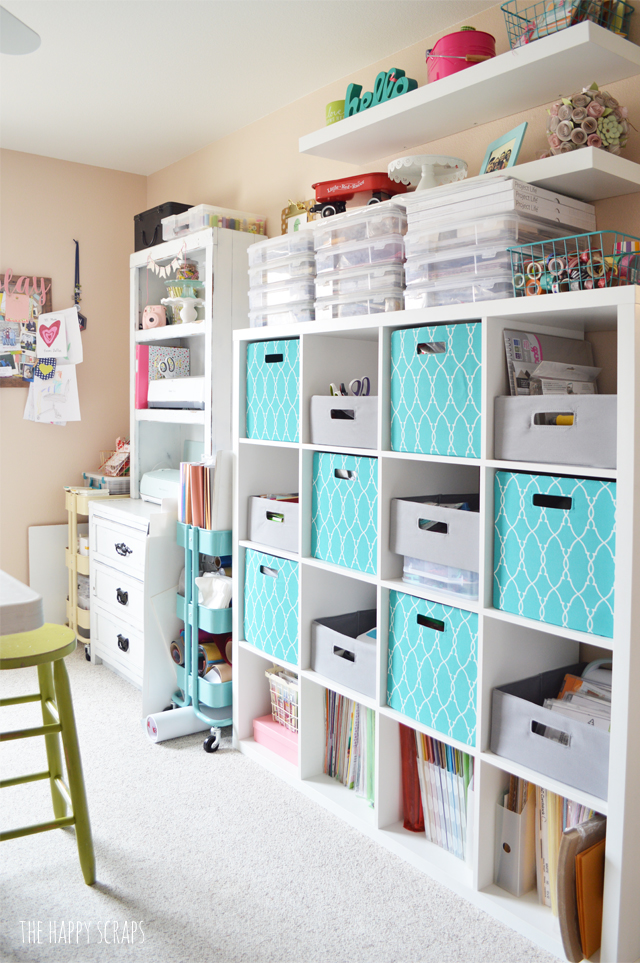
Several years ago while I was attending Snap Conference, Blitsy was a sponsor. When they were cleaning up, they had a couple of these cube shelves that they were either going to give to someone local or throw them away. Well, I happened to hear about it, and went and talked with them. I was able to take one home. When I got it, we didn’t live in this house, so we had a hard time finding a home for it, but we made it work. Once we moved, we knew right where it would go. 🙂 I didn’t have any of the bins that fit it perfectly, and it wasn’t in the budget at the time either. Since I’ve been working on the craft room the last month, I’ve been looking for cute bins that didn’t cost an arm and a leg (ok, maybe just an arm), and after looking at Ikea, Target, and Michael’s, I decided to check Wal-mart. Well, Wal-mart had bins that would fit, and they cost me less than $7 each for the large ones and the half size ones were less than $4 each. I was so excited to find them! Other places did have cute ones, but I couldn’t justify spending $10 each on a bin! Once I had the bins, I had to really sit down and figure out what I needed and wanted to be stored in this cube shelving unit. I’ve got a bin full of adhesives, ribbons, thickers & paper straws, paper and plastic packaging, project materials, and random things. The half size bins have my scissors, punch boards, Cinch, baker’s twine, EasyPress, and Cuttlebug in them. It works well, because I can just see and grab, but they are contained! I did add a couple of shelves (several months ago) above the cube shelving. I intended to use the shelves for props and things, but I couldn’t get them to hang on the wall correctly and I was afraid of them falling, so they are more decorative. Notice the boxes of paper stacked on the shelf? Those are kind of holding that bottom shelf level.
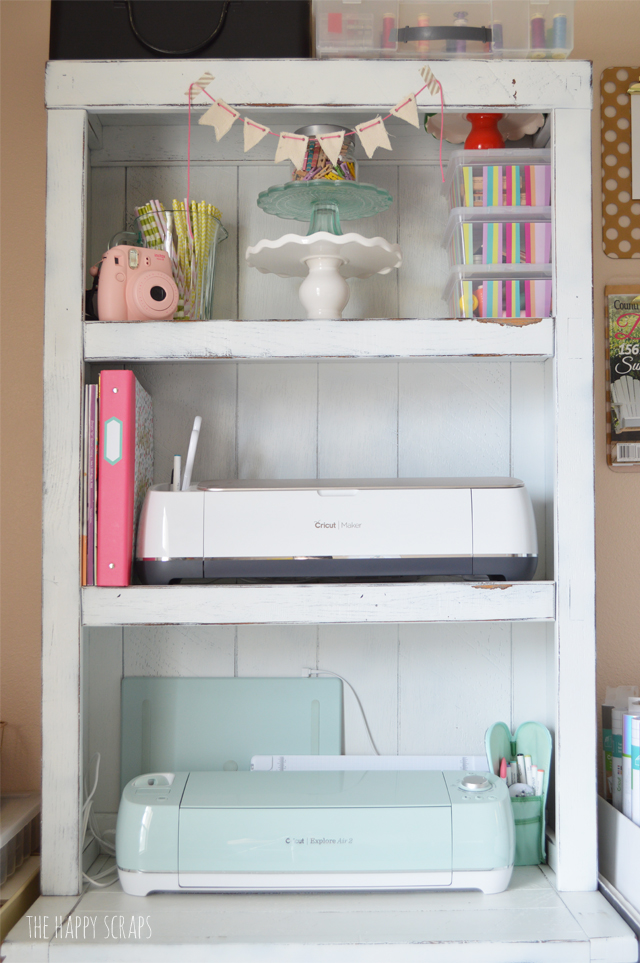
Just to the left of the cube shelving, I have this set of drawers with a small hutch. It makes for the perfect place to have my Cricut machines. On the wall between the two shelves, I have a couple of clipboards. The magazine on the one is the magazine that I have this project published in. I was so honored, so I kept it where I could see it. 🙂 I have a cute print from Liz on Call on the top one. Also, the black bin (I think I need to paint it, eventually) on the top, it’s full of treats that I can use for projects. 🙂 It’s my mom’s old bread box, but it’s such a cute box, don’t you think? In the drawers, I have my Minc supplies, fabric, and some Cricut supplies.
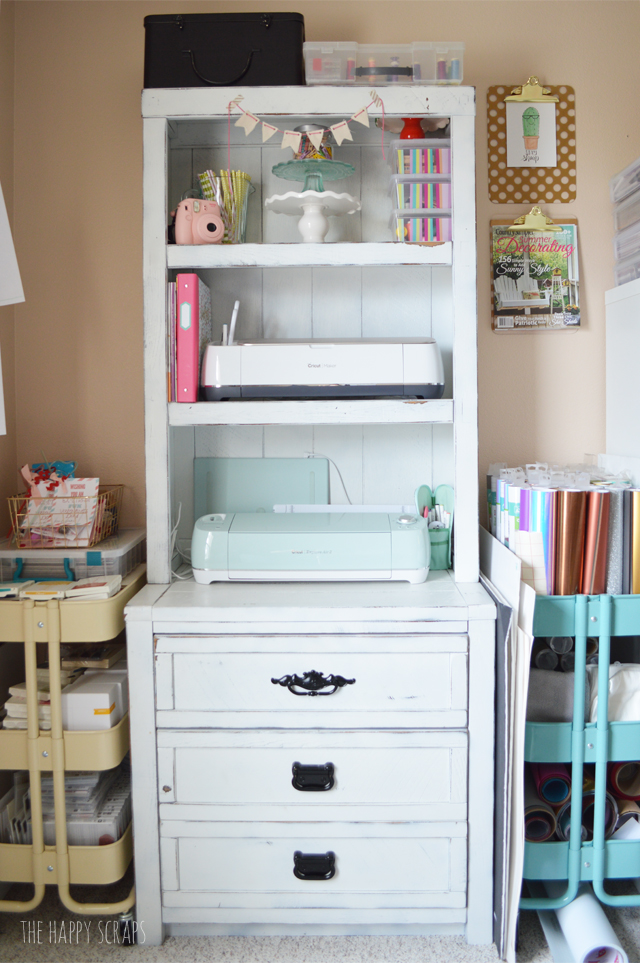
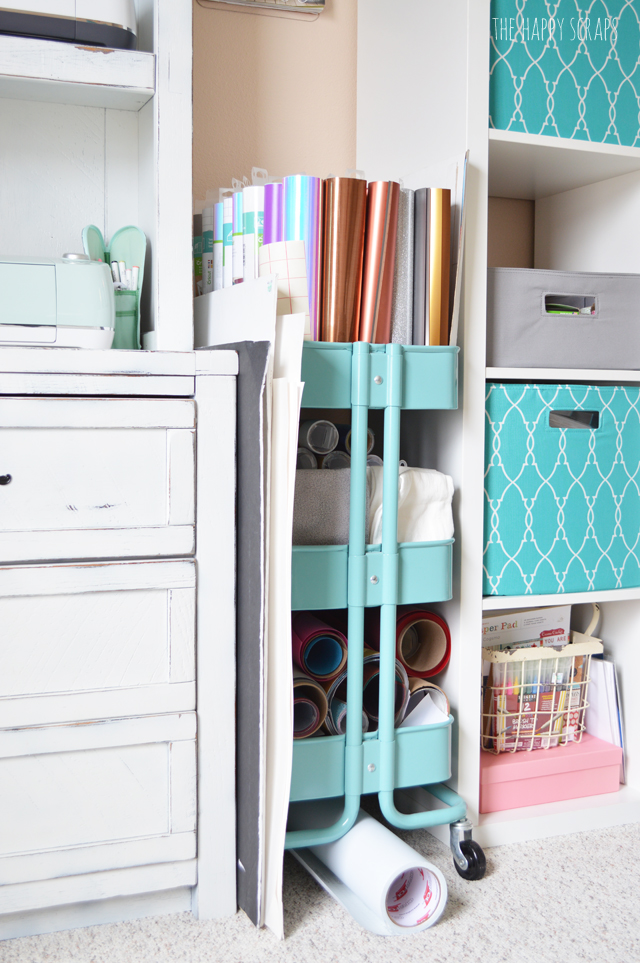
To the left of the small drawers and hutch, I have an Ikea rolling cart. It’s full of all of my Stampin’ Up! stuff. Next to that along the wall I have some of the boards that I use for taking pictures.

On the other side, I have another cart full of all of my vinyl, iron-on, and other cutting material. I also have more boards that I use for picture taking stored next to this cart.
At the bottom of the cube shelving, I have almost all of my paper in the bottom slots. I kind of love having my paper on this shelf! I also love that I went through all of my paper and am getting rid of so much!
The way the pieces on this shelf and the decorations all come together just make me happy! The cake stands (both from Target dollar spot) the mini bunting, my Instax, etc. I love it all!
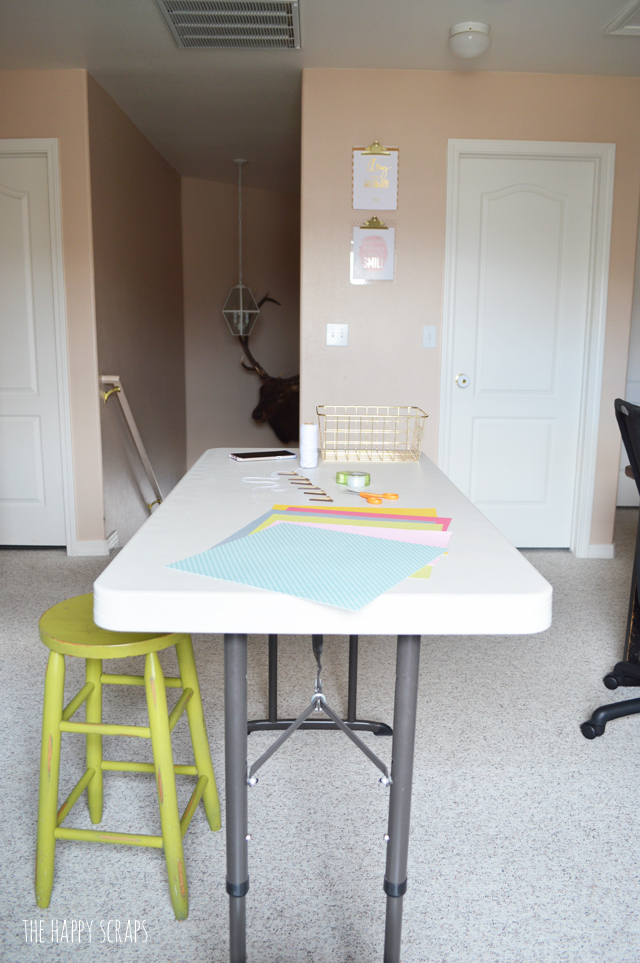
In the center of the room, I moved one of my tables away from the wall and am using it for an island. This table is great because it can be three different heights. I have it on the tallest height so I can stand by it or sit on a stool. I’m loving having an island, and I also love that I can take it down anytime too, so it isn’t too permanent. I keep a small basket on the table so I can place things there that I need to put away when I’m done with a project, or if I don’t quite finish, I can put things there and then come back to what I’m working on.
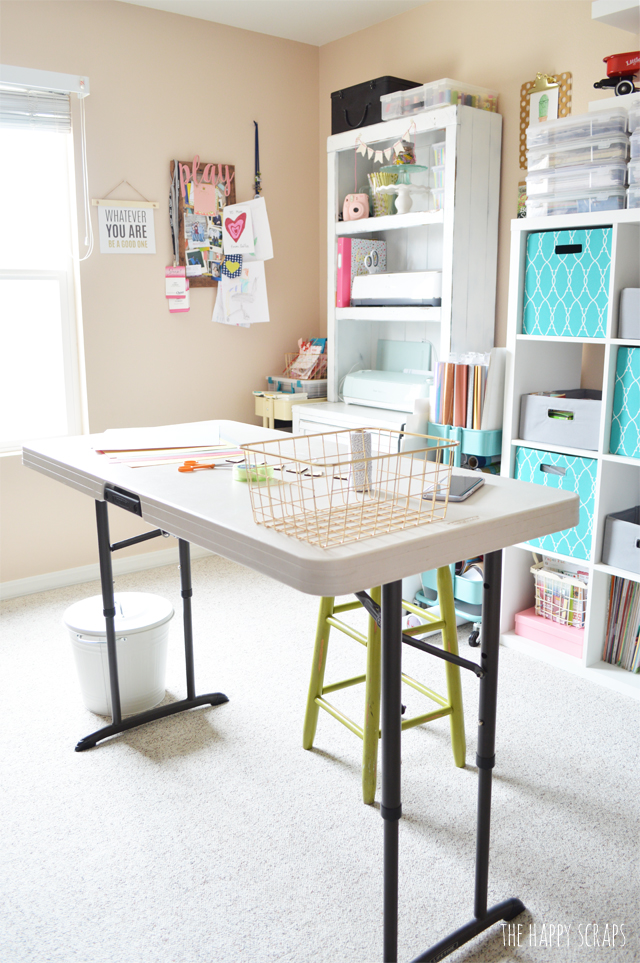
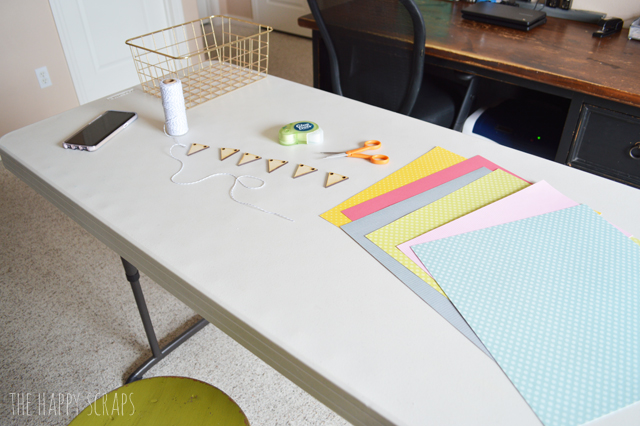
Someday maybe we’ll build an actual island for this center of the room, but for now I’m completely content with using this table!
On the other side of the room, I have our computer desk, the printer under the desk, and another table. One of my goals when I was reorganizing this room, was to make it a place where my kids could also work on homework. We got a couple of Chrome Books for Christmas and I wanted to have a place where they could sit with those. So we moved our desktop computer (that didn’t really work) out of this room, and cleared the space to be used better.
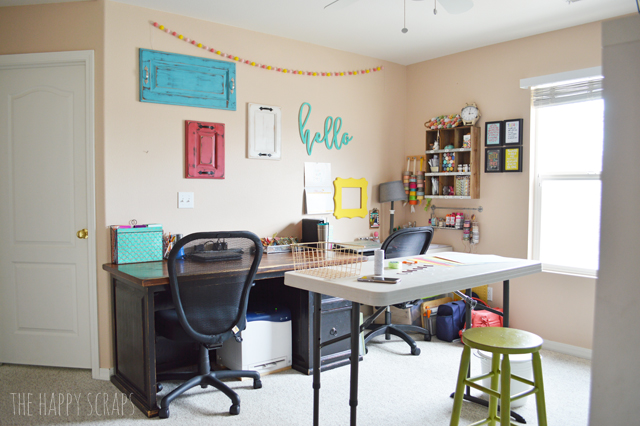
On the wall I have some cupboard door trays that I bought years ago. I use them in photos at times, and when they aren’t in use, I think they look cute hanging on the wall. I also have a string of felt balls hung. I placed my calendar on the wall right above where I work on my computer, as well as a yellow frame that I plan to use for photos as well. The Hello was a gift from my secret sister at Snap a couple of years ago. I love it! I have an old cupboard door in my garage that I’m thinking I might finish in a color that I don’t have to add to this too.
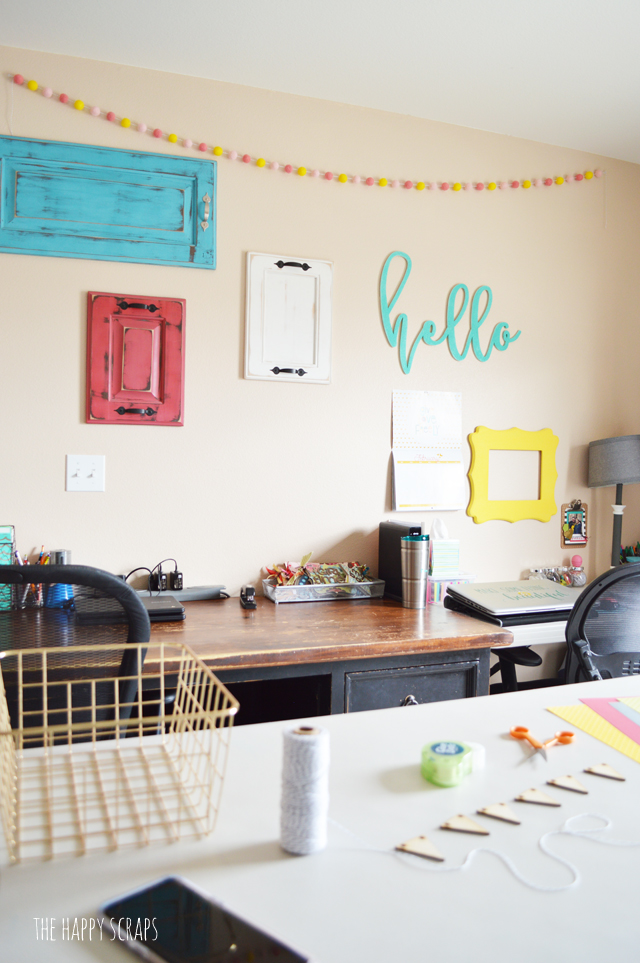
I still have this shelf that I picked up at Target a few years ago. I try to keep some pretty and useful supplies in it, so I can grab them. I also have some ribbon, washi and some twine close by there too. My Paper Flower Centerpiece is still one of my favorites. I keep it up all year in the craft room.
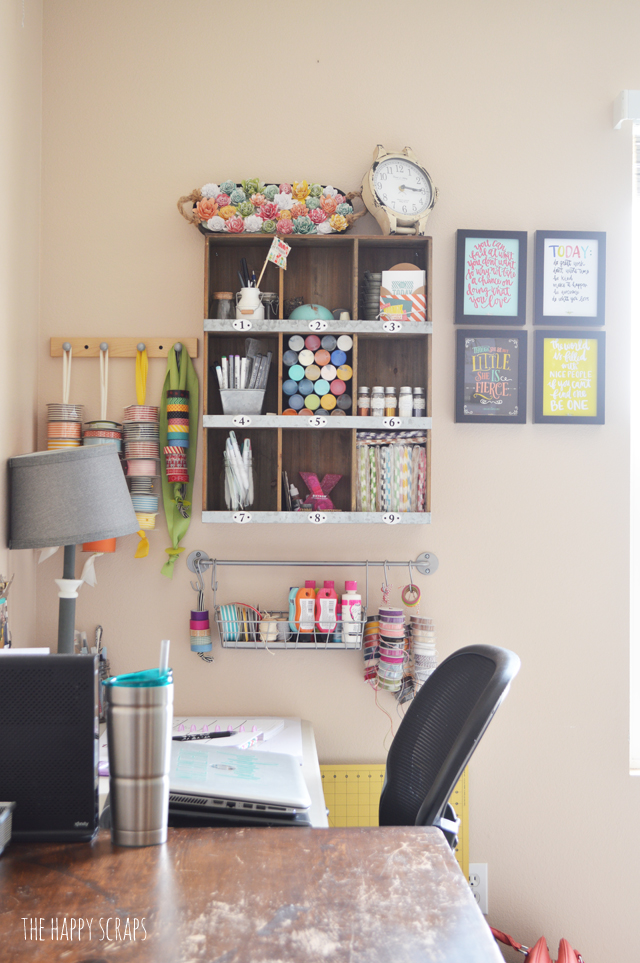
If I’m not working at the center island, then I’m sitting in this corner on my computer. I love this corner!
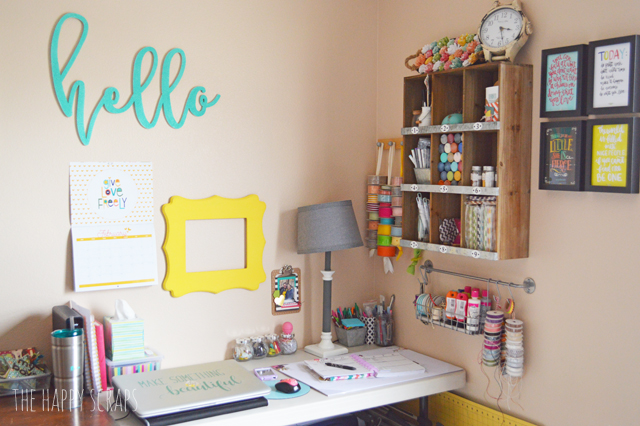
Under the table I have a box full of unfinished wood projects, all my paints, then my sewing machine, paper trimmer, and camera.
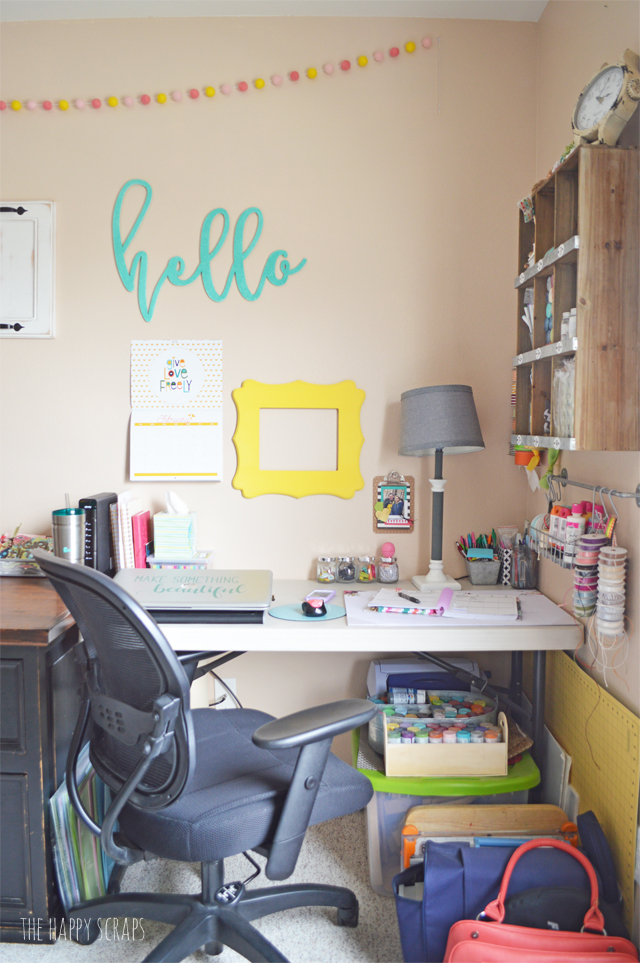
This room has been such a work in progress for years, not just since we moved here two years ago. I picked up the tables at Costco a few years ago so I could have a place to work in our last home. We got the desk second hand. I’ve picked up little things here and there, and that’s how it has all come together. While organizing this space over the last month, the only purchases I made was for the bins in the shelf, which I spent about $70 on. I’m hoping that they will last me a long time too.


I hope you’ve enjoyed seeing my Cute & Functional Craft Room on a Budget today. If you’re looking for more inspiration for your own craft room, then click below to find several.
Find all of the craft rooms over at The Country Chic Cottage. Life in the Craft Lane shared hers before me and Happiness is Homemade is next on the hop. Be sure to check them out!

Leave a Reply