This week I have been working on a birthday banner {that I have been working on now for what seems like ages:)}. Last month I had purchased some ink pads, but didn’t get them out until this week. Apparently I purchased an old one, because one of them was nearly dry. So I headed out to see if I could find another one in just the right color. I found one that had the right color, but didn’t realize until I got home that the actual ink pad was not the kind I was looking for. Why oh why can’t all ink pads be created equal?! 🙂 So today, I’m going to share with you some of the different kind of ink pads, and hopefully help others out there choose the kind they want, or at least figure out how to use it. Ha!
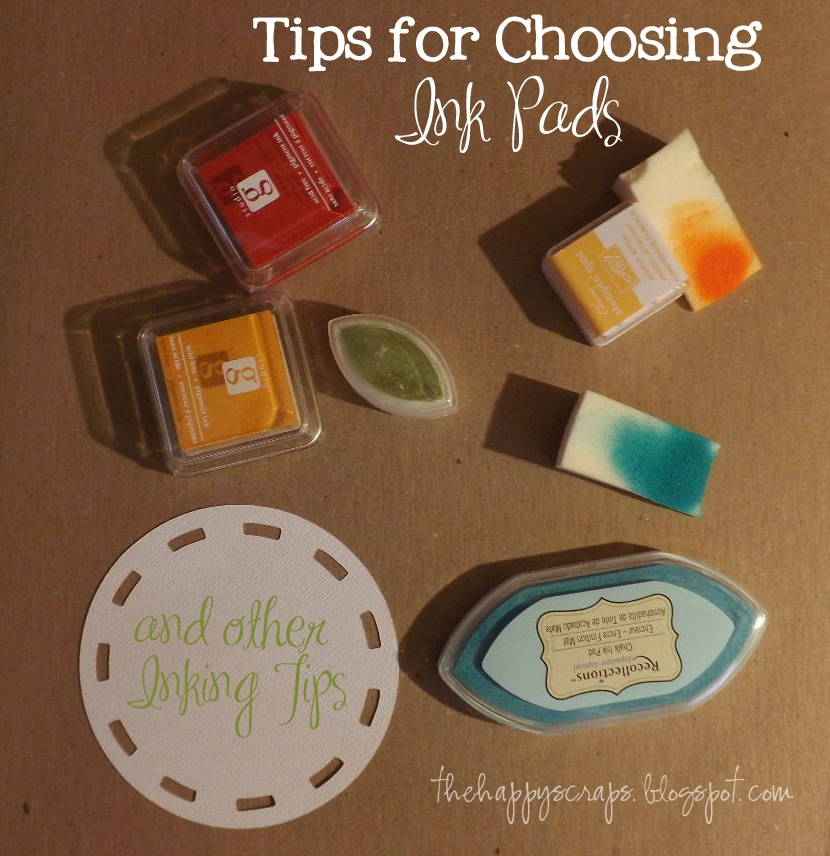
One of my favorite places to look for ink pads is in the $1 bins at JoAnn. They usually have a good selection of colors, and they work really well for inking edges. And if I ruin it, it wasn’t expensive. These are the G Studio kind, and they are sponge like. Sometimes if you aren’t careful when inking, you can get too much. It usually depends on how full of ink it actually is. Also, sometimes these dry lighter than they actually look.

This is a Color Box cat eye ink pad, and it’s the first time I’ve ever bought one. It seems to work really well. It also is the sponge like texture, and works really well for inking. This is a chalk ink, and seems to not go on so heavily, but maybe it’s an old one too. The one I bought that was old was this kind, so I don’t know. I do love this shape for getting into corners, etc.

This is a Stampin’ Up Stampin’ Spot. These come in packs with several colors and are a great way to get a lot of ink. {If interested, head on over to my friends blog, she can hook you up!} The texture of these are more of like a canvas or fabric filled with ink. They are a little hard to use on the edges and get a really good distressed look. While using this yesterday {if you following along on Facebook, you may have seen this} I decided to try using a makeup wedge to get more of the look I was going for. It worked like a charm! The only thing is, by the time I had inked 4 or 5 items, the makeup wedge was starting to come apart. So it doesn’t hold up like an ink pad, but it’s a nice alternative.

This is a Recollections chalk ink pad I picked up at Micheal’s. I love the color, but the texture of this is sponge like on the bottom, but the top is more like a hard flat surface full of ink. Almost like a puddle. Sadly, this isn’t the first time I’ve bought one of these thinking it would be perfect, getting it home and realizing that it won’t work, simply because of the type of ink pad. Well, the makeup wedge worked awesome for this one as well! I’m so glad that I figured out a way to use this ink pad to get the look I was going for!

I LOVE the look that Inking can give to any project. It just adds that little something extra. Do you like to ink the edges of your paper projects? I’ve even used ink on the edges of some of the wood projects that I’ve done. If you have Inking Tips of your own, we’d love to have you share them with us in the comments!

Leave a Reply