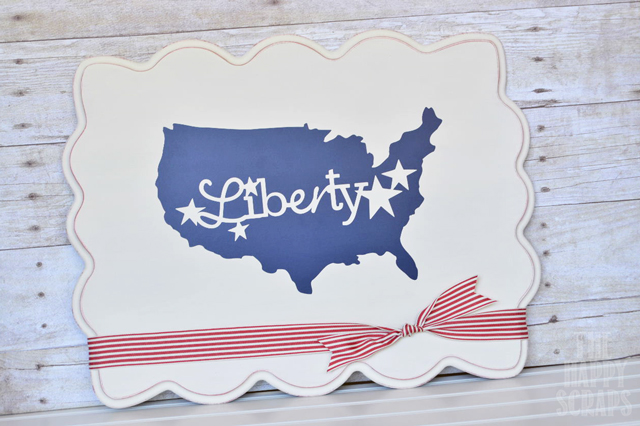
Do you have your 4th of July Decor up yet? I’m still working on mine, but I’m so excited to have the addition of this Independence Day Liberty Board for my patriotic decor! This was a super simple project, but it makes such a fun statement!
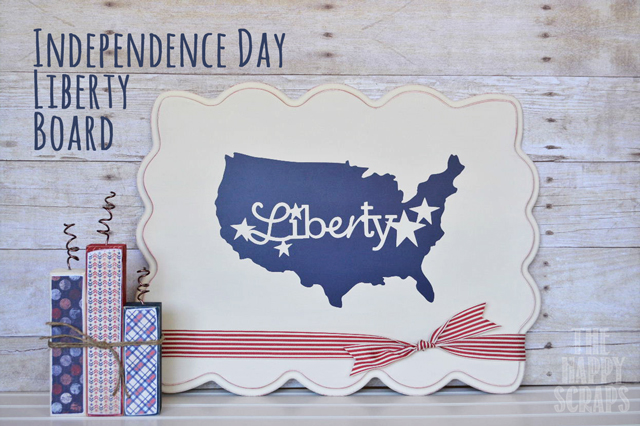
I ordered this shaped board from my favorite wood craft store, and have had it in my stash for a few months. I started by partially painting the edges red. Then I gave it 3-4 good coats of white, including the red edges. MDF seems to soak up the paint, so it takes a few coats, and you need those extra coats to cover the red up as well.
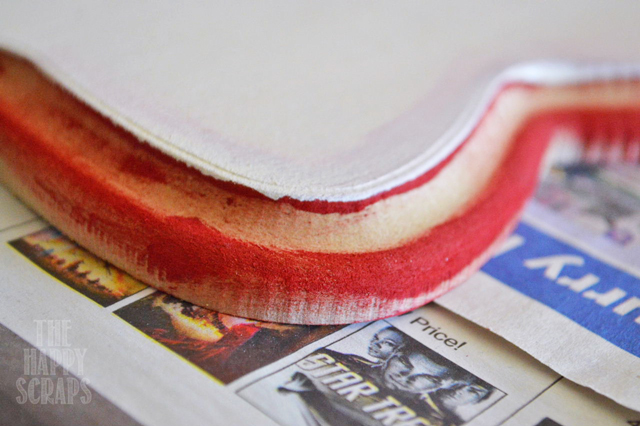
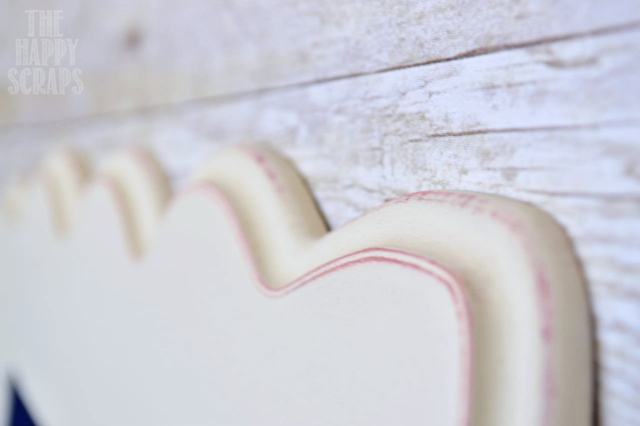
Once all your paint is dry, using some fine sand paper, lightly sand the top, just to smooth it out, and then distress the edges, letting the red show through just a little bit.
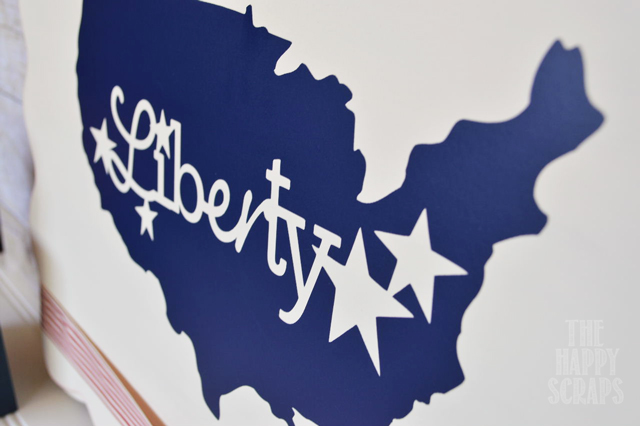
I got into Cricut Craft Room (this program is free and totally awesome!!) and started looking for a fun shape or design to use on this project. I found these two fun design on the Stand and Salute Cartridge. When I design a project like this one in CCR, I use two different layers. I put the outline of the US in one layer and then put “liberty” in another layer. It makes it easy because you can change the colors of the layers and picture what it is going to look like when it is all cut out. Once I had it designed, I cut it out on my Cricut Expression using the brand new Cricut Vinyl! I love this stuff! My favorite part about it is the backing! It comes off the mat SO easy! (If you would like the file for this project, you can grab it here.) After I had it cut out, I used transfer tape to put it on the board.
Once I had the vinyl put on the board, I decided that it needed a little something more, so I added this fun striped ribbon. I think it was the perfect finishing touch.
What do you think?

Does this make you want to make one of your own or what? 🙂 What kind of 4th of July decorations do you have? Which one of your patriotic decorations is your favorite? I think this Independence Day Liberty Board is my new favorite!

Leave a Reply