This is not a sponsored post. The links to Pick Your Plum are affiliate links. All opinions are 100% my own.
The day is finally here! I’m sharing my Living Room Gallery Wall with you today, and I couldn’t be more excited about it. When I started thinking about putting up a gallery wall in my living room a few months ago, I didn’t think it would take this long to get it done, but I’m glad it did, because had I done it when I started thinking about it, it would have turned out completely different and I wouldn’t have some of the stuff that I do on there. And to think, I almost changed my mind about putting it on this wall too. We rearranged the living room a few weeks ago, and I thought it messed everything up, but it still works, and I simply love the way it turned out!
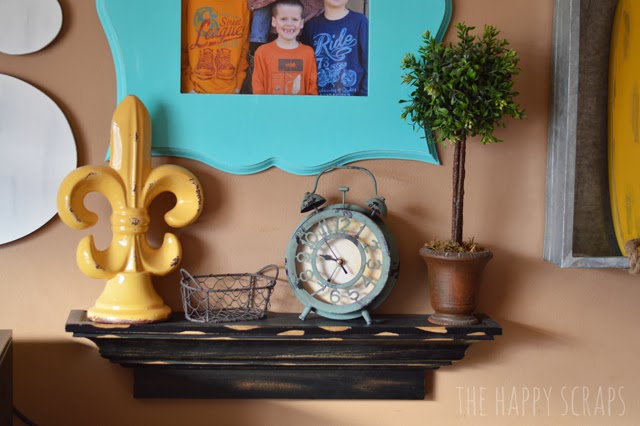
I purchased this large frame from The Wood Connection a few months back. I’ve wanted one of these cute frames for a few years, and I’m so excited to finally have one hanging in my house!
I painted the frame white and then turquoise over the top of it. Then I distressed it a little bit with some sand paper to let the white show through.
I found this black shelf at Hobby Lobby. I was originally going to paint it gray to match the rest of the color scheme for this wall, but I got it hung and didn’t really want to take it down to paint it. Maybe I will some day, but I don’t mind the black, so it will stay for a while. See the yellow fleur de bee? My mother in law gave that to me for Christmas, and that is when this wall really started coming together. I decided the colors that I wanted to use, and it was because of the yellow that I went with this color scheme. The small wire basket and clock on the shelf came from Pick Your Plum, and the tree is from a fun store I went to last summer during our family vacation.
I really like the way this side of the wall came together. I purchased everything separately and was hoping I could make them all work on the wall somehow. I shared my Quote Board a couple of weeks ago. The mirror is one that I also found at Hobby Lobby.
This “6” is from The Wood Connection. They have numbers 0-9, and I love how chunky they are. I wanted to put a “6” on the wall because that is how many are in our family. I painted the “6” gray followed by white, and then I distressed it.
This Utah shape was a little bit of an after thought, after I had already started on the wall. Back in January Pick Your Plum had these, and when I saw them, I knew that I wanted to try and incorporate a Utah shape into the wall. The jury is still out on whether or not the stripes should stay, but they are staying for now, mostly because I don’t know what else I’d do with it. I’ve thought about repainting it and putting polka dots on it though.
This is one of my favorite parts of this wall. I got this tall skinny “C” over a year ago from Oh My Crafts, and it has sat in my stash ever since. I always knew I wanted to use it with a gallery wall, I was just slow to ever get it done. Then one day a few months back, Pick Your Plum had these fun metal trays that I knew I needed as soon as I saw them, and they were cheap! I ordered one of all of them, and sometime after I had received them, I realized that the middle sized one was the perfect size to fit my tall skinny “C” in. So that is what I did. I love that it isn’t the typical shelf that you would see.
This is my second Gallery Wall that I’ve done. I’ve never shared the first here on the blog (I should do that sometime) but I have shared it on Instagram. For the first one I did, I put nails in the wall and that was tricky getting every thing lined up just right, and now they get bumped all the time and don’t stay straight on the wall. For this one I used 3M Command strips to hang everything but the black shelf. All I can say is I am in love with those things! Totally life/stress saver!
I hope you’ve enjoyed this post and hearing all about my Gallery Wall. It was fun to put together! Do you have a gallery wall in your home? What color scheme did you use with it?


Leave a Reply