I had full intentions of working on a project yesterday and getting the pictures taken and scheduling the post. But I decided to do the mom gig instead, and I enjoyed it! 🙂 My boys bedroom has been needing to be gone through for some time, but I didn’t really want to tackle it. (You should have seen the before, during, and after, but I didn’t get any pictures.) All 4 of them share the bedroom, and it would be a very good sized room for one child, but having 4 in there, it is a little crowded. We have all their toys in there, along with a dresser, a changing table/dresser, and a book shelf, along with the boys bunk beds. So we really have all the walls lined with stuff. Last week, I was talking to my husband about the clothes storage situation. We don’t have enough drawer space in the room for all their clothes, and they are growing, so their clothes are getting bigger. I told my husband that I thought we needed to get a couple of new dressers that would fit more clothes in them. So, a few days ago I headed to IKEA and picked up some dressers. Since I want these dressers put together and put to use asap, I decided that I wasn’t going to craft yesterday, and I dug out my boys bedroom. It took me a good 6 hours at least. That did not include building the dressers. That will probably happen tomorrow. I rearranged, and decluttered a bunch. I filled my car with things to donate to good will. (If you are on Instagram and follow me, you may have seen the picture of my car. I filled it even more after the picture was taken.) It felt SO good to get it done! I love when I find motivation like that and I’m able to get rid of things without thinking about how much money was spent on the items that needed to go! My boys were pretty excited that I was rearranging their room too. Although, all that I did was put the book shelf in the closet. 🙂
Anyway, I didn’t know if I’d get anything posted today, and then I remembered about these cards that I made a couple of years ago, that I just never got posted. I sent my best friend a package when she had her baby, and in it I included a stack of handmade Thank You cards that she could use, and not have to take the time to make any. These are some of those cards. I have shared a few of them in the past, but I’m going to try and share the rest of them in the next few months. The best part about making all of these was that I was able to use up a ton of my scrap papers. It worked out great!
I thought that this turquoise ombre card turned out great! I’m not a huge fan of ombre, but I occasionally like it, and this would be one of those times. 🙂
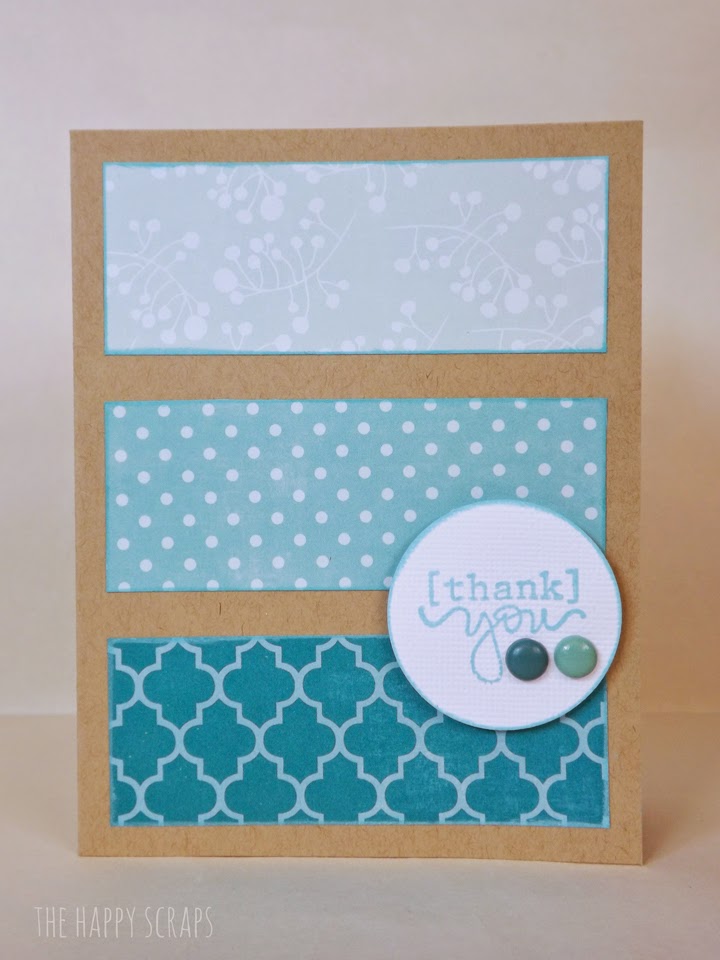
I added a couple of brads before I put the “thank you” circle on with dimension squares.

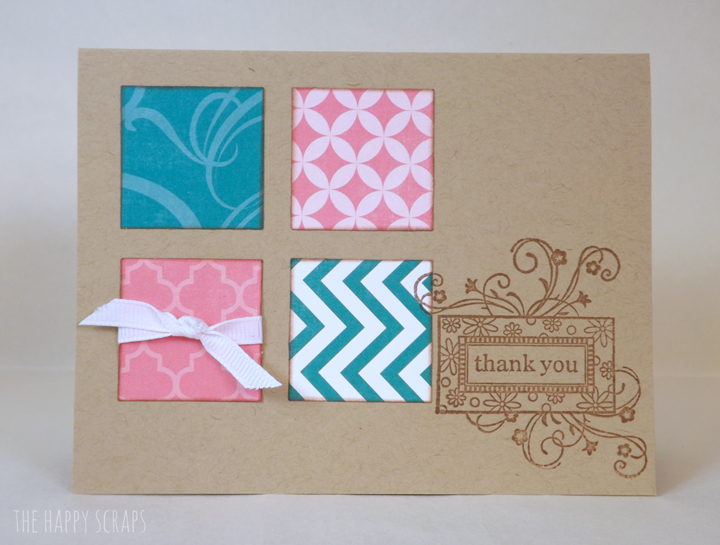
This card is very basic and simple. I used a square punch and some patterned paper that coordinated. Inked the edges, tied a ribbon, and glued the squares on. Then I stamped the Thank You stamp on, and it was finished.
Remember if you give cards as a gift, always include the envelopes as well.
I hope these cards give you a little bit of inspiration, if you are making some. 🙂

Leave a Reply