Every so often I think up some projects that I really want in my home. I was driving my car a while back and was listening to one of my husband and I’s favorite songs and these words were in it. I’ve sang these words probably over 1000 times and that day, it hit me. I needed to make sign with these words on them to hang in our bedroom. So, I wrote it down, and I finally got around to making my DIY Song Quote Sign.

This post contains affiliate links.
DIY Song Quote Sign Supplies:
- Cricut Explore Air 2 Machine
- Cricut Vinyl for Stencil
- 12 x 24 Cutting Mat
- Paint in colors of choice
- Wood – cut to size

Start by painting your wood. Once you have your wood background painted, let it dry while you cut out your vinyl with the Cricut Explore Air 2 Machine.

Once your paint is dry and you have your vinyl cut, peel the backing off the vinyl and place it on your board. Smooth it out really well with a vinyl squeegee.

Peel the transfer tape off, exposing the vinyl.
![]()
Now you are ready to paint your words. Here is a tip when stencil painting. Use a sponge paint brush and blot it onto the sign. This helps so the paint doesn’t bleed under the vinyl stencil. Also, I would not recommend using the cheaper kind of plywood like I used. The vinyl stencil didn’t want to stick to it very well, that is why I have the blue tape all around it. 😉

Since I had the blue paint out, I painted the sides for my frame and let them dry.

After I did two coats of paint, I peeled off the vinyl stencil. It was looking ok, but the paint did bleed a little. I think it’s a combination of the white paint that I used as well as the wood.

I used my sander and lightly sanded the top of the sign to give it a distressed look.

It really brought out the wood grain.

Now I’m ready to attach the sides of the frame. I used my Ryobi Brad Nailer. This makes it SO easy to put these frames together!

I put the long sides on first, then added the short sides. If you’ve ever made framed signs like this, then you’ll know that it’s easier to assemble them after the are painted.

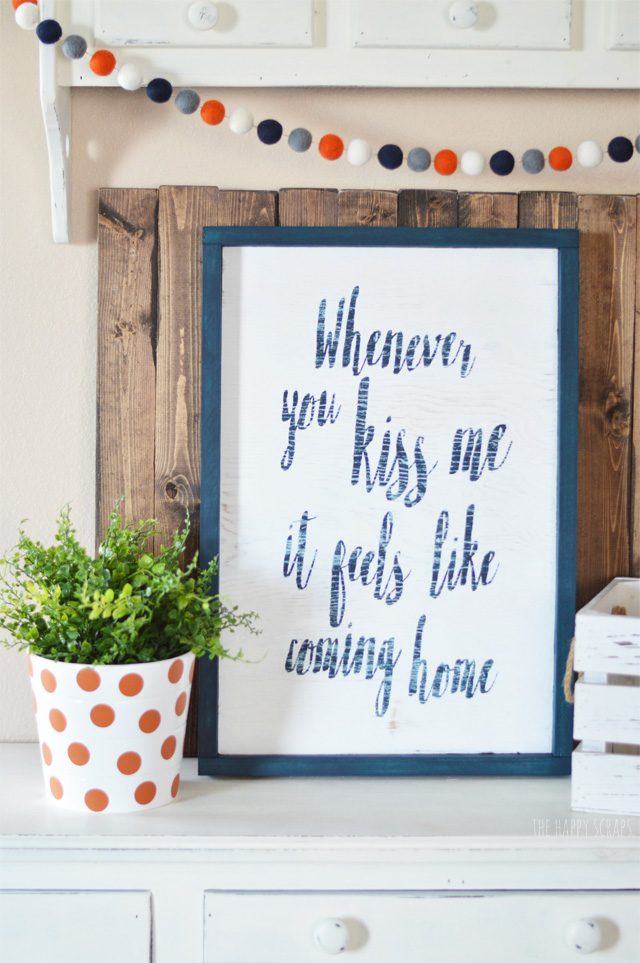
Once I had all the sides attached, I was ready to put the hanger on the back and display my sign.

I really adore the way this sign turned out. It’s the perfect addition to my bedroom. I did consider using it in the living room since that is where I took these pictures. 😉 Doesn’t it look good on my entry table?
Now I want to make a second coordinating sign to hang in my bedroom on the other side of the window that this one is on.

How do you have your master bedroom decorated?

If you want to see some other fun project that I’ve shared, you can see the gallery HERE. Also, be sure to check out my post all about What is a Cricut Explore Air 2 Machine and what can I do with it?

Leave a Reply