I have a love/hate relationship with snow. I love how pretty it looks, how peaceful it is when it falls, and I love looking closely at it and seeing the snowflakes. The downside to winter when it snows is that it’s cold outside. I don’t mind that it gets cold outside so much, but when it’s cold outside, I have a hard time keeping my body warm. I’m always freezing! I have to keep a blanket on my lap almost constantly and wear sweatshirts quite often. The last couple of weeks have been cold enough to snow, but we haven’t gotten more than a skiff. I wish snow would start falling for a couple of reasons, to clear the air out (inversion 🙁 ) and because it’s pretty. But, since it hasn’t been snowing here, I decided to create these pretty Crepe Paper Hanging Snowflakes with the Cricut Maker and the best part is I can put them up now, and leave them up through January!

This is a sponsored post written by me on behalf of Cricut. All ideas and opinions are my own.
This post also contains affiliate links.
Crepe Paper Hanging Snowflakes Supplies:
- Cricut Maker Machine
- LightGrip Cricut Mat
- White Crepe Paper
- Fishing Line
- Needle
- Dowel
- Snowflake Cut File (or use your own design)

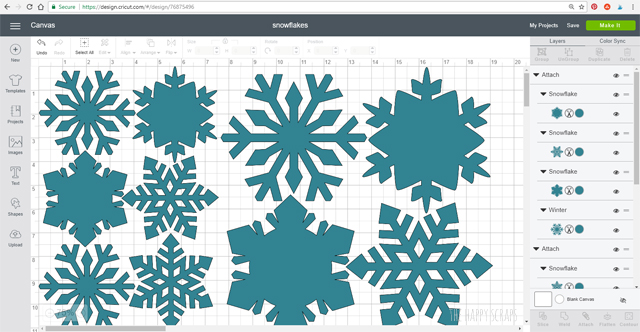
If you open up the Snowflakes Cut File, you can click on customize to get to the screen that looks like this. You can make changes to sizes as desired. Once you are ready to cut, click “Make It”.
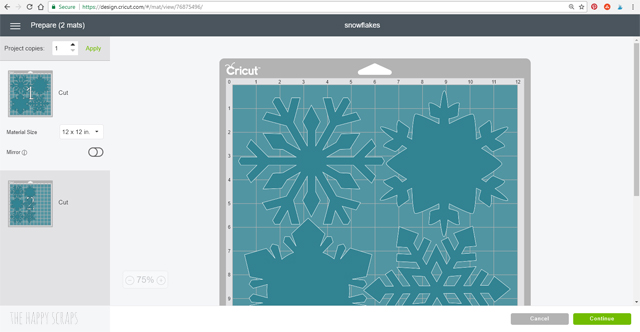
It will show you your designs on the mats. When I put this together, I “attached” the snowflakes together, so that they would cut on the paper the way I wanted. The crepe paper that I used was 20″ wide, so when I cut it to be 12″ x 12″ to fit the mat, I had a piece left that was 20″ x 8″, so the smaller snowflakes are attached together to fit that size. Once you double check your mats to make sure they will cut properly, click “Continue”.
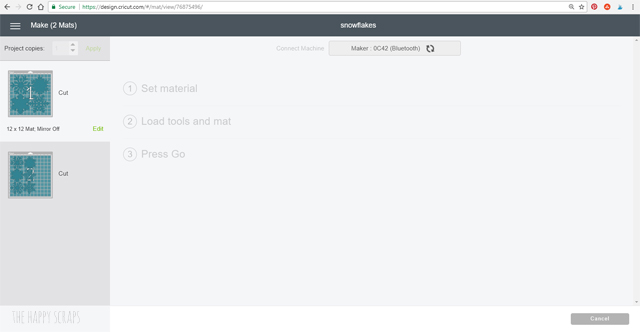
On the next screen, select your Cricut Maker machine at the top.
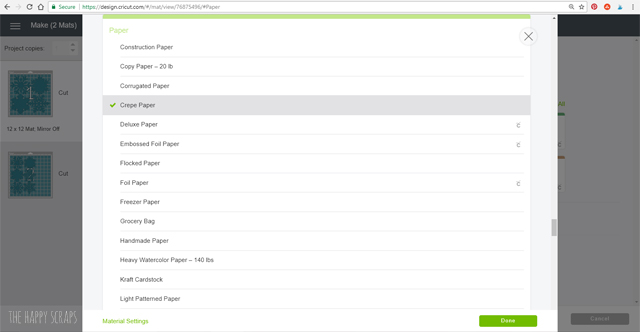
Once the Cricut Maker machine is connected, the material needs to be set. Click on “view all”.

Click the “Categories” drop down menu and select paper.

Click on “Crepe Paper”, then click “Done”.
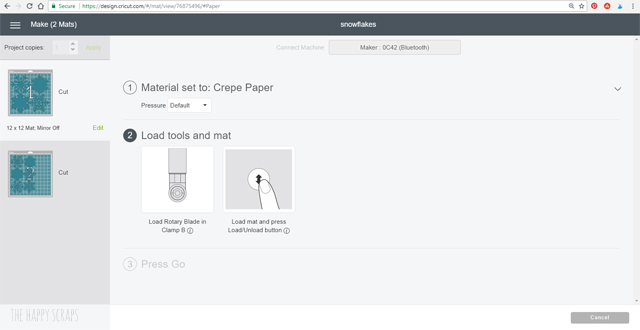
Your screen should look like this. It will tell you that you need the rotary blade and the arrow button on your machine should be blinking and ready for the mat to be loaded.
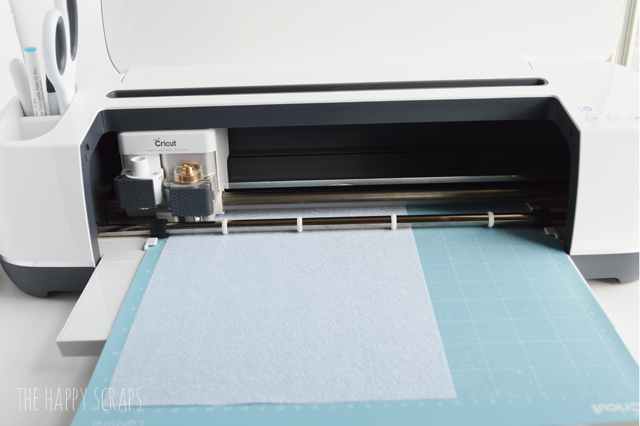
Load your mat with your crepe paper on it. I enjoy watching this machine work, and cut things with the rotary blade. It’s pretty amazing!
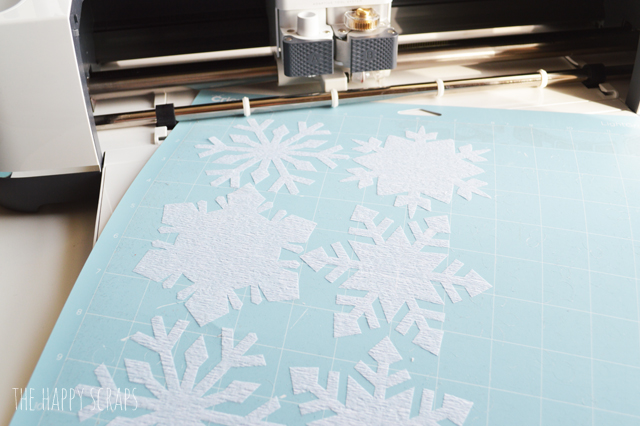
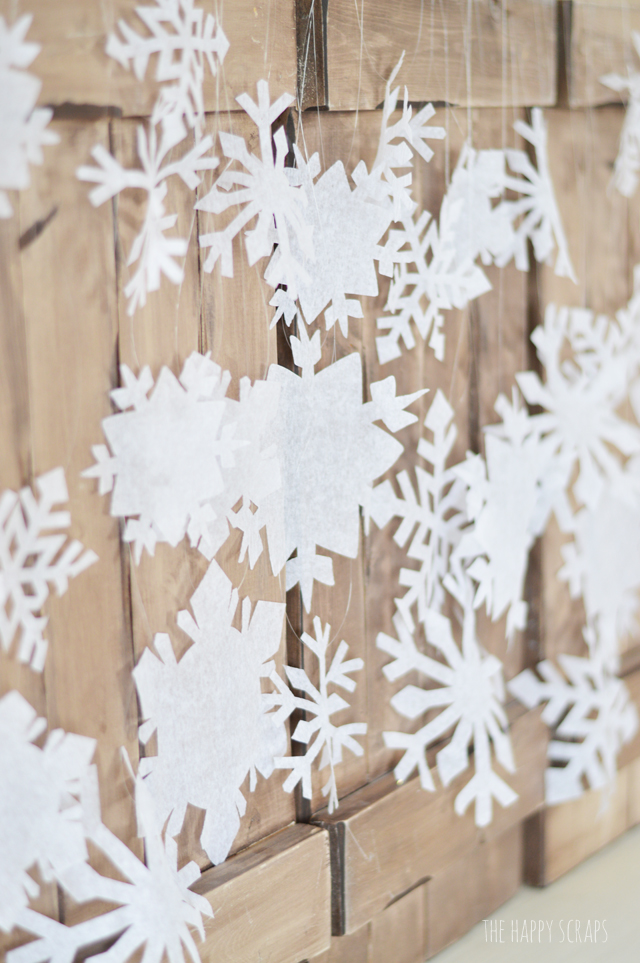
Once your snowflakes are all cut out, pull the extra crepe paper off of your mat. You’ll be left with beautiful snowflakes! I loved the way these cut and also loved the way they came up off the mat.
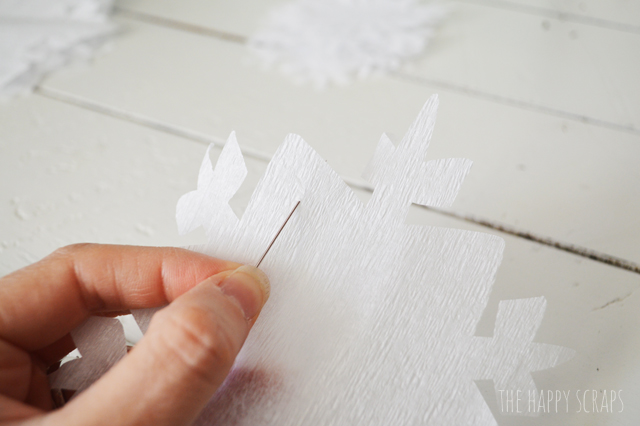
With a needle and fishing line, poke a hole and pull the fishing line through the snowflakes. Once I had the fishing line through the paper, I just tied the ends of the line together. I used all different lengths of fishing line, so my snowflakes would all be different lengths when hung up.
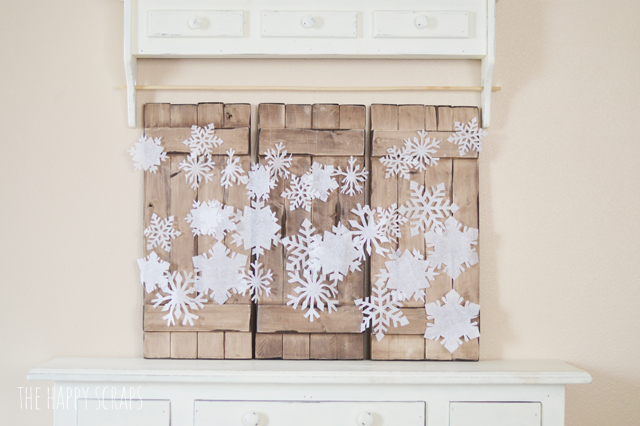
Once I had all of my snowflakes on their strings, I hung them from the dowel. I tried to put all the different lengths throughout, so it was staggered. I think it turned out well.

Seeing all these pretty snowflakes together almost makes me want to like being cold! 😉

I really love the way the Cricut Maker cuts the crepe paper. You can also cut tissue paper with the Cricut Maker as well as other delicate papers. I was able to cut tissue paper, but I had a hard time getting it off of my mat, once cut. I need to play with it some more and figure out how to do that. I think it could be lots of fun cutting tissue paper for different things.
Do you have the perfect place to put Crepe Paper Hanging Snowflakes in your home? I think it would be so pretty to hang a whole bunch of these from a curtain rod, filling up a window with snowflakes.
One thing I did learn, because of the size of the snowflakes I was cutting, I ended up trying to cut snowflakes with straight lines, rather than cutting the ones with lots of curves. These seemed to work better.

I’ll admit, I did take my Christmas decorations down, to put these up for pictures, but not to worry, my Christmas decorations are back up now. I am looking forward to putting this all back up after Christmas though. Although, I did leave the snowflakes, because they go well with my Christmas decor too!

Do you decorate for winter in January? It is something I always like to try and decorate for, and this year I’m excited to do it. If you’re looking for more winter decor, then check out my project gallery. I’ve shared some fun projects in the past.
If you’re wanting to get a Cricut Maker for yourself (and you should!) then be sure to enter this giveaway!
This is a sponsored conversation written by me on behalf of Cricut. The opinions and text are all mine.

Leave a Reply