• Contact
  • Etsy Shop
  • About Me
  • Home

The Happy Scraps

a creative blog

  • DIY Projects
  • Cricut
  • Holidays
    • New Year’s
    • Valentine’s Day
    • St. Patrick’s Day
    • Easter
    • Mother’s Day
    • Father’s Day
    • Independence Day
    • Halloween
    • Thanksgiving
    • Christmas
  • Paper Crafts
    • Banners
    • Cards
    • Mini Albums
    • Printables
    • Scrapbook Layouts
    • Wreaths
  • Sewing
  • Recipes

DIY Red Truck Christmas Ornament

December 5, 2018 By Amy | The Happy Scraps 2 Comments

310 shares
  • Share
  • Tweet

Christmas ornaments are always fun to make. Each year, I try to sit down and make ornaments with my boys. Sometimes I just let my boys create ornaments without my help, and sometimes I create ornaments on my own with out them. 🙂 This year, I’ve got the supplies to make ornaments with them, we just need to pick a day to do it. Do you enjoy making ornaments with your family? Last year, I got invited to an ornament exchange party and was so excited to go. I quickly put this DIY Red Truck Christmas Ornament together, and I made two of them so I could keep one for myself! Today, I’m going to show you how I did it. 

You'll have this DIY Red Truck Christmas Ornament put together in no time! Also learn how to layer multiple colors of vinyl!

This DIY Red Truck Christmas Ornament post contains affiliate links. If you click on an affiliate link and purchase something, you won’t pay anything extra, but it will help support this blog. All ideas and opinions are my own.

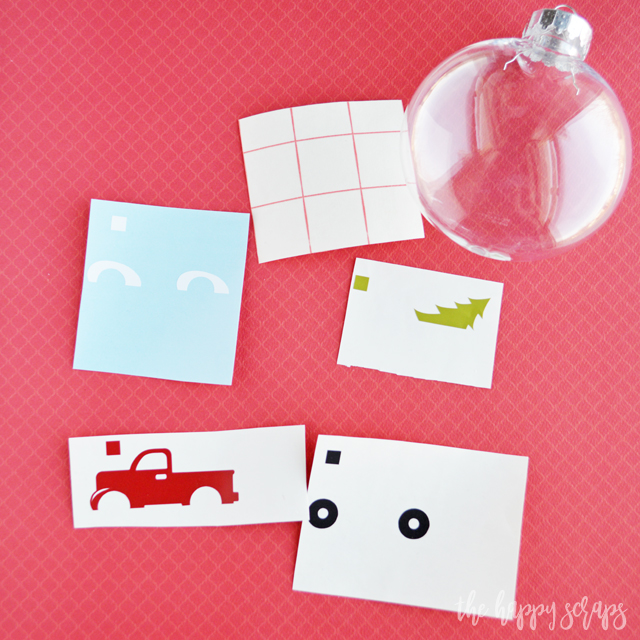
DIY Red Truck Christmas Ornament Supplies:

  • Adhesive Vinyl (in colors of choice)
  • Cricut Maker or Cricut Explore Air 2
  • Blank Ornament
  • Transfer Tape
  • Ribbon
  • Design Space Cut File

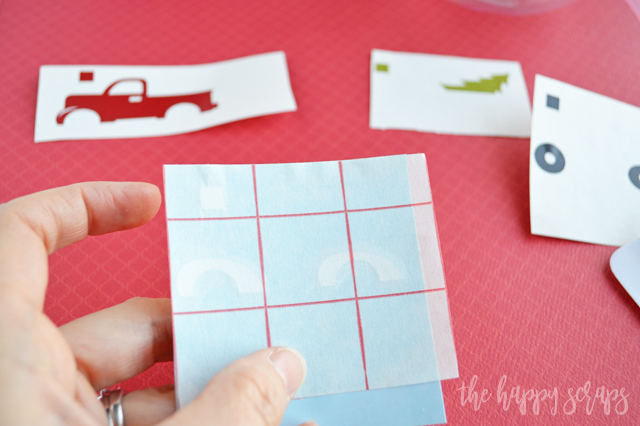
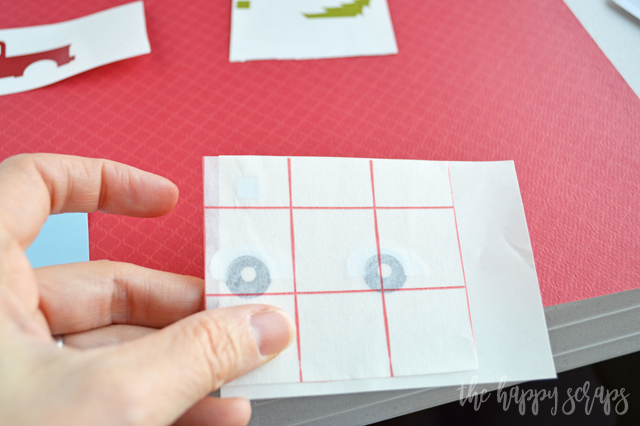
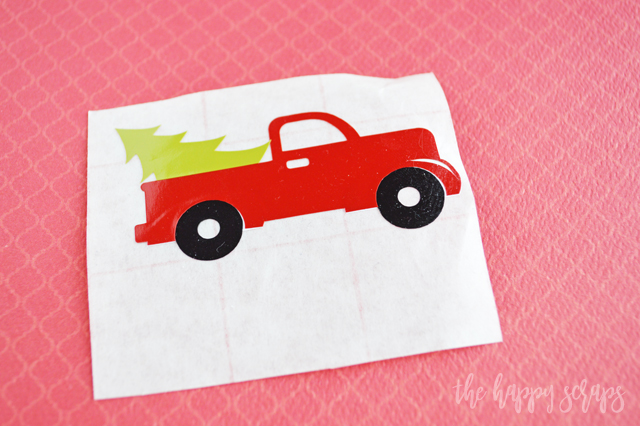
I started out by cutting the vinyl with my Cricut machine. Then I weeded each piece. I  was sure to leave the square in the corner of each piece. I did this to help me line up each layer. 

You'll have this DIY Red Truck Christmas Ornament put together in no time! Also learn how to layer multiple colors of vinyl!

I was ready to start layering the vinyl. For this project, I wanted it all layered on the transfer tape, before I started applying it to the ornament. 

You'll have this DIY Red Truck Christmas Ornament put together in no time! Also learn how to layer multiple colors of vinyl!

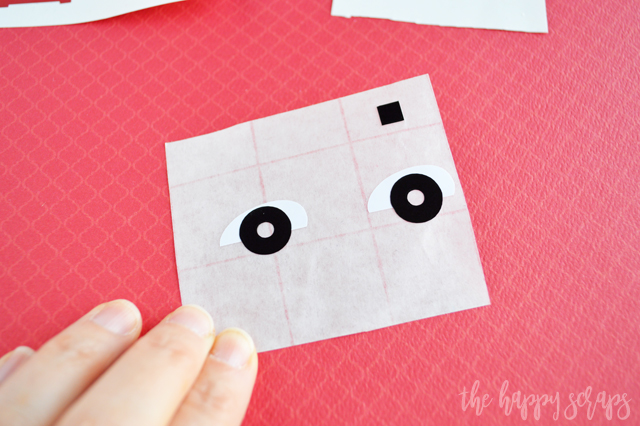
I determined which layer would be the very top layer. I applied the transfer tape to the white layer. 

You'll have this DIY Red Truck Christmas Ornament put together in no time! Also learn how to layer multiple colors of vinyl!

I removed the white layer from the backing. 

You'll have this DIY Red Truck Christmas Ornament put together in no time! Also learn how to layer multiple colors of vinyl!

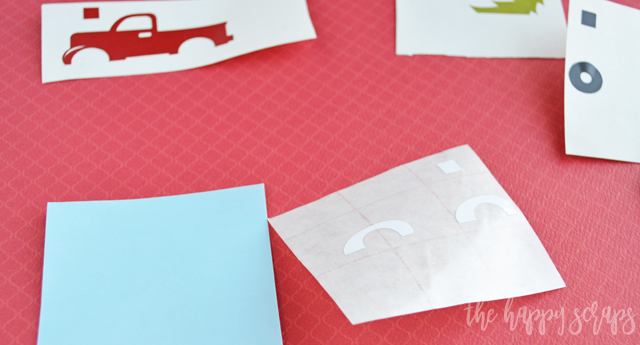
Next was the black layer. I lined up the square in the corner, making sure I got the wheels under the fenders lined up just right. The square helps with this! 

You'll have this DIY Red Truck Christmas Ornament put together in no time! Also learn how to layer multiple colors of vinyl!

Then I peeled that layer off of the backing. 

You'll have this DIY Red Truck Christmas Ornament put together in no time! Also learn how to layer multiple colors of vinyl!

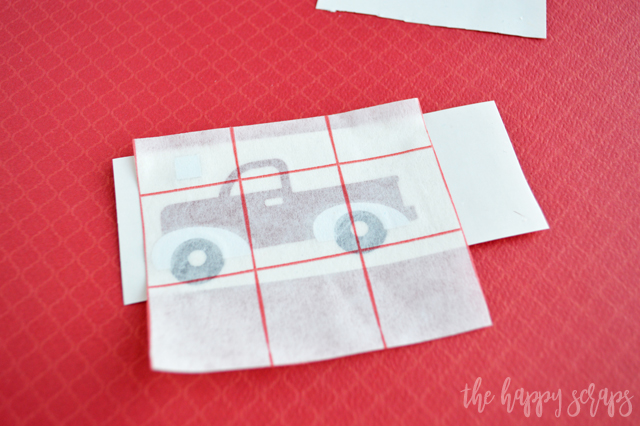
Next I placed the transfer tape on the red layer, also lining up the square in the corner. 

You'll have this DIY Red Truck Christmas Ornament put together in no time! Also learn how to layer multiple colors of vinyl!

I was almost done at this point. 

You'll have this DIY Red Truck Christmas Ornament put together in no time! Also learn how to layer multiple colors of vinyl!

Lastly, I put the green layer on. 

You'll have this DIY Red Truck Christmas Ornament put together in no time! Also learn how to layer multiple colors of vinyl!

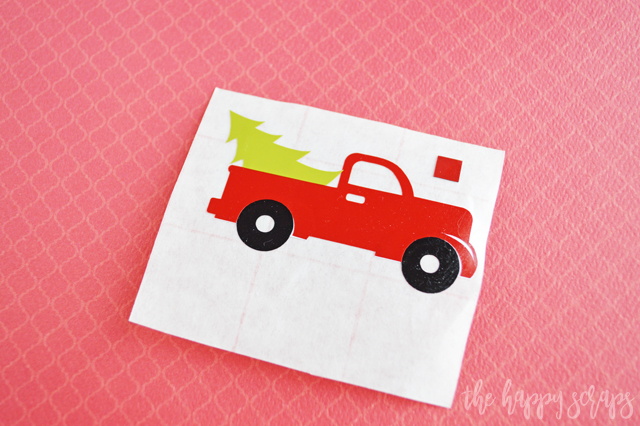
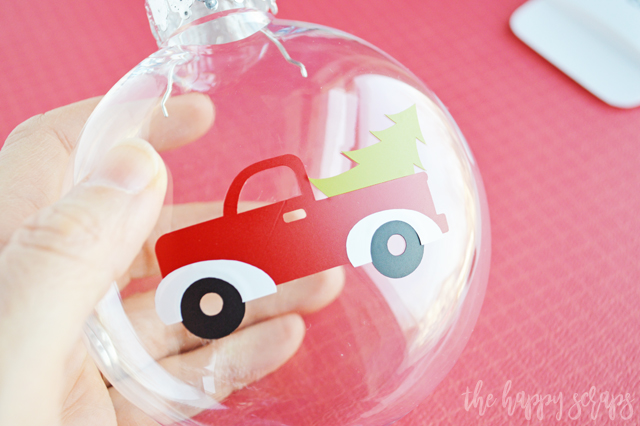
Before I applied the truck to my ornament, I made sure to remove the squares, so they didn’t stick to the ornament. 

You'll have this DIY Red Truck Christmas Ornament put together in no time! Also learn how to layer multiple colors of vinyl!

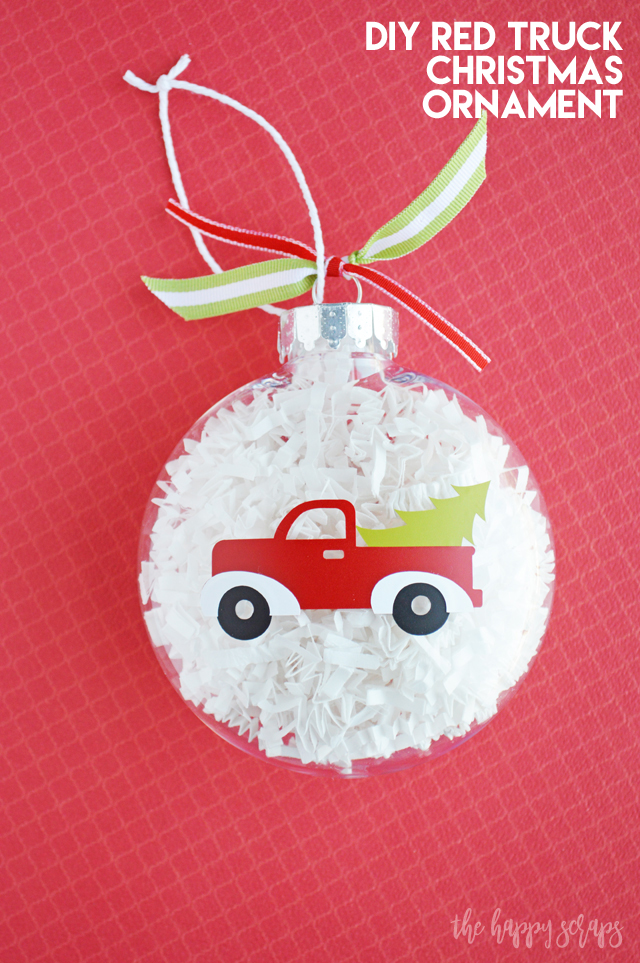
I applied the red truck to the front of the ornament, and smoothed it out well. 

You'll have this DIY Red Truck Christmas Ornament put together in no time! Also learn how to layer multiple colors of vinyl!

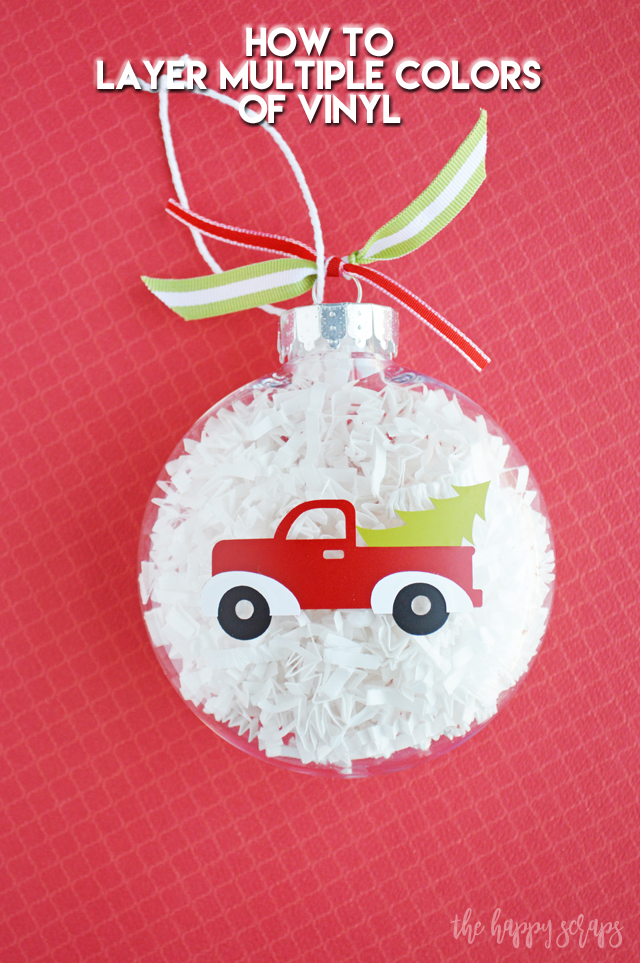
Then I filled the ornament with shredded paper. 

You'll have this DIY Red Truck Christmas Ornament put together in no time! Also learn how to layer multiple colors of vinyl!

I added a couple of ribbons to the top and it was finished! I adore the way this DIY Red Truck Christmas Ornament turned out. I might just have to make a couple more to go on my tree too! 

You'll have this DIY Red Truck Christmas Ornament put together in no time! Also learn how to layer multiple colors of vinyl!

Do you love the look of and old Red Truck? Especially at Christmas time? Also, this is a great tutorial for layering vinyl! 

You'll have this DIY Red Truck Christmas Ornament put together in no time! Also learn how to layer multiple colors of vinyl!

If you enjoyed this DIY Red Truck Christmas Ornament post, then you might also like to check out my vinyl gallery here. 

Filed Under: Christmas, Cricut, DIY Projects, Holidays Tagged With: christmas, cricut, cricut design space, cricut explore air 2, cricut maker, expressions vinyl, ornaments, vinyl

« DIY Buffalo Check Christmas Ornaments
Santa’s Magic Key Ornament »

Comments

  1. Rafid Ruman says

    November 2, 2022 at 1:57 am

    This post really too helpful for me to do blog commenting. Thank you for sharing.

    Reply
  2. Tonny says

    December 11, 2022 at 11:11 pm

    https://trackersbd.com/product/smartwatch-2-0-lte-wifi/

    Reply

Leave a Reply Cancel reply

Your email address will not be published. Required fields are marked *

CommentLuv badgeShow more posts
  • Farm Sweet Farm Front Porch Sign with the Cricut Maker 3
  • Farm Fresh Eggs Kitchen Sign
  • How to Make a Summer Hat with the Cricut Joy
  • Bless Our Farmhouse Kitchen Sign
  • Welcome to the Farm Front Door Decor
  • How to Use Offset in Cricut Design Space

Popular Posts

Page Ranking Tool

Categories

Archives

The images and text on this site are copyright of The Happy Scraps. If you would like to feature a project or image on this site please email [email protected] Thank you! Please read the Privacy Policy and Disclosure here.

Copyright © 2023 · Tasteful theme by Restored 316

Copyright © 2023 · Blog Design by Key Lime Digital Designs · WordPress · Log in

310 shares