• Contact
  • Etsy Shop
  • About Me
  • Home

The Happy Scraps

a creative blog

  • DIY Projects
  • Cricut
  • Holidays
    • New Year’s
    • Valentine’s Day
    • St. Patrick’s Day
    • Easter
    • Mother’s Day
    • Father’s Day
    • Independence Day
    • Halloween
    • Thanksgiving
    • Christmas
  • Paper Crafts
    • Banners
    • Cards
    • Mini Albums
    • Printables
    • Scrapbook Layouts
    • Wreaths
  • Sewing
  • Recipes

DIY Buffalo Check Christmas Ornaments

November 30, 2018 By Amy | The Happy Scraps 10 Comments

394 shares
  • Share
  • Tweet

Hi friends! How are you? I can tell that it is truly the beginning of the Christmas holiday season. Between being sick with a cold last week and the beginning of this week and trying to keep up with my family and work, I haven’t hardly had time to do anything I need to do. I was going to post this yesterday, but it didn’t happen, so it’s coming today! πŸ™‚ Better late than never, right? Last night, after I had taken my boys to the dentist, I finally decided that I was just going to get home and pull out the Christmas trees. (We have one big one, and a couple of 3′ trees.) I’ve been trying to get to it for days, and rather than editing photos last night, I decided to put the trees up. My two year old couldn’t be more excited! We put one of the small trees in his bedroom. He is so excited, which makes me more excited than I was about getting all the decor out! I just haven’t had the motivation or excitement about getting it all put up this year. But I’ll get there. Anyway, we pulled the big tree out, and plugged it in, and guess what?! A couple of sections of lights aren’t working. I mean, this is the 5th year using the same tree, and it’s been great for being a $70 Walmart tree (we’ve never had a light problem), but I can’t afford to replace it this year. So, we’ll be heading to the store tonight to find something to help us fix the light strands so all the lights work. Once we get those lights working, then I’ll be able to add my ornaments, including these DIY Buffalo Check Christmas Ornaments that I’m sharing with you today! 
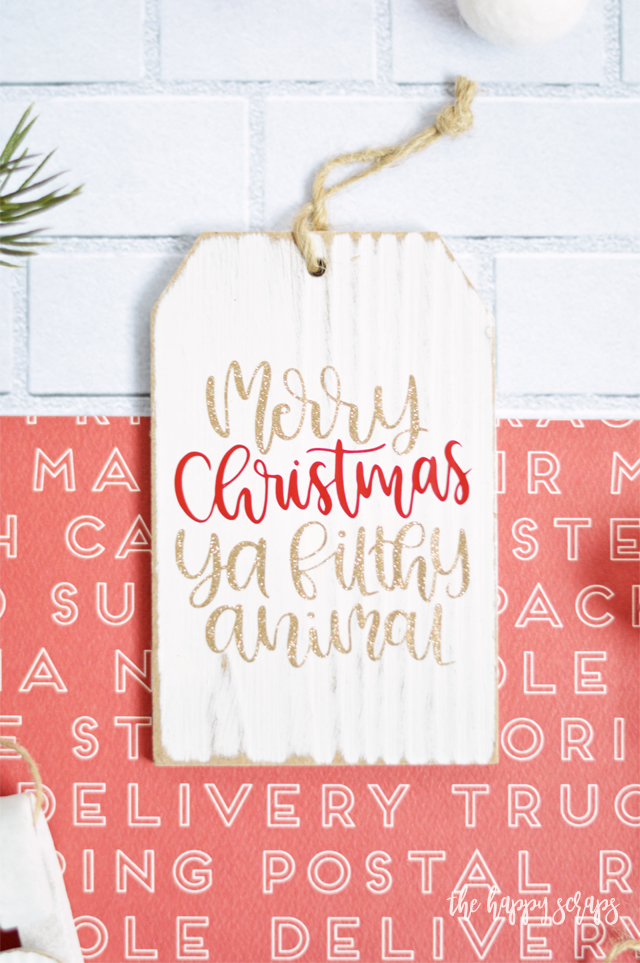
These DIY Buffalo Check Christmas Ornaments are so easy to create and will be the perfect addition to your Christmas tree! Tutorial at The Happy Scraps.

This DIY Buffalo Check Christmas Ornaments post contains affiliate links. If you click on an affiliate link and purchase something, you won’t pay anything extra, but it will help support this blog. All ideas and opinions are my own.

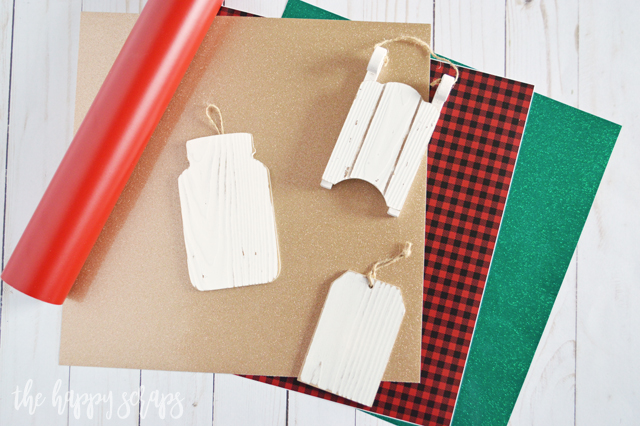
DIY Buffalo Check Christmas Ornaments Supplies:

  • Buffalo Check Adhesive Vinyl
  • Glitter Vinyl (gold & green)
  • Adhesive Vinyl (brick)
  • Transfer Tape
  • Blank Ornaments (I found mine at Michael’s)
  • Cricut Maker
  • Design Space Cut File

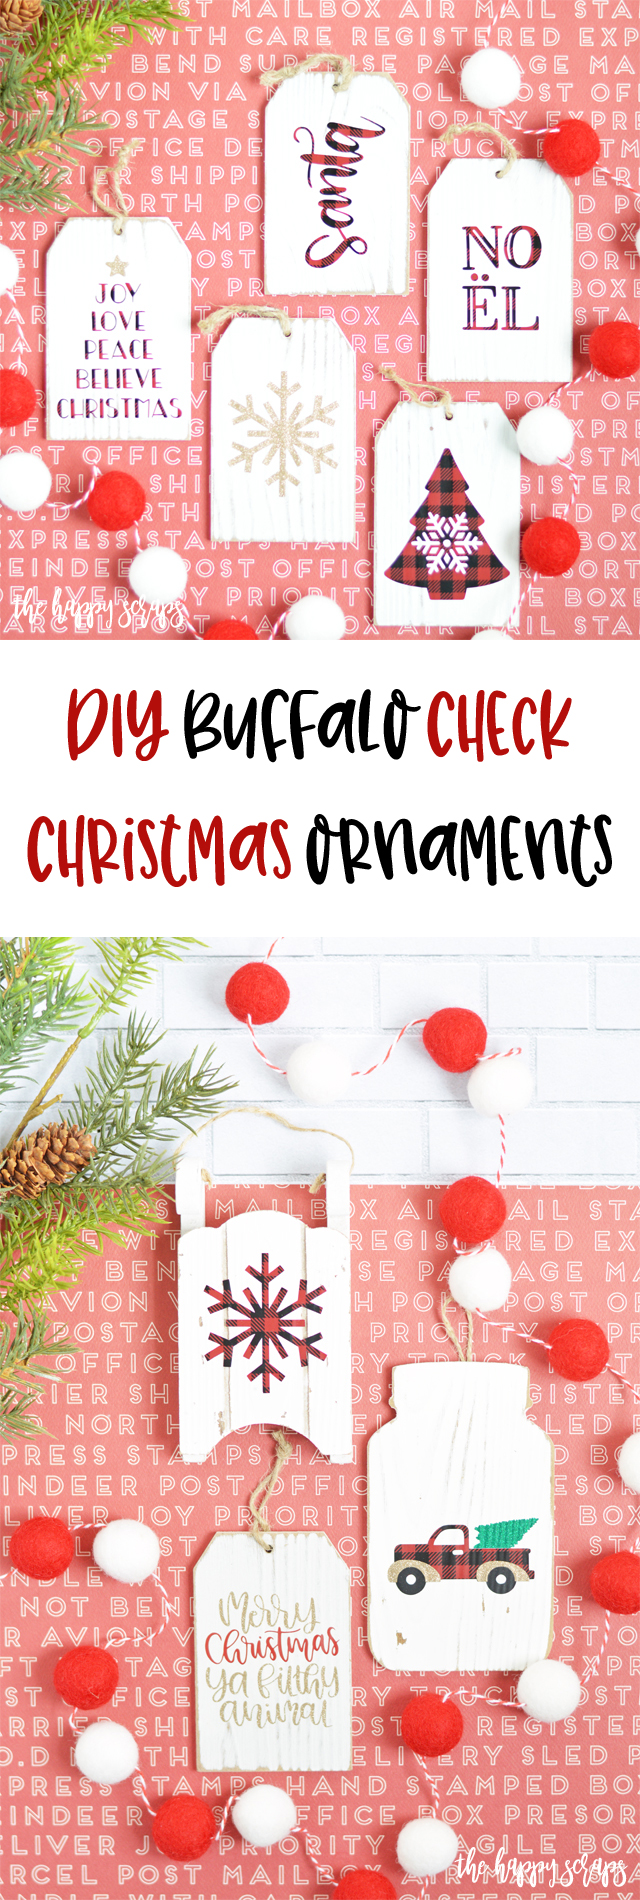
These DIY Buffalo Check Christmas Ornaments are so easy to create and will be the perfect addition to your Christmas tree! Tutorial at The Happy Scraps.

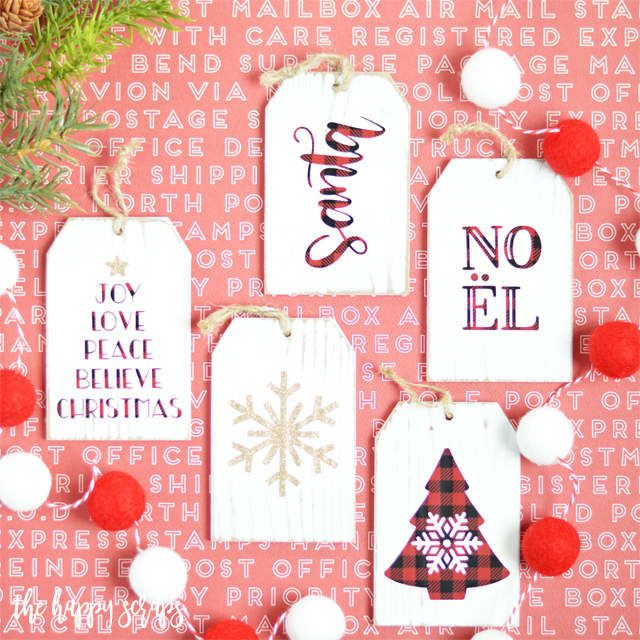
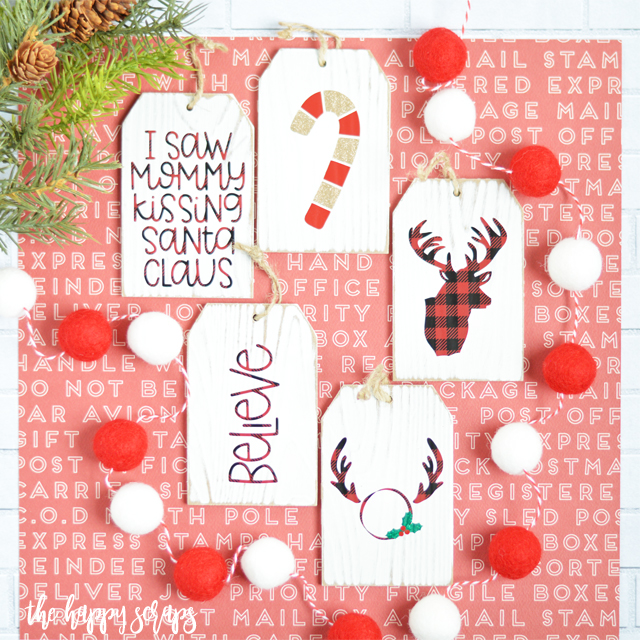
I found some designs and put some designs together of the things I wanted to cut and put on the ornaments. Lucky for you, you can just open up the Design Space file and cut these. They are all sized to what I was putting them on. 
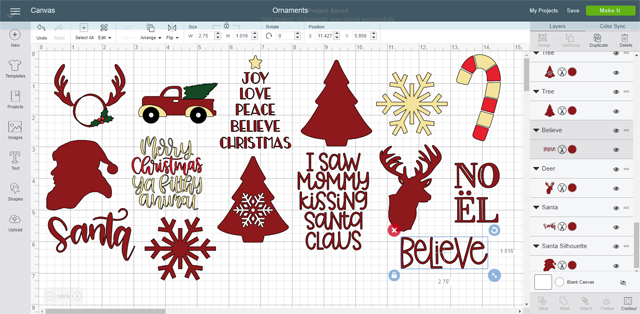
These DIY Buffalo Check Christmas Ornaments are so easy to create and will be the perfect addition to your Christmas tree! Tutorial at The Happy Scraps.

I used the Cricut Maker to cut them out. The only thing I would have done differently was add some pressure when I cut the patterned vinyl. It cut it, but it was super hard to weed those, and I think if it would have had a little more pressure it would have helped. 
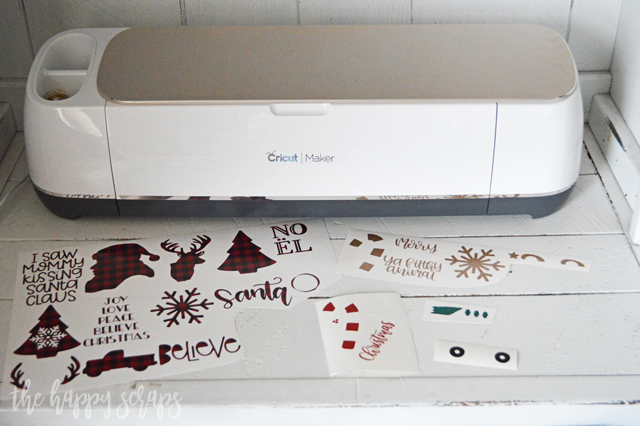
These DIY Buffalo Check Christmas Ornaments are so easy to create and will be the perfect addition to your Christmas tree! Tutorial at The Happy Scraps.

There are a handful of these that have more than one layer of vinyl. Put both layers of the vinyl on your transfer tape. 
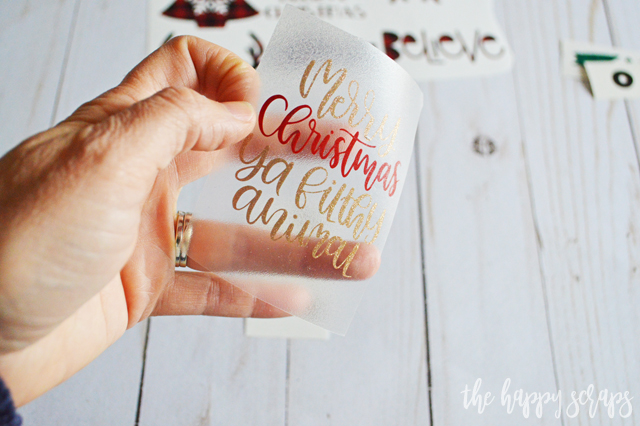
These DIY Buffalo Check Christmas Ornaments are so easy to create and will be the perfect addition to your Christmas tree! Tutorial at The Happy Scraps.

Then apply it to your ornament. I found a 14 pack of these tags at Michael’s. It was a couple of months ago, and I’m not sure if they still have them. Anyway, they are perfect for these ornaments. 
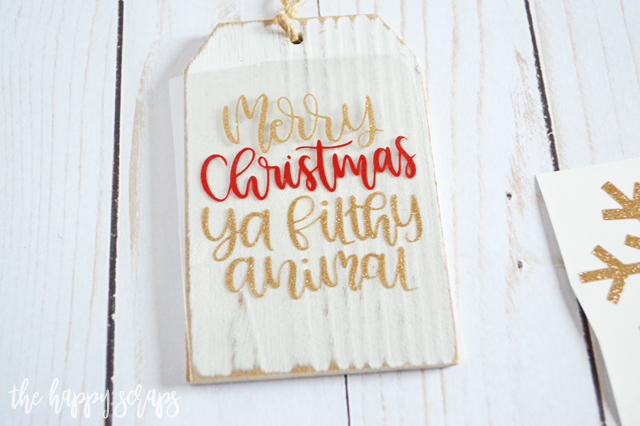
These DIY Buffalo Check Christmas Ornaments are so easy to create and will be the perfect addition to your Christmas tree! Tutorial at The Happy Scraps.

After I made sure the vinyl was on the ornament securely, I peeled off the transfer tape, and that one was done! 

These DIY Buffalo Check Christmas Ornaments are so easy to create and will be the perfect addition to your Christmas tree! Tutorial at The Happy Scraps.

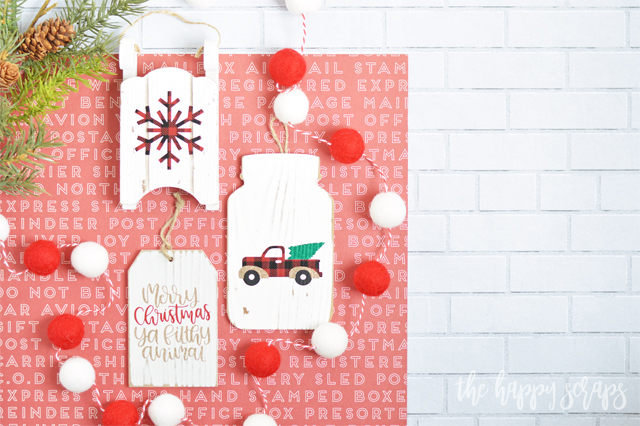
I did the truck next. For this one, I did one layer at a time. The trick is to make sure you put them on in the correct order. Starting with the truck first, then the wheels, then the fenders, and last the tree. I realize that I would never actually see a truck like this driving down the road, but I adore the way this turned out, and it’s on a jar shaped ornament! 
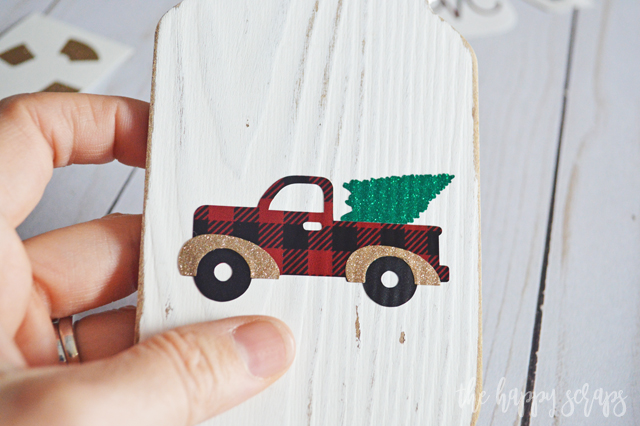
These DIY Buffalo Check Christmas Ornaments are so easy to create and will be the perfect addition to your Christmas tree! Tutorial at The Happy Scraps.

I applied the vinyl to the rest of the ornaments and I was ready to go, all except I’m still waiting to hang these on my tree! I’m really am getting excited to decorate my tree this year. I’ve bought several new things to include on it, and I’m excited!! These ornaments are just a few of them! 
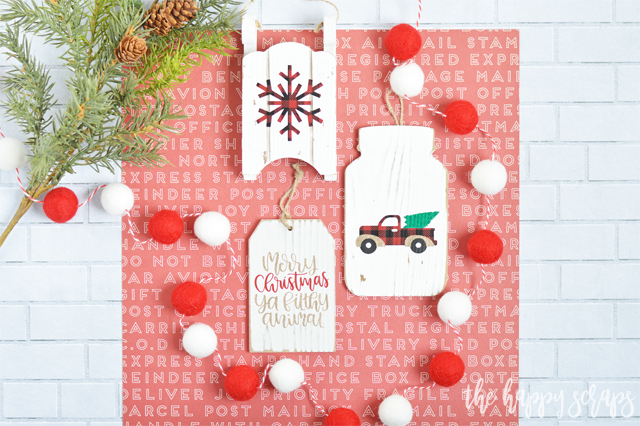
These DIY Buffalo Check Christmas Ornaments are so easy to create and will be the perfect addition to your Christmas tree! Tutorial at The Happy Scraps.

Aren’t they all so fun?!

These DIY Buffalo Check Christmas Ornaments are so easy to create and will be the perfect addition to your Christmas tree! Tutorial at The Happy Scraps.

Which ornament is your favorite? 

These DIY Buffalo Check Christmas Ornaments are so easy to create and will be the perfect addition to your Christmas tree! Tutorial at The Happy Scraps.

I’m really hoping that I can make these new ornaments work well with my older ones. I have a color scheme of red & white with a little bit of gold for my tree, but other than that, it is mostly an anything goes tree. πŸ™‚

These DIY Buffalo Check Christmas Ornaments are so easy to create and will be the perfect addition to your Christmas tree! Tutorial at The Happy Scraps.

What kind of tree do you have? A themed tree?
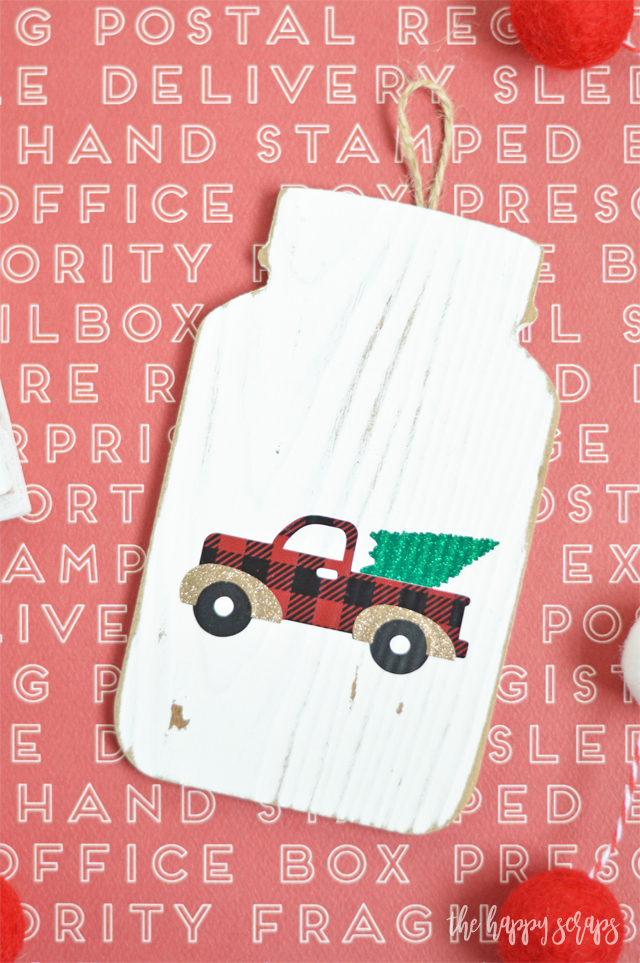
These DIY Buffalo Check Christmas Ornaments are so easy to create and will be the perfect addition to your Christmas tree! Tutorial at The Happy Scraps.

Or certain colors?

These DIY Buffalo Check Christmas Ornaments are so easy to create and will be the perfect addition to your Christmas tree! Tutorial at The Happy Scraps.

Or is your tree full of handmade ornaments from your kids?
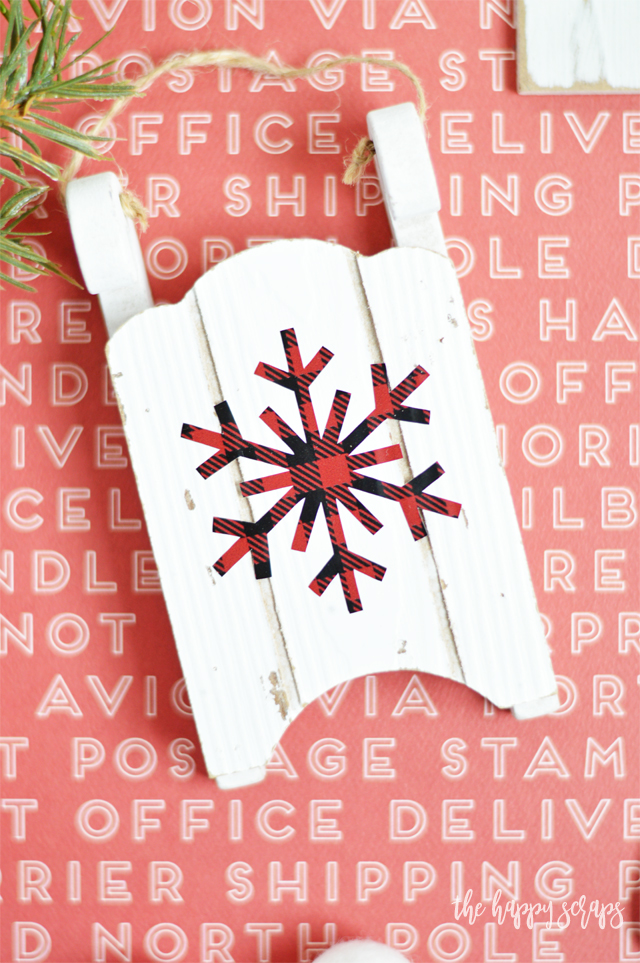
These DIY Buffalo Check Christmas Ornaments are so easy to create and will be the perfect addition to your Christmas tree! Tutorial at The Happy Scraps.

This time of year is so magical, and last night after we did set up the small trees, and tried to set up the big one, watching my three year old be so excited really made me remember the magic of Christmas and got me more excited about it! 

These DIY Buffalo Check Christmas Ornaments are so easy to create and will be the perfect addition to your Christmas tree! Tutorial at The Happy Scraps.

Though, I wouldn’t say I’m a scrooge, I’ve just had a lot going the last couple of weeks, so I haven’t been able to do all that I’ve wanted to.

These DIY Buffalo Check Christmas Ornaments are so easy to create and will be the perfect addition to your Christmas tree! Tutorial at The Happy Scraps.

Anyway, I hope you enjoy these DIY Buffalo Check Christmas Ornaments! I know I will! If you’re looking for more fun projects to create for the holidays, then check out my Christmas gallery! 

Filed Under: Christmas, Cricut, DIY Projects, Holidays Tagged With: christmas, cricut, cricut design space, cricut explore air 2, cricut maker, expressions vinyl, glitter vinyl, ornaments, patterned vinyl, vinyl

« Apron & Knife Men’s Gift Idea
DIY Red Truck Christmas Ornament »

Comments

  1. Tracy Shaw says

    December 1, 2018 at 2:28 pm

    Unfortunately this project was saved as PRIVATE and is not available in Design Space. Cut though…

    Reply
    • Amy | The Happy Scraps says

      December 1, 2018 at 4:26 pm

      I’m not sure why it was set to private, but it should be fixed now. Let me know if it is still giving you trouble. πŸ™‚

      Reply
  2. Elaine says

    December 2, 2018 at 7:29 am

    When trying to open Cricut cut file I get a message that it is marked as private and it will not open. Am I doing something wrong or does the file need to be marked as public for us to use?

    Reply
    • Amy | The Happy Scraps says

      December 3, 2018 at 9:10 pm

      Shoot! I thought I had fixed this. I’ll have to figure out what is going wrong. Thanks for the heads up!

      Reply
    • Amy | The Happy Scraps says

      December 4, 2018 at 7:42 am

      Hi Elaine, I think it should be fixed if you’d like to try it again. I’m not sure why this one is having trouble.

      Reply
  3. Betty says

    December 8, 2018 at 7:20 pm

    I love these. How do I find the dukes in Cricut Design space.

    Reply
    • Amy | The Happy Scraps says

      December 10, 2018 at 9:51 pm

      The designs in Cricut Design Space? Click the link to them in the supply list. I was having some trouble with the link to the cut file, but it should be working now. Let me know if it doesn’t. Thank you!

      Reply
  4. Write my essay for me says

    February 3, 2022 at 1:13 pm

    These a very creative designs.

    Reply
  5. Kerry B. Granado says

    August 11, 2022 at 4:50 am

    Great post
    It was a very useful blog. I really like your blogs later. Thanks for sharing

    Reply

Leave a Reply Cancel reply

Your email address will not be published. Required fields are marked *

CommentLuv badgeShow more posts
  • Farm Sweet Farm Front Porch Sign with the Cricut Maker 3
  • Farm Fresh Eggs Kitchen Sign
  • How to Make a Summer Hat with the Cricut Joy
  • Bless Our Farmhouse Kitchen Sign
  • Welcome to the Farm Front Door Decor
  • How to Use Offset in Cricut Design Space

Popular Posts

Affiliate With

Page Ranking Tool

Categories

Archives

The images and text on this site are copyright of The Happy Scraps. If you would like to feature a project or image on this site please email [email protected] Thank you! Please read the Privacy Policy and Disclosure here.

Copyright © 2023 · Tasteful theme by Restored 316

Copyright © 2023 · Blog Design by Key Lime Digital Designs · WordPress · Log in

394 shares