• Contact
  • Etsy Shop
  • About Me
  • Home

The Happy Scraps

a creative blog

  • DIY Projects
  • Cricut
  • Holidays
    • New Year’s
    • Valentine’s Day
    • St. Patrick’s Day
    • Easter
    • Mother’s Day
    • Father’s Day
    • Independence Day
    • Halloween
    • Thanksgiving
    • Christmas
  • Paper Crafts
    • Banners
    • Cards
    • Mini Albums
    • Printables
    • Scrapbook Layouts
    • Wreaths
  • Sewing
  • Recipes

DIY Stenciled Easter Sign

March 19, 2013 By Amy | The Happy Scraps 12 Comments

19 shares
  • Share
  • Tweet

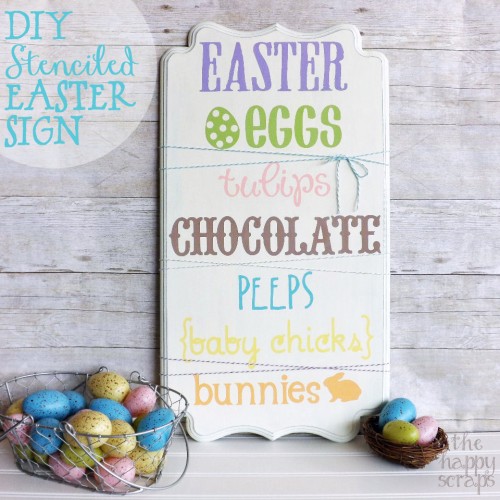
I am so excited to share this post with you today!  This is the post that I shared over at A Little Tipsy last week for my very first contributor post.  This is my DIY Stenciled Easter Sign. It is very simple to make, but does take a little bit of time, for letting the paint dry.

DIY Easter Sign

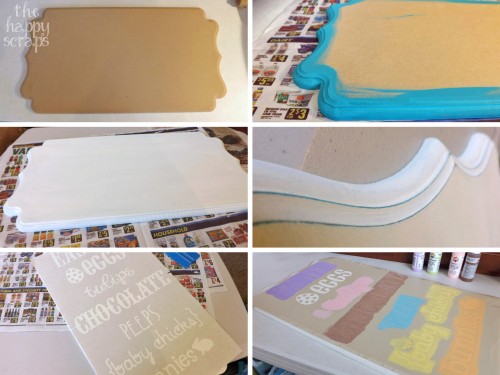
I got this board from my favorite store, The Wood Connection, it was actually an extra I had from a class I recently taught.  So, you start with your board, and paint all of the edges blue.  Once the blue paint is dry, you can start painting your layers of white on.  If you are using MDF, then it will take a few coats of paint.  Once you are finished painting the white on, using some fine sandpaper, distress your edges to reveal the blue.  Next, using some vinyl and your Cricut, you will cut out your vinyl stencil and stick it on.  Because of the large size of the vinyl, it was kind of tricky to line up straight, but I got it.  Next you are ready to paint!  I chose pastels, and some of the colors I had to mix with white paint to get just the right shade.

DIY Easter Sign collage

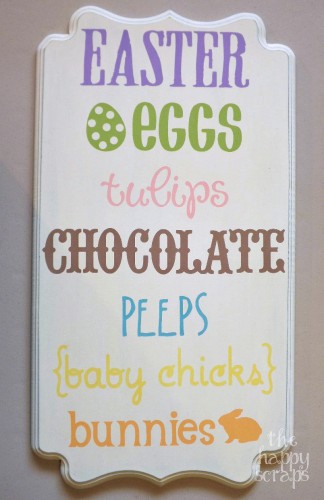
Once you’ve painted all of your words the desired colors, peel up your stencil.  Now you can distress it with some fine sandpaper if you would like.  I sanded the top of my sign, then I wiped it down with a wet wipe to get the dust off.

plaque prior to distressing

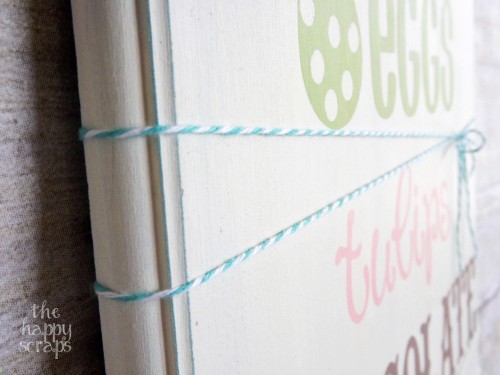
Once I was finished with the distressing, I wrapped some twine around the board in a few different places. Twine makes everything better, doesn’t it?!

distressing and twine

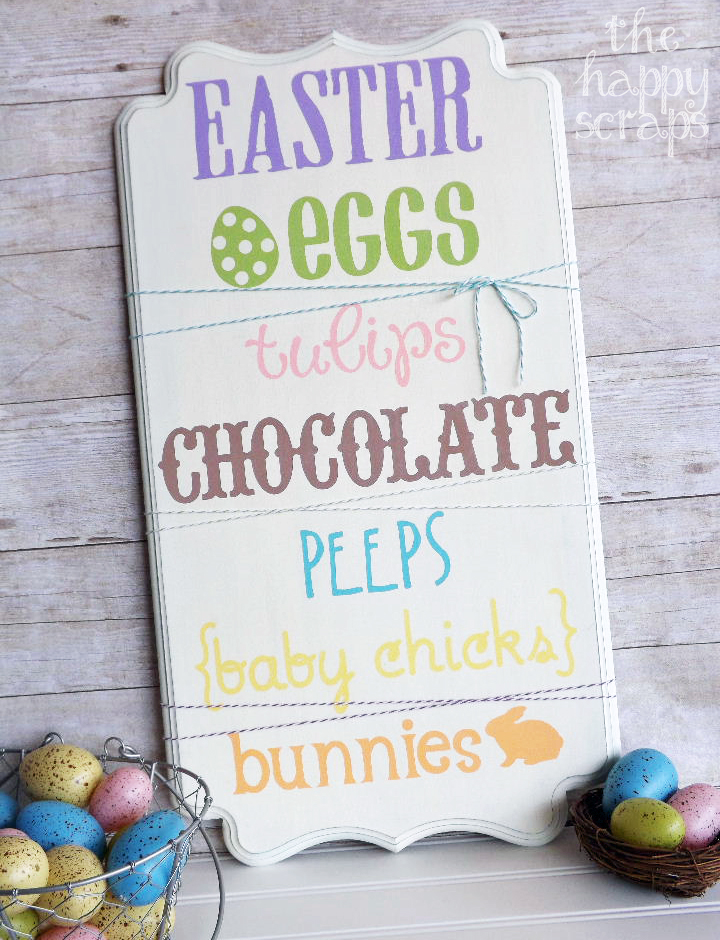
That’s it, you are finished!  Now you just need to find the perfect place to put it in your home.

Easter Sign

My St. Patrick’s Day decor may or may not have come down a little bit early because I was so darn excited to put this up!

Filed Under: DIY Projects, Easter, Holidays, Spring Tagged With: baker's twine, cricut, decor, easter, paint, spring, wood

« Happy Spring Banner on Shaped Plaque
Potted Spring Flowers »

Leave a Reply Cancel reply

Your email address will not be published. Required fields are marked *

CommentLuv badgeShow more posts
  • Farm Sweet Farm Front Porch Sign with the Cricut Maker 3
  • Farm Fresh Eggs Kitchen Sign
  • How to Make a Summer Hat with the Cricut Joy
  • Bless Our Farmhouse Kitchen Sign
  • Welcome to the Farm Front Door Decor
  • How to Use Offset in Cricut Design Space

Popular Posts

Page Ranking Tool

Categories

Archives

The images and text on this site are copyright of The Happy Scraps. If you would like to feature a project or image on this site please email [email protected]. Thank you! Please read the Privacy Policy and Disclosure here.

Copyright © 2025 · Tasteful theme by Restored 316

Copyright © 2025 · Blog Design by Key Lime Digital Designs · WordPress · Log in

19 shares