• Contact
  • Etsy Shop
  • About Me
  • Home

The Happy Scraps

a creative blog

  • DIY Projects
  • Cricut
  • Holidays
    • New Year’s
    • Valentine’s Day
    • St. Patrick’s Day
    • Easter
    • Mother’s Day
    • Father’s Day
    • Independence Day
    • Halloween
    • Thanksgiving
    • Christmas
  • Paper Crafts
    • Banners
    • Cards
    • Mini Albums
    • Printables
    • Scrapbook Layouts
    • Wreaths
  • Sewing
  • Recipes

Kitchen Utensil Holder

February 17, 2015 By Amy | The Happy Scraps 16 Comments

19 shares
  • Share
  • Tweet

For the last couple of years, I’ve had a small glass pitcher in my kitchen for holding Kitchen Utensils. I painted it orange to match the kitchen, but the longer I used it, I just didn’t like it. The hole in the top wasn’t big enough to fit all that I wanted to, into it. So I headed out last week to find something new to use for a Kitchen Utensil Holder.

cooking-utensil-holder

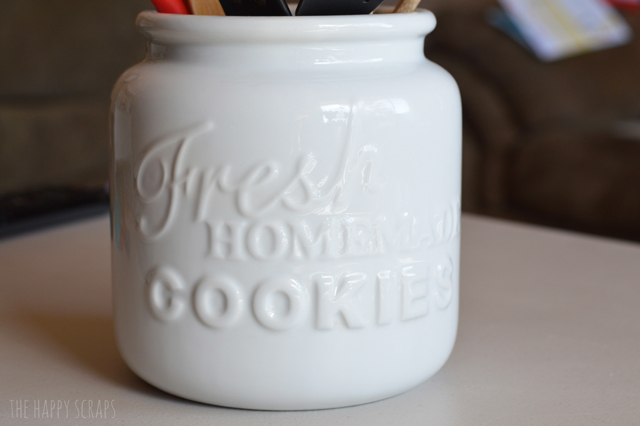
I couldn’t find exactly what I wanted, but found something that would work. This is the back of it.

utensil-holder

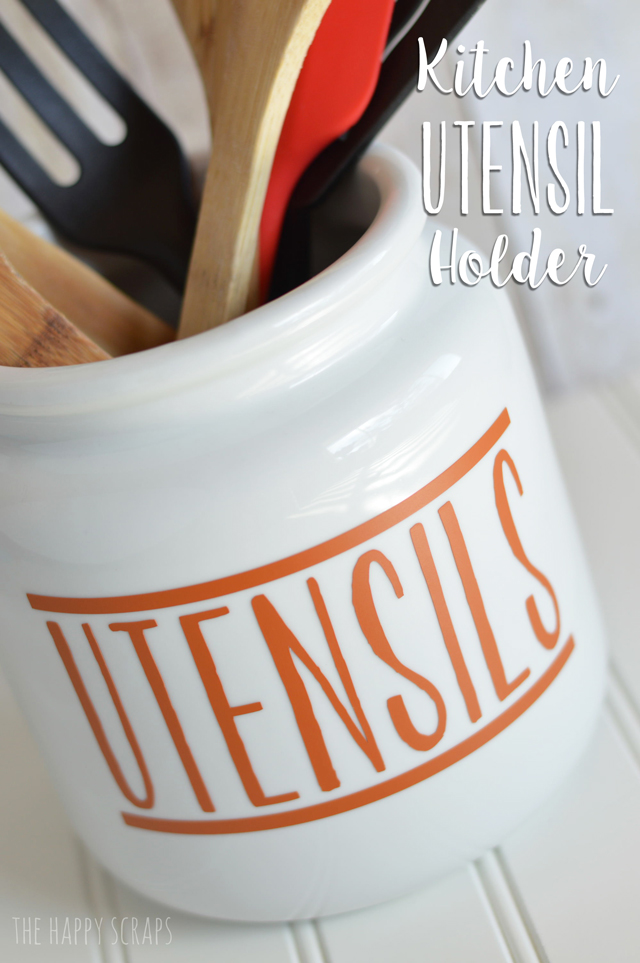
This is the front. It was only $5, and I figured since it was the right size and shape that I could just keep it turned backwards and have the back be the front. And if I ever decide to use it for cookies, then I’ll just turn it around. 😉

cookie-jar

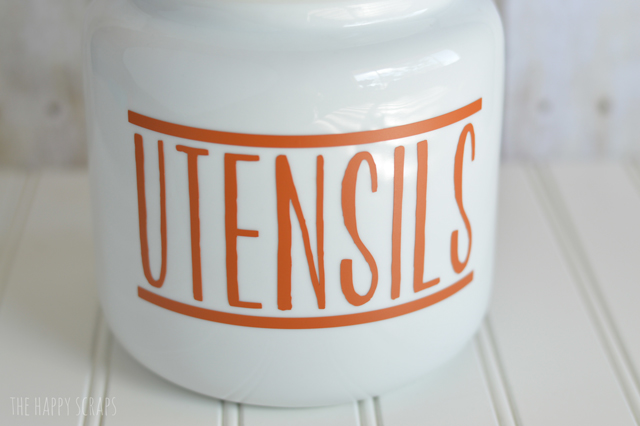
I used Cricut Design Space to design what I wanted to put on the jar. While designing it, I couldn’t decide on what kind of font I wanted, so using my Cricut Explore, and my vinyl, I cut both and then chose one.

cricut-vinyl

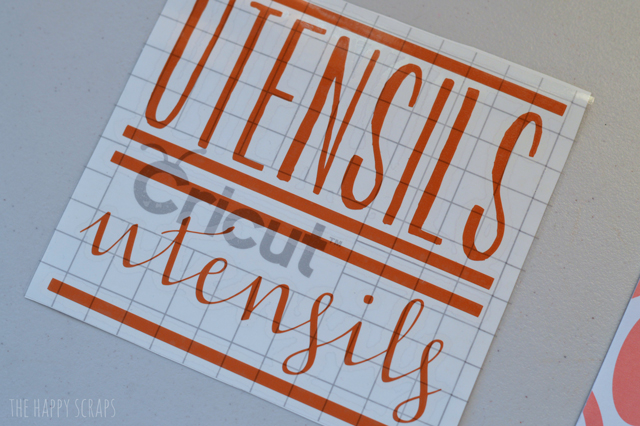
I went with the non italics/cursive font. Although, I love both of the fonts.

vinyl

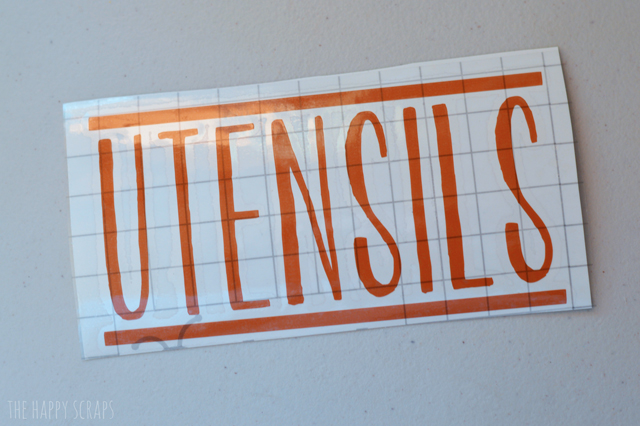
I measured to make sure I had my vinyl straight, and I applied it to the jar.

apply-vinyl

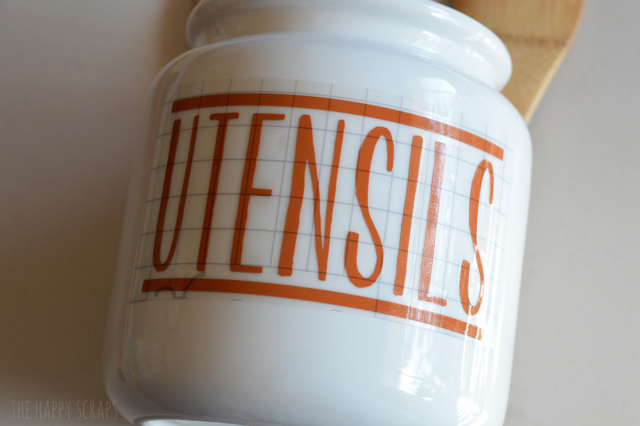
Once I pulled of the transfer tape, I made sure the vinyl was all on there smoothly.

vinyl-decal

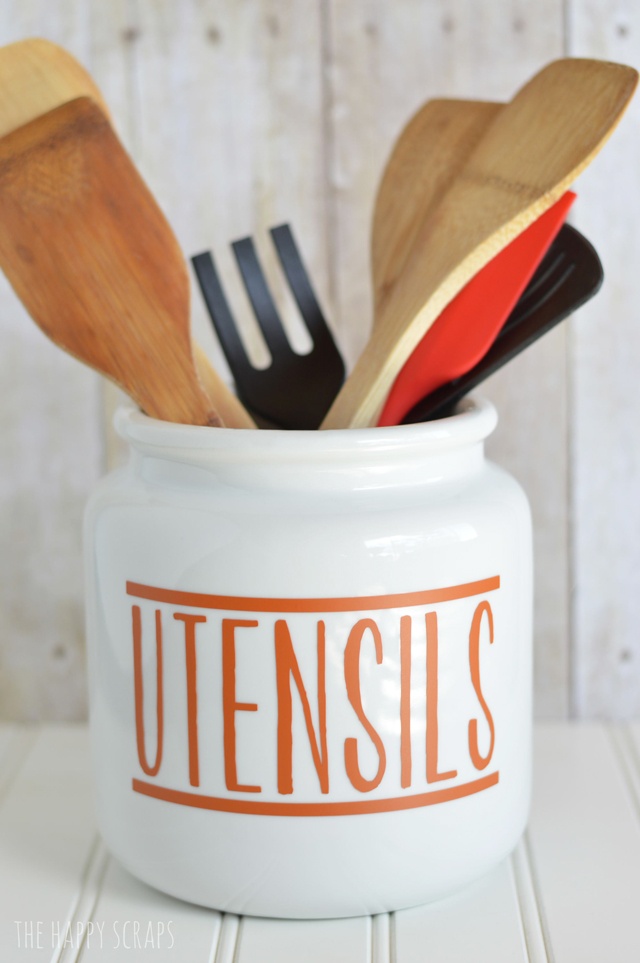
Filled it up with my Utensils and I put it in it’s place on the kitchen counter.

kitchen-utensil-holder

I love this project, because once I decided what font I wanted and had the vinyl cut out, it really only took me about 5 minutes to do.

Filed Under: Cricut, DIY Projects, Home Decor, Tutorial Tagged With: cricut, home decor, kitchen, vinyl

« The Creative Exchange Link Party #39
The Creative Exchange Link Party #40 »

Comments

  1. Aliza B says

    February 17, 2015 at 8:09 am

    This is such a cute idea. I haven’t used my Cricut Explore yet for vinyl. Is it hard to transfer?

    Reply
    • Amy | The Happy Scraps says

      February 17, 2015 at 8:29 am

      No, not hard at all! When you use the vinyl setting on the explore, it kiss cuts the vinyl for you, making it so easy! You just apply transfer tape to the top and then apply the vinyl. 🙂

      Reply
  2. Summer says

    February 17, 2015 at 11:39 am

    Amy I love this. The vase I have on my counter holding mine just isn’t big enough – I might have to find something like this!

    Reply
    • Amy | The Happy Scraps says

      February 17, 2015 at 2:45 pm

      Thanks Summer! I found this for $5 at Taipan Trading. 🙂

      Reply
  3. Jen says

    February 17, 2015 at 7:12 pm

    Very cute!
    Love the orange…its my fave color!

    Reply
    • Amy | The Happy Scraps says

      February 18, 2015 at 8:20 am

      Thank you! Orange is my husbands favorite color and one of my favorites as well!

      Reply
  4. Chelc | Inside the Fox Den says

    February 18, 2015 at 6:58 am

    I’m always looking for projects that will allow me to use my Cricut more! Love this project!

    Reply
    • Amy | The Happy Scraps says

      February 18, 2015 at 8:21 am

      Thank you! I always love using my Cricut too. 🙂

      Reply
  5. Maria says

    February 18, 2015 at 6:59 am

    What a great idea! I need a new utensil jar too, yours looks awesome!

    Reply
    • Amy | The Happy Scraps says

      February 18, 2015 at 8:22 am

      Thank you Maria!

      Reply
  6. Desiree @The36thAvenue says

    March 2, 2015 at 3:09 pm

    I love it all! Featuring you this Wednesday! Thank you for partying with us!

    Reply
    • Amy | The Happy Scraps says

      March 2, 2015 at 4:08 pm

      Awww, Thank you Desiree! xoxo, Amy

      Reply
  7. Jessy @ The Life Jolie says

    March 3, 2015 at 12:03 pm

    Very cute! I especially love the font and the color.

    I stopped over from Frugal Crafty Home.

    Reply
  8. Heidi says

    March 6, 2015 at 8:13 am

    This is so cute! What a fun pop of color.

    Reply
  9. [email protected] Polka Dots in the Country says

    March 7, 2015 at 6:57 pm

    Hey, stopping by from the Cook it, Craft it, Share it linkup!

    I love your utensil holder! I have a plain white one I bought from Home Goods and I’ve been wanted to use my Silhouette to label it, just gotta decide what color I want to do! Thanks for sharing!

    Reply
  10. Angela, blue i style says

    March 10, 2015 at 5:31 pm

    This looks so great and I love the orange! I have a really old Cricut, and I’m debating on getting a new one – so this project defintely makes me want and Explore! Thanks for linking up at The Creative Circle! I hope you’ll join us for the party again this Thursday – I can’t wait to see what you’ll have to share!

    Reply

Leave a Reply Cancel reply

Your email address will not be published. Required fields are marked *

CommentLuv badgeShow more posts
  • Farm Sweet Farm Front Porch Sign with the Cricut Maker 3
  • Farm Fresh Eggs Kitchen Sign
  • How to Make a Summer Hat with the Cricut Joy
  • Bless Our Farmhouse Kitchen Sign
  • Welcome to the Farm Front Door Decor
  • How to Use Offset in Cricut Design Space

Popular Posts

Page Ranking Tool

Categories

Archives

The images and text on this site are copyright of The Happy Scraps. If you would like to feature a project or image on this site please email [email protected] Thank you! Please read the Privacy Policy and Disclosure here.

Copyright © 2023 · Tasteful theme by Restored 316

Copyright © 2023 · Blog Design by Key Lime Digital Designs · WordPress · Log in

19 shares