I’ve been working on this Happy Birthday Banner for a while, and I’m happy to have it done now! 🙂 I started on this banner back in May before my husbands birthday, and then got busy working on something else, so this project got put on the back burner. Then I was going to have it all done for my sons birthday that was last week, and I just couldn’t get it finished for that either. Well, I will be so happy to get it out next month for one of my other boys birthdays!
If you remember my Happy Birthday Decor, then you’ll know that I used the same paper for this!
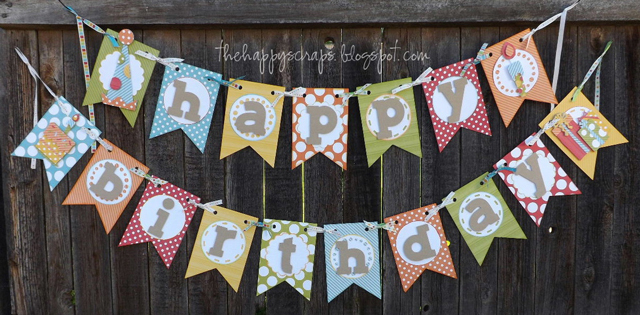
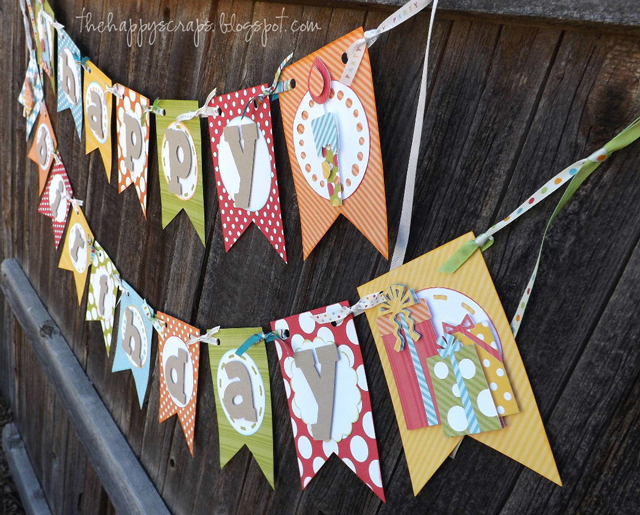
I used my Cricut to cut everything for this project. I love the look of these flags for the banner, and I love that my Birthday Bash Cricut cartridge has them {among other banner shapes} on it. The Birthday Bash cartridge also has all sorts of fun birthday shapes on it, so I decided to put something fun on each end of “happy” and “birthday”. The birthday hat, candle, cake, and gifts were the ones that I chose. When putting these all together, I used lots of dimension squares, and I love the depth that it added. I also added the dimension squares when I adhered them to the banner/flags. The letters are also found on the Birthday Bash cartridge.
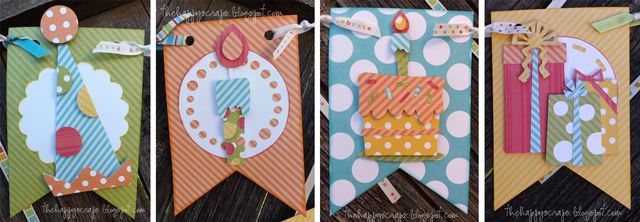
You can see the how the letters and birthday shapes are up off the banner/flags in the next few pictures. For the white circles behind everything, I used my Mini Monograms Cricut cartridge. I think that they add some fun character to the overall look of the banner.
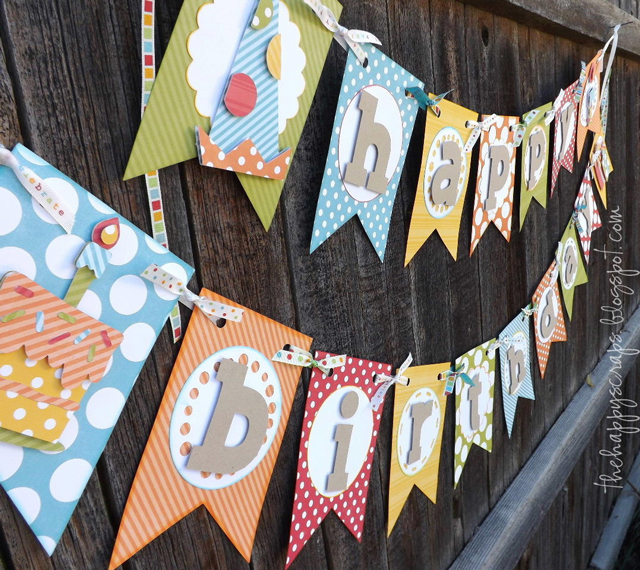
I also had fun inking the edges of the flags and the white circles/shapes on this banner. This is the project that I was working on and decided to share a few of my tips for choosing ink pads, because I thought there just might be others that are trying to figure it out. 🙂
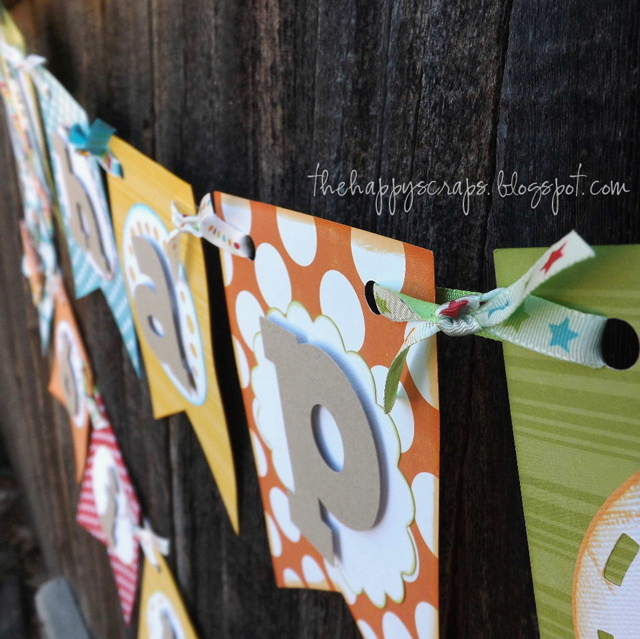
Once it was all done, and ready to be tied together with ribbon, I wasn’t sure what ribbon I was going to use. I got out my ribbon box and was looking through it, and found all of my American Crafts ribbon that was for their birthday line a couple of years ago, and guess what!? It matches perfectly, and I have nine rolls of coordinating, different ribbon! I was so excited. I got to work tying it all together, and I’m just so excited with how it has turned out.
I just can’t wait until the next birthday at our house, so I can hang it up! Do you decorate for birthdays? I know it’s kind of a lot of work to put everything up for one day, but it’s fun to make the birthday person feel special! I just keep it all in one box, and grab it and any decor that I take down for the birthday just goes in that box for the day. It works great! My next project to go with all the birthday stuff is going to be something for my front door. I can’t wait!

The banner looks so nice, Amy. I love having ours to pull out on each birthday. 🙂 Well done.
Wow! This is beautiful! I love it 🙂
Wow I love this! I’m planning my daughters party in September and this is now a must. Thanks for sharing!
Absolutely adorable and fun! Love the colors!
I love this banner. I might have to get that Birthday Bash Cricut cartridge. It sounds like there is a lot of fun stuff on it. This is so nice to have this banner you can use for all your birthdays now!
I agree. I like to make my birthday decor versatile so I can reuse it for other birthdays. Your banner is amazing. I love the bright colors.
Wow! What a great design. This looks absolutely fabulous! Jodi @ http://www.meaningfulmama.com
I love love this banner! It’s so happy & bright!
Kathryn
destinationcraft.blogspot.com
It is so cute, Amy! I absolutely love it!!
xoxo,
Amy
The dimension add so much to this banner, I love it. I think, like you I want to get a birthday box going so that for each birthday I can just pull out my decor stash.
I’d like to invite you to link up this post to my Pin Party.
http://www.sarahdawndesigns.blogspot.com/2012/07/pintastic-monday-link-party-1.html
Adorable!
This is adorable!
Really cute–I love all the patterns you mixed!
Love it!
So whimsical!
Linda @ http://partycraftsecrets.blogspot.com/
Hi, I’m visiting from The Ta-Da-Tuesday linkup party.
This banner is absolutely adorable, I love it! I have a Cricut on my {extensive} wish list.
I love all the added details and layering!
Rhiannon @ http://beingmomme.blogspot.com
Love this so much! Thanks for sharing!!
-Jen
http://www.littlemissalizzi.com/
The mixture of colors and patterns really work well in this – Very cute! I need to get myself a cricut now 🙂
This is so cute – I’m sure it was a ton of work, but it looks flawless!
Visiting from jugglingactmama.blogspot.com – found you on the Ta-Da Tuesday – hope you’ll come visit me too 🙂
Wow, the results are impressive! I always go slightly overboard with decorating for parties, even if we’re not throwing a party. Usually I make things like cake toppers and bunting (not as cute as yours) and then stash them away to re-use after the birthday/other occasion is over. But I rarely to re-use the bits because I can’t resist making more party decor the next time!
This is soooo pretty! I love all of the extra details you used like the layers and the pretty ribbon. Definitely going to use some of these ideas for my next banner. If you’re looking for a new place to share your creative projects, come over to Etcetorize. Party is still on and I’d love to see you there!
Thanks for linking to TAke-A-Look Tuesday over at Sugar Bee Crafts – you were featured today!
–Mandy, http://www.SugarBeeCrafts.com
Really beautiful. How long did it take you to make? Stopping by from HOH. I am a new follower. Hope to see you at True Aim! Thanks for sharing.
This is soooo sweet Amy!! I love the colors you chose – it’s just darling!
Thanks for linking up today – I featured you today! http://www.flamingotoes.com/2012/07/crush-of-the-week-think-pink-sundays-3/
I love this banner. It looks so fun and festive! Thanks so much for linking up to our Pretty Things Party! I hope you’ll be back next week!
Adorable! I found you through Flamingo Toes. Such a great banner!
So funky and fun! Looks fabulous!
Featuring YOU today! Thank you for linking up to {wow me} wednesday.
Ginger @ gingersnapcrafts.com
http://www.gingersnapcrafts.com/2012/08/take-look-at-you-my-favorites.html
Very cute! I love all the fun details! that will be nice to have for all the birthdayS!!!!
I love, love, love this! The colors are all so bright and cheery…just what a birthday banner should be like. 🙂
Love this banner! Where did you get all your great scrapbook papers?
Your banner is so cute! I love all the details. Do you remember the size you cut each piece at? I would love to make my grandson something like this for his 2nd birthday. Thank you!
The flags on the banner are approx 5″ wide by 7″ tall. If you do it that size, you can only get 2 flags out of a sheet of 12×12 paper, but I’ve made similar banners and have been able to get 4 flags out of a sheet, the banner is just slightly smaller. 🙂
This is so fabulous Amy! I love decorating for birthdays and this banner would fit right in. 🙂
What is the name of the font used?
The font is the letters that are on the Birthday Bash Cricut Cartridge.
Do you sell the birthday banner? If so, how much. Love it!
I don’t sell these at this time. Sorry.
I love this!
Thank you!
The happy birthday yard sign is ideal for your birthday celebrations! “HAPPY BIRTHDAY” Yard Sign is a great way to wish someone a happy birthday. Let’s get creative with your party!
Great informative blog. Keep sharing such type of informative and useful blogs
with us.