I received compensation and product in exchange for this post. All opinions and ideas are 100% my own. This post contains affiliate links. I only share products with my readers that I love and personally use.
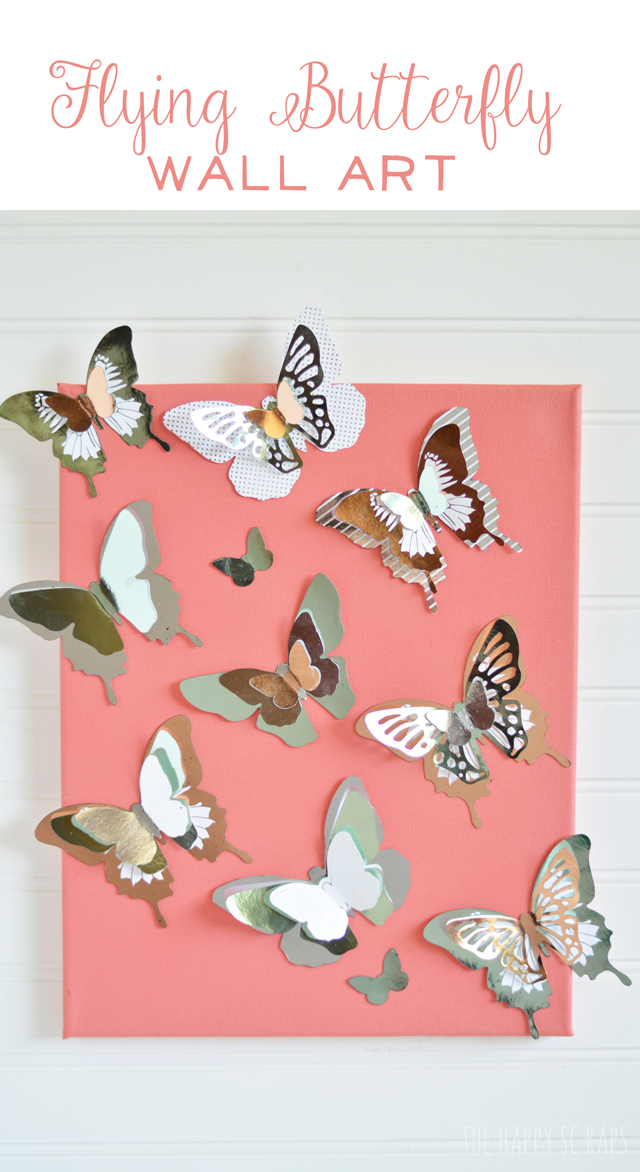
So, I’ve shared a couple of projects using the Heidi Swapp Minc Foil Applicator with you now, my Foiled Sympathy Block and Mother’s Day Foil Gift Tag. Today I’m sharing another one with you. Seriously, once you start foiling, you’ll want to foil all the things! It is so addicting! I’m going to show you how I created this Flying Butterfly Wall Art today, and I hope you’ll love it as much as I do. Doesn’t it just make you think of Spring?
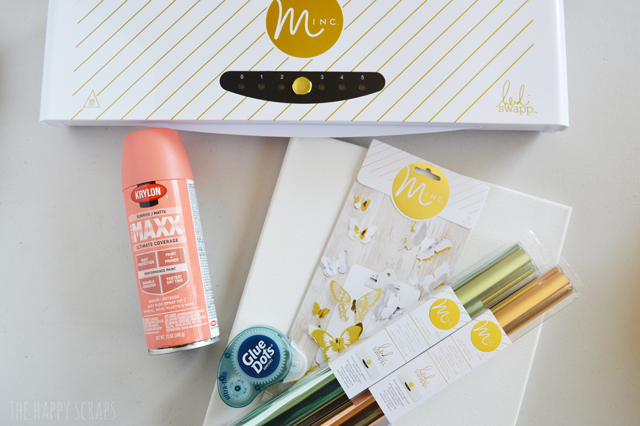
For this project you’ll need:
- Heidi Swapp Minc Foil Applicator
- Minc 3D Paper Butterflies
- Minc Reactive Foil in Mint, Rose Gold, & Silver
- 11 x 14 canvas
- Coral Spray Paint
- Adhesive (I used glue dots)
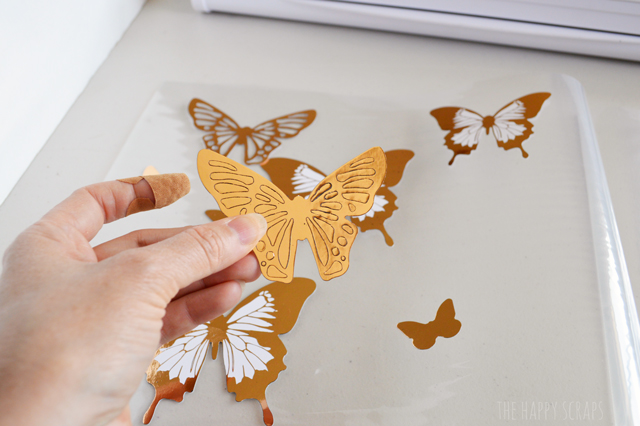
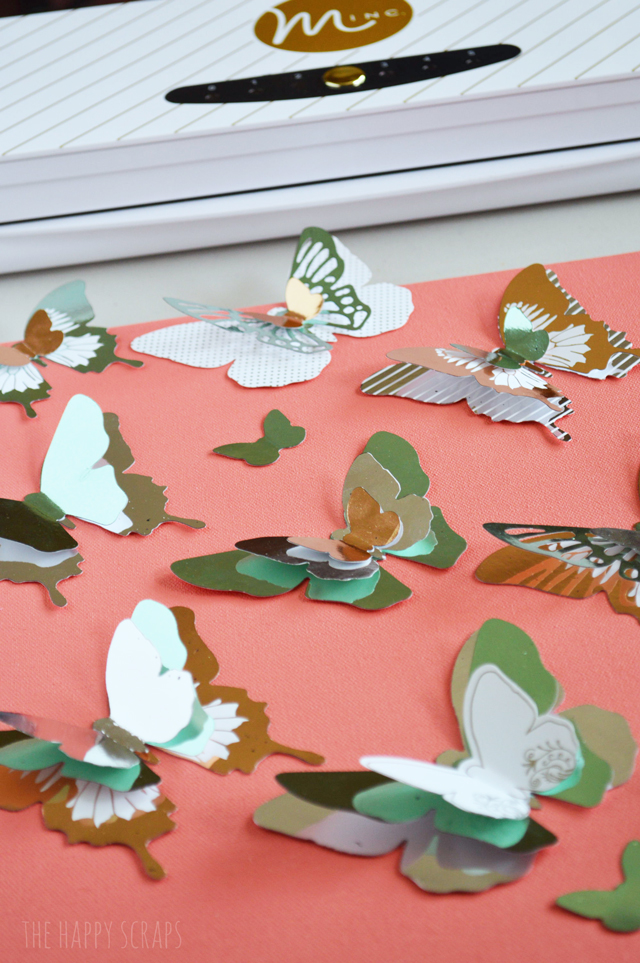
I started off by picking out which butterflies I wanted in the different foil colors. I put them in the Minc Transfer Folder, then cut the Reactive Foil to the size I needed and put it in the folder as well. The Minc Foil Applicator makes it so easy to add foil, and it is the easiest and most consistent way to do so. One tip I learn while foiling these butterflies is this: when foiling pre-diecut images, make sure they are free from paper dust before foiling them, or you may end up with black spots where foil should be.
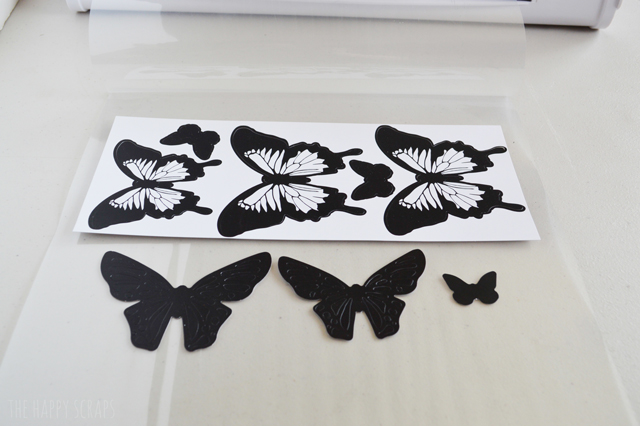
Once I had my butterflies foiled, some of them needed to have pieces removed. I used a vinyl weeding tool for the really small pieces that I couldn’t get with my fingers.
I spray painted my canvas a coral color, isn’t it pretty?

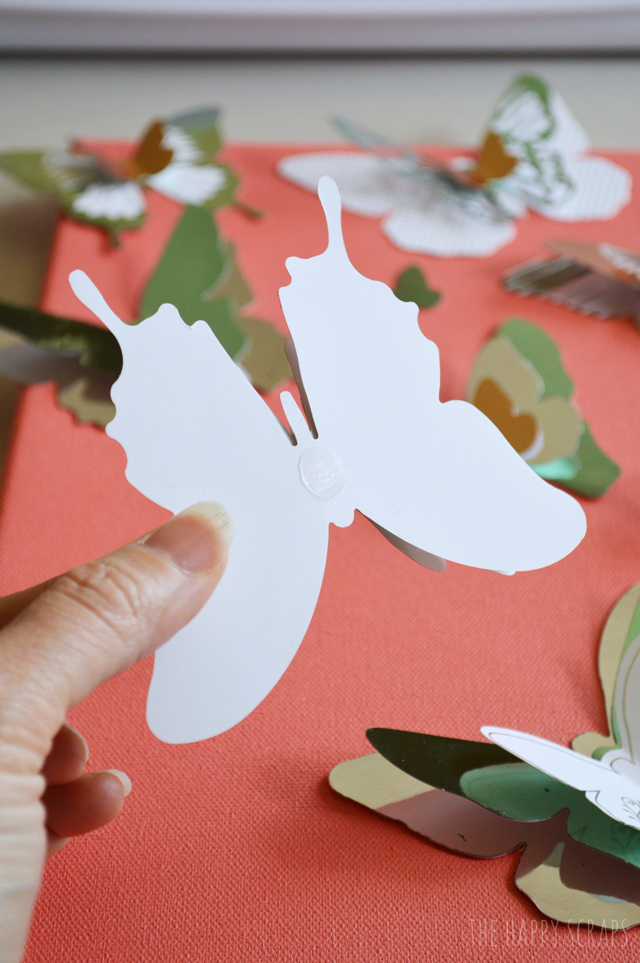
Now you are ready to assemble all your butterflies. I simply used a glue dot under the center of each butterfly, attaching them together. Then I folded the wings slightly upward. The great thing about this is that you can mix and match any of the butterfly shapes, sizes, and colors.

Once you have all the butterflies put together, lay them out on your canvas to figure out the best placement.
Then attach them to the canvas with a glue dot.
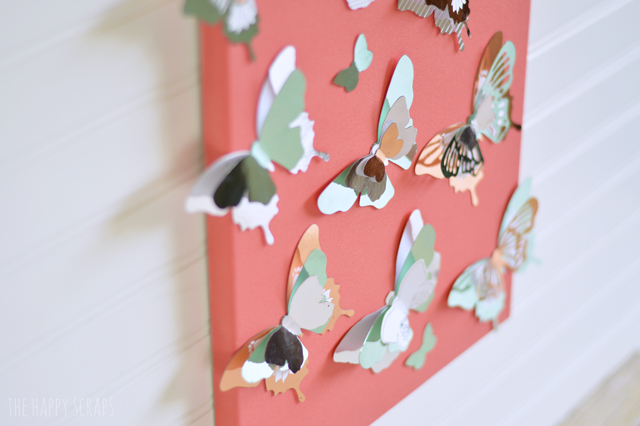
Now you have a beautiful Flying Butterfly Wall Art ready to hang up in your home. This would be perfect in a little girls bedroom, an office, or anywhere else in your home!
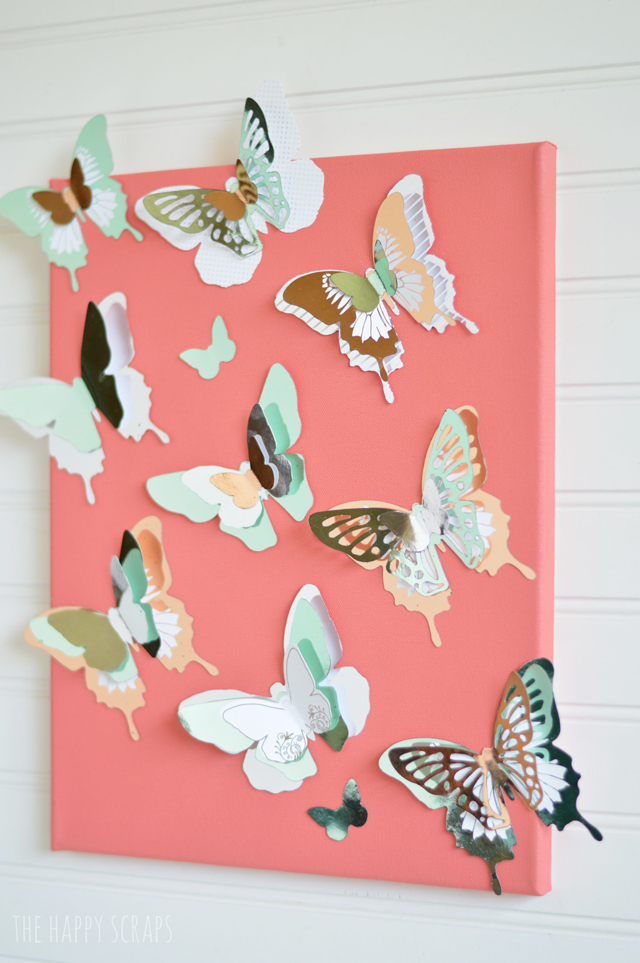
I love the dimension of the 3D Butterflies, but the shimmer of the foil is what makes this whole project unique. Isn’t it so fun?!
If you are ready to make your own, you can find all the Minc products and accessories at Hobby Lobby and Jo-Ann, as well as local stores and online retailers.

Leave a Reply