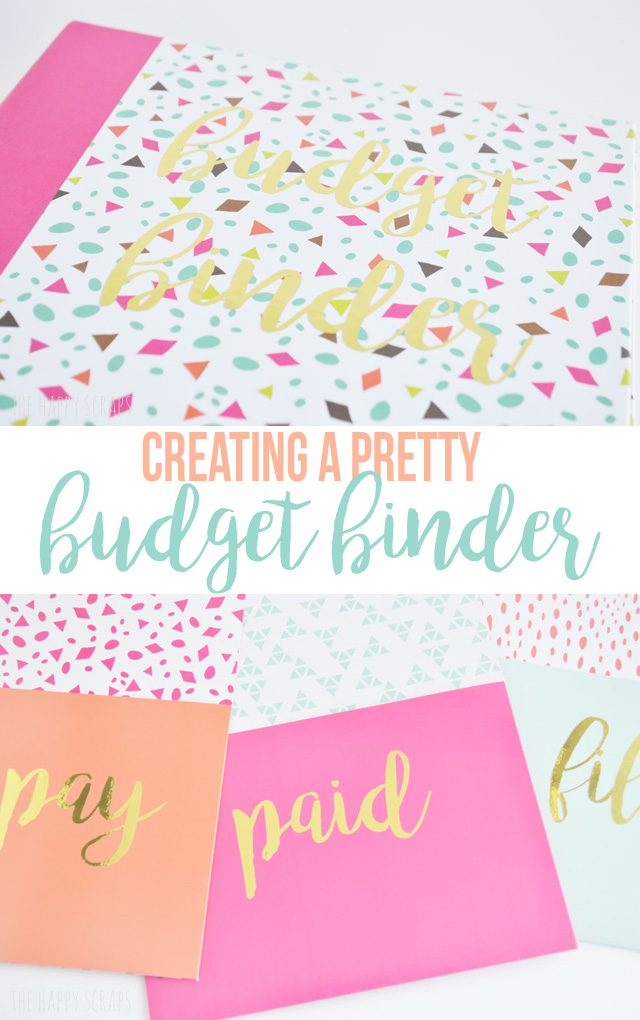
Sometimes being an adult just isn’t very fun. You have to get up and be responsible everyday. Some go to work, some take care of kids, some have the chance to stay home with kids and some don’t, and some want to work and can’t or don’t have a job. Life isn’t always fun. It’s a challenge most days. Lately, one of the things that I’ve really wanted to do, is to find joy in each day. I’ve been praying to find joy each day. Not just something that makes me smile, although that is good too, I really want to find JOY in each and every day. For me, this is a work in progress. I’ve been struggling with anxiety for a while now and some days, it’s really hard to find that joy. Anywho, I kind of got side-tracked there a little bit. Back to adulting. One of my least favorite things about it, is paying bills. I mean really, who likes that. I’m glad that I can afford to pay our bills (most of the time anyway 😉 ), but it really isn’t a favorite thing of mine. So, I decided that I wanted to create a pretty Budget Binder, to try and help it be something I don’t dread quite so much!
This post contains affiliate links.
I knew I wanted to create a pretty budget binder, but I hand’t figured out yet how I was going to do it exactly. I was shopping at Target one day (Hello, I can’t seem to stay away from there…) and I found this binder in the Dollar Spot for $3. They also had these binder pockets for $3 that matched, so I snatched those up and decided that this pretty thing was going to be turned into my budget binder.
Creating A Pretty Budget Binder Supplies:
- Binder and Pocket Dividers
- Cricut Explore Air 2
- Adhesive Foil
- Transfer Tape

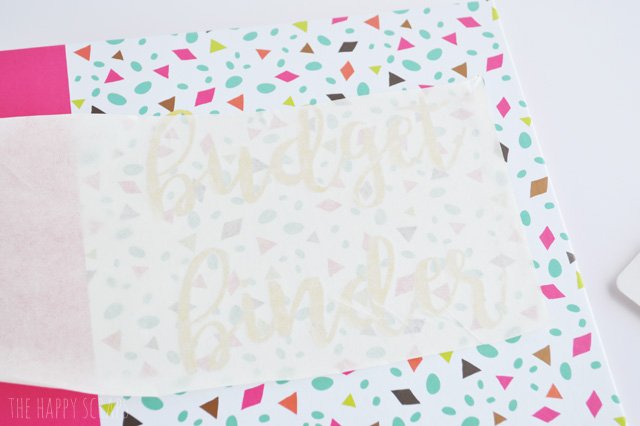
I designed my words using Photoshop Elements and then uploaded the .jpg file to Cricut Design Space. Sometimes I like to design right in Cricut Design Space and sometimes I design in PSE and upload it. It just depends on what I’m making, but I sure love that I am able to do that, and I don’t just have to use the designs that Cricut offers in Design Space. Once I had my words designed and uploaded, I cut them out on the Cricut Explore Air 2 using Gold Adhesive Foil.

Once I weeded the cut foil (weeding foil is a lot harder than weeding vinyl. It takes a lot more patience…) I placed transfer tape over the top of it, carefully peeled the backing off, and then placed it where it needed to be.
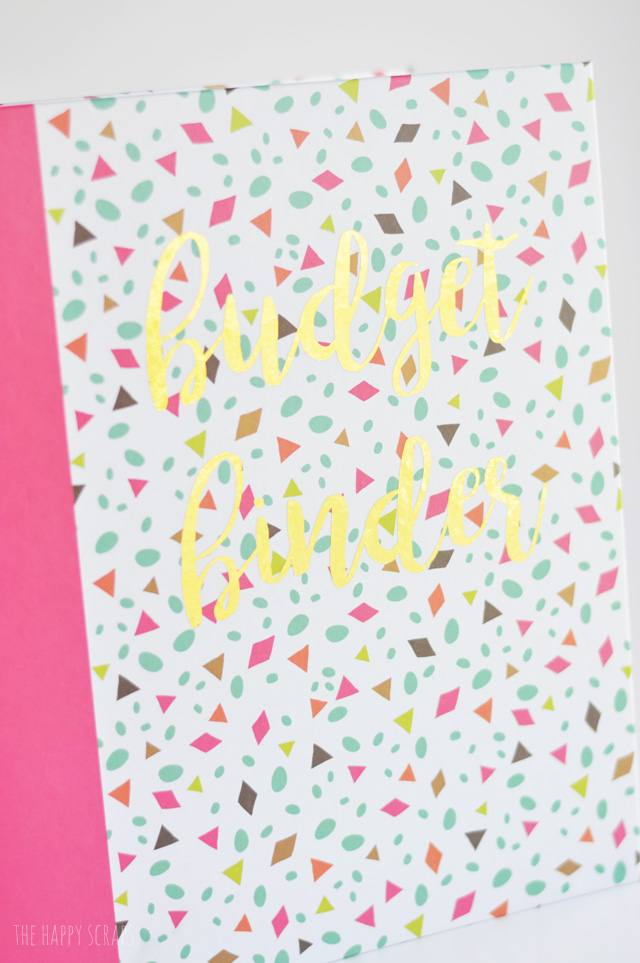
I peeled off the transfer tape, and the cover was done! Yay! At this point, I was getting pretty excited about the way this was looking. I’m glad that I picked the gold foil. I don’t know when I started to like gold, I used to really dislike it, but it’s a favorite of mine now!
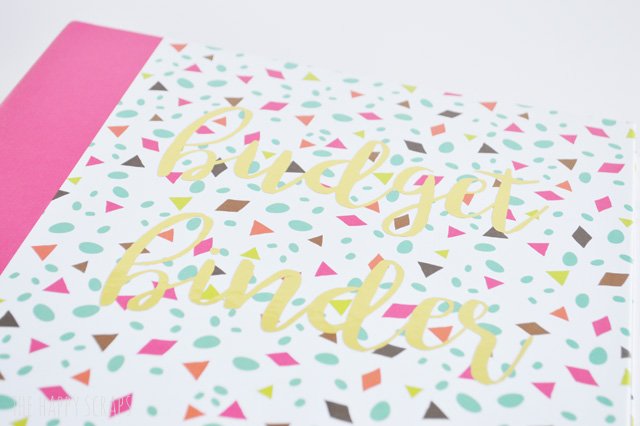
Plus, there is just something about using shiny foil! Here is a picture of the front where you can see the shine.
I put the foil words onto the pockets as well.
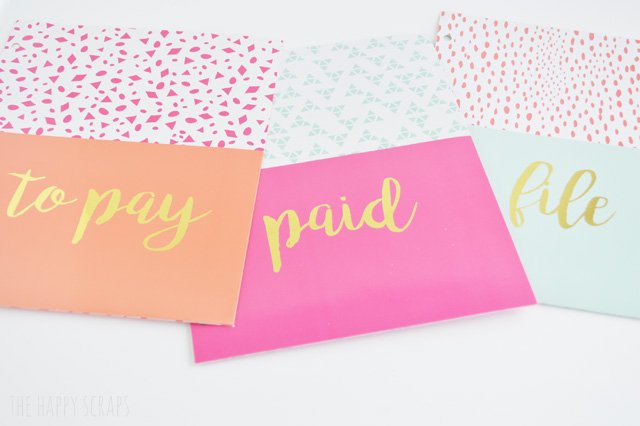
Then put the pockets into the binder.
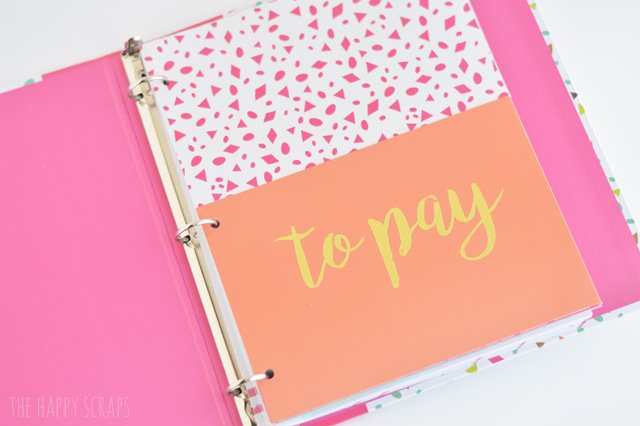
I really love the way each of these turned out.

And I really hope that this helps me want to pay bills just a little bit more. 😉

I also printed out these pretty monthly budget sheets from Printable Crush, and bonus, they match this cute binder too!
If you enjoyed this project using Adhesive Foil, then check out these other projects.


Leave a Reply