How is your summer going so far? Mine is going. It’s been good. I don’t know about you, but for me, when my boys are home, I want to spend time with them doing fun things. Not everyday, but at least a couple of times a week. When I say fun things, I don’t mean like going to amusement parks or the zoo every week, I just mean things like taking them to parks, making snow cones at home, sleeping on the trampoline, etc. I want my boys to enjoy the time they have away from school, and even if we aren’t doing a bunch of big things, I hope they are making memories with the little things we do. I will say though, after a couple of weeks of them being home from school, I do start feeling like we need more of a routine. Maybe I need to set a schedule for when we wake up, and when we eat breakfast, lunch & dinner. In the summer time, our schedule is always thrown way off. Sometimes I don’t mind, and other times I do. 🙂 What kind of summer schedule do you have? I’m glad that I got a few projects finished up before school ended and the boys were home, because it’s proving to be rather hard for me to get things done these days. This Pineapple project is one of those. Today I’m sharing with you How to Apply Adhesive Foil to Wood. It’s easy really. I also thought that applying HTV foil to wood would be easy, but it didn’t turn out well for me, as you’ll see. 😉 I am going to get that one figured out and share that with you eventually too.

This How to Apply Adhesive Foil to Wood post contains affiliate links. If you click on an affiliate link and purchase something, you won’t pay anything extra, but it will help support this blog.
How to Apply Adhesive Foil to Wood Project Supplies:
- Pineapple Shape (I found mine in the dollar spot at Target)
- Adhesive Foil
- Cricut Explore Air 2
- Weeding Tools
- Transfer Tape
- Application Tool
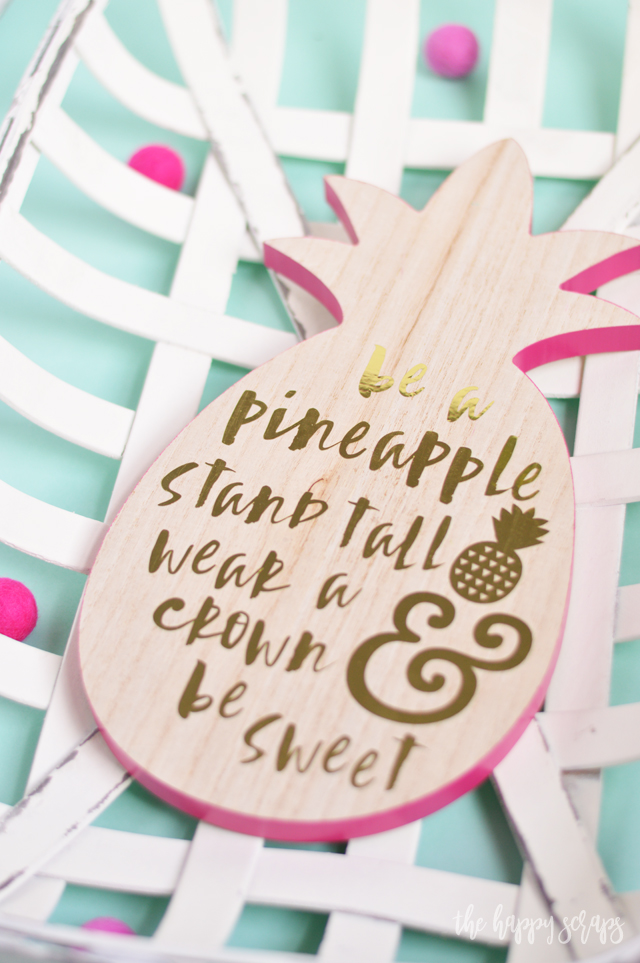
I designed what I wanted to cut in Photoshop Elements and then uploaded it into Cricut Design Space. Once I had it in Design Space, I added the pineapple. I originally was trying to do this with HTV foil.

I tried to iron it on to my pineapple, but it shifted when I applied the heat and then I had a really hard time removing the carrier sheet. This is how that turned out. You can see where it was supposed to be and where it shifted to. I decided, since I still wanted to finish the project, that I would turn it over and try again with adhesive foil.
Using my Cricut Explore Air 2, I cut out my design from Adhesive Foil. At this point, this was starting to turn into one of those projects that just was not working out. It shouldn’t have been that hard! When I cut my design, my & sign was cut off. I had measured my adhesive foil wrong… So I cut just the & again. I weeded the design then applied the transfer tape.
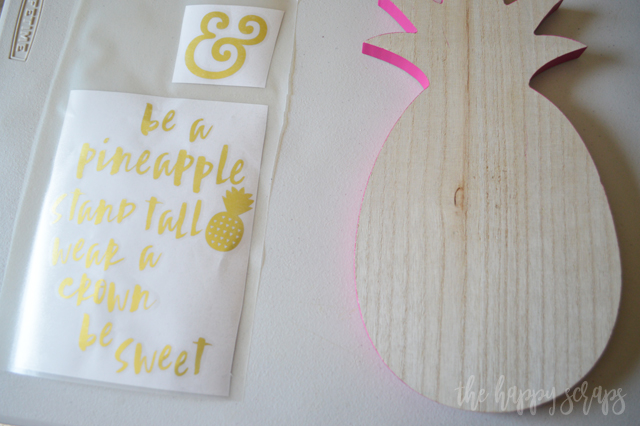
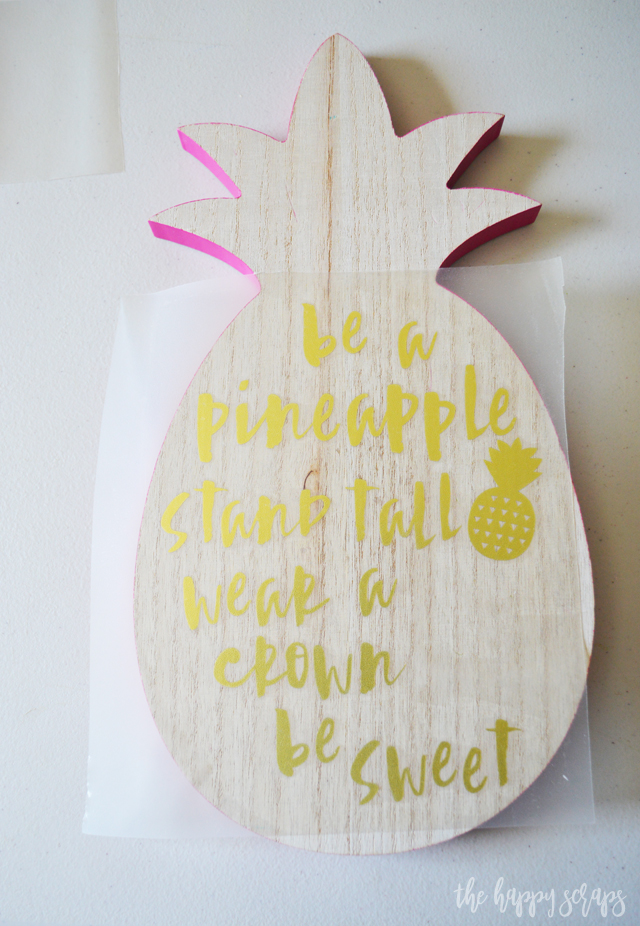
I placed the larger part of the design onto the pineapple and used the vinyl applicator to smooth it out and get it to stick to the wood. I carefully peeled the transfer tape off, then applied the & sign.
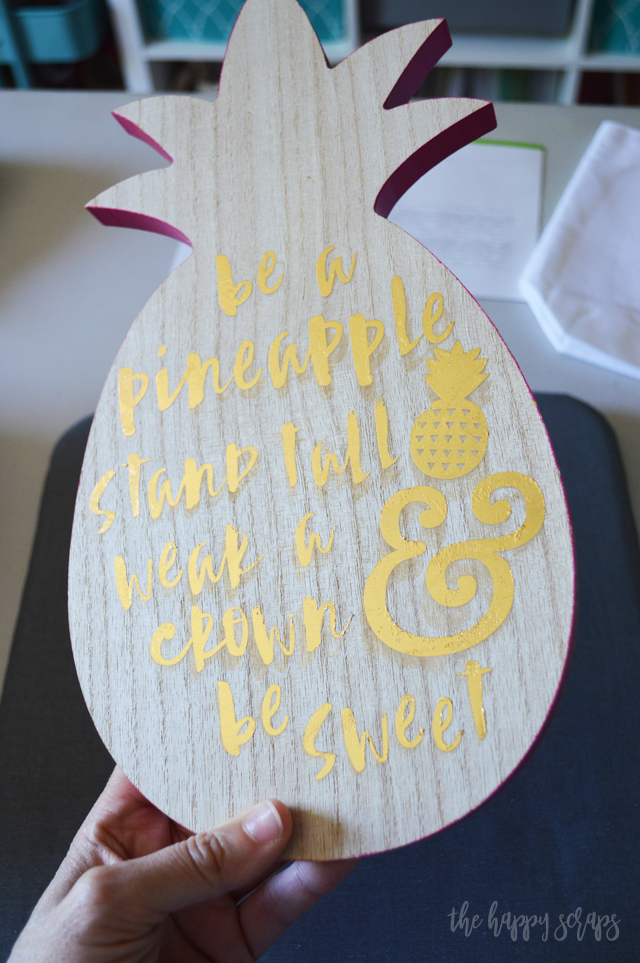
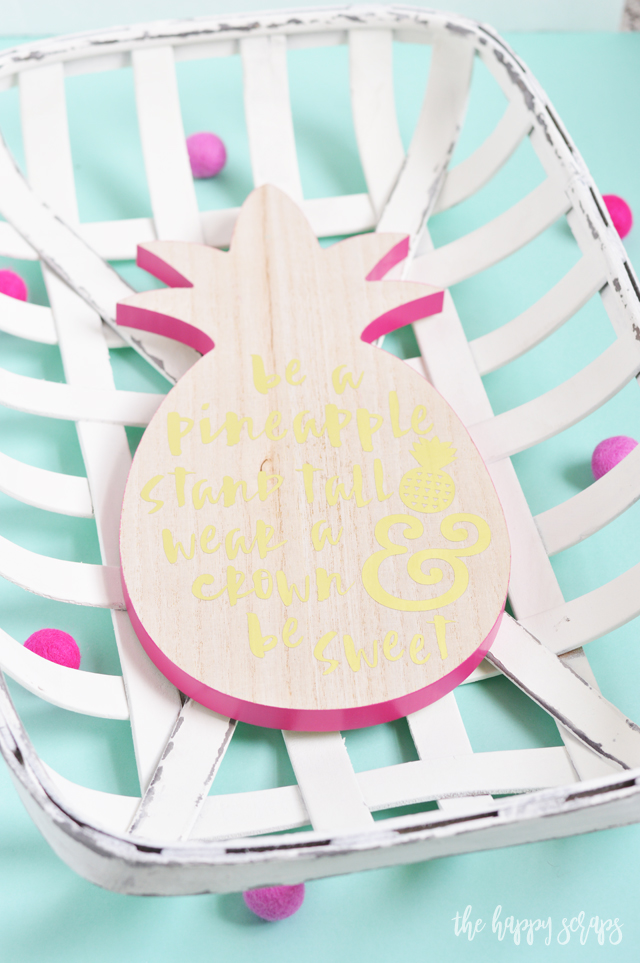
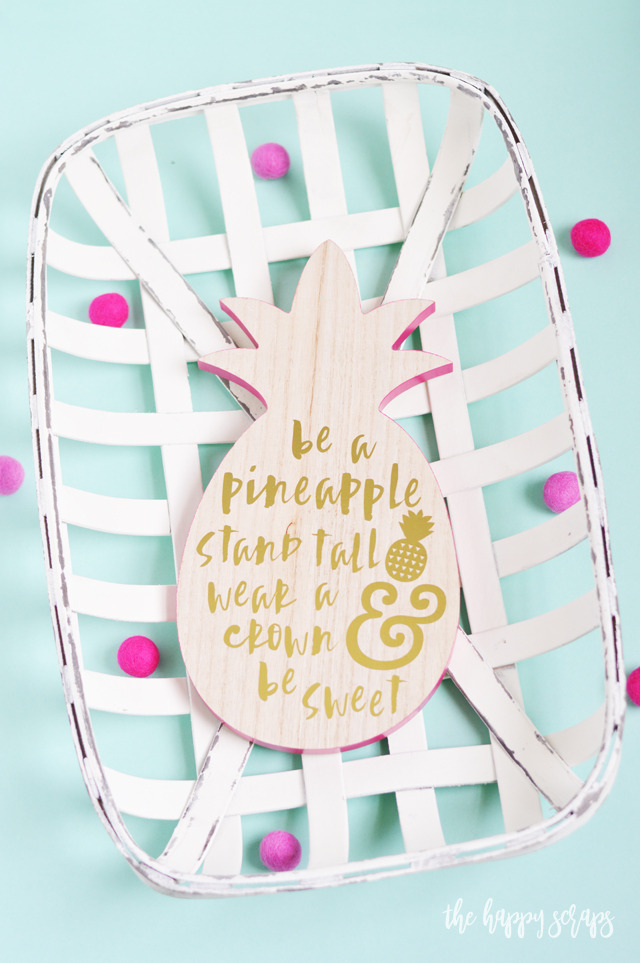
I was so excited how well it turned out, even if the HTV side didn’t work so well. It really was a quick and simple project, because the pineapple was ready to go when I bought it.
I love that the edges of the pineapple are a bright fuchsia color, it’s a fun pop of color!
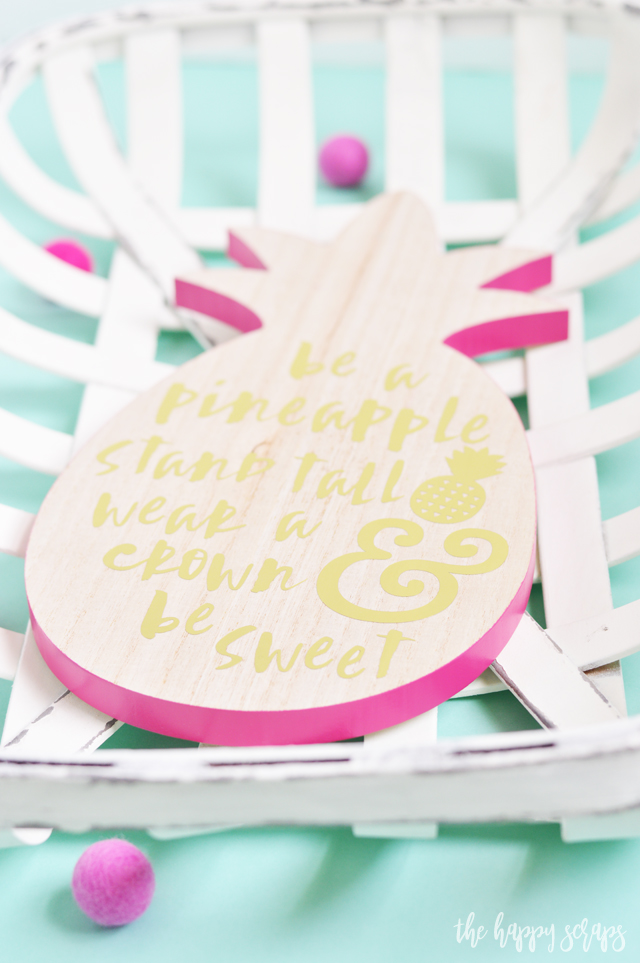
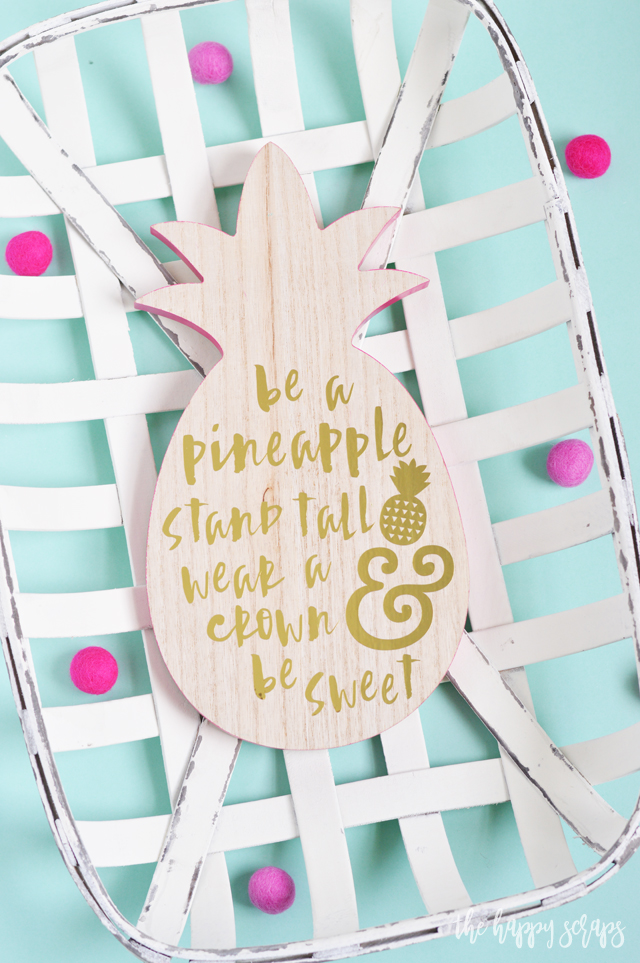
I decided to hang it up in my craft room. I have a wall that has a few photo props on it, and it’s been growing with other things I’ve been adding. I’ve added a letter board, this pineapple and a tobacco basket that I got from Hobby Lobby.
I don’t know if Target still has any of these pineapples, but they are so fun, so keep an eye out next time you’re at Target so you can add a fun quote to a pineapple too!

Not that you’ve seen How to Apply Adhesive Foil to Wood, what will your next project be?
If you are looking for more fun ways to use adhesive foil, then check out my gallery here. I’ve shared a handful of other fun projects in the past.
Thank you for stopping by to read this post. I appreciate all of you who take the time to stop and read and leave sweet comments here on the blog or on social media. I enjoy being able to share my creativity with you and I hope it inspires you to be creative as well!

Leave a Reply