This DIY Farmer and Animal Halloween Costumes with the Cricut Maker post is a sponsored conversation written by me on behalf of Cricut. The opinions and text are all mine.
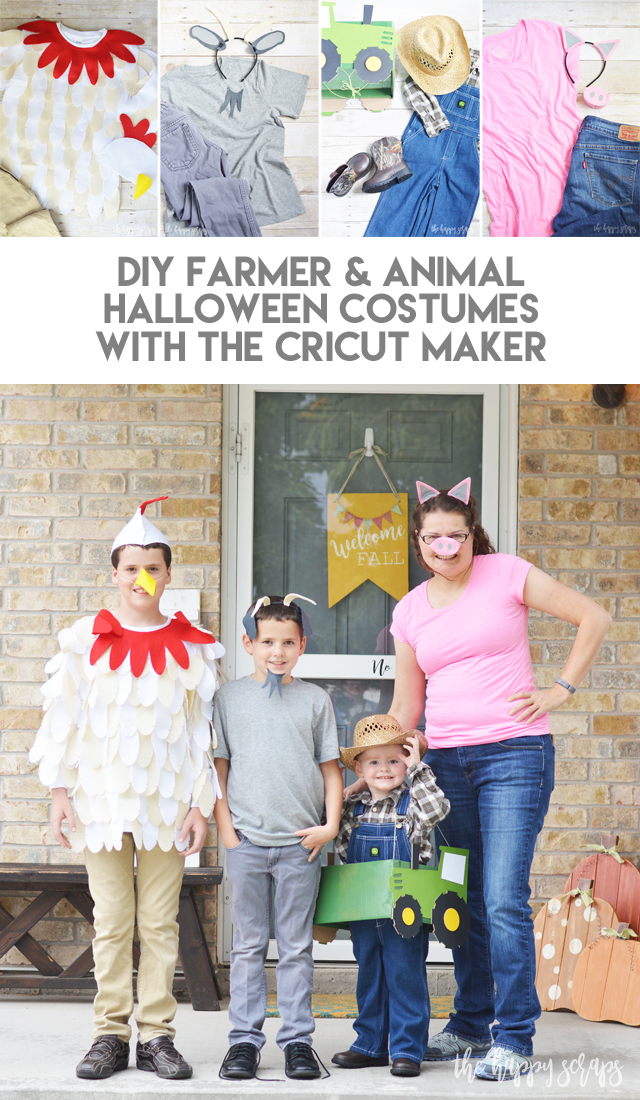
Raise your hand if you enjoy putting together group or family Halloween costumes! I hadn’t really discovered the fun in doing group costumes until last year, and it happened a little by accident, but last year my boys were all characters from Super Mario. We had a Mario, Luigi, Wario, Waluigi, and Toad. I will actually be sharing those costumes here on the blog soon. Well, since I decided that group costumes could be so fun, I decided to put some together this year. Once I decided on the theme, I came up with these DIY Farmer and Animal Halloween Costumes with the Cricut Maker. I was originally planning to have my husband be the farmer, and then decided that it would be so cute to have my two year old be the farmer, so that is what I did! Today, I’m sharing with you how to make each of these four costumes. Hang on tight, this is going to be a little longer post than usual. 😉
This DIY Farmer and Animal Halloween Costumes with the Cricut Maker post contains affiliate links. If you click on an affiliate link and purchase something, you won’t pay anything extra, but it will help support this blog. I received product and compensation in exchange for this post. All ideas and opinions are my own.
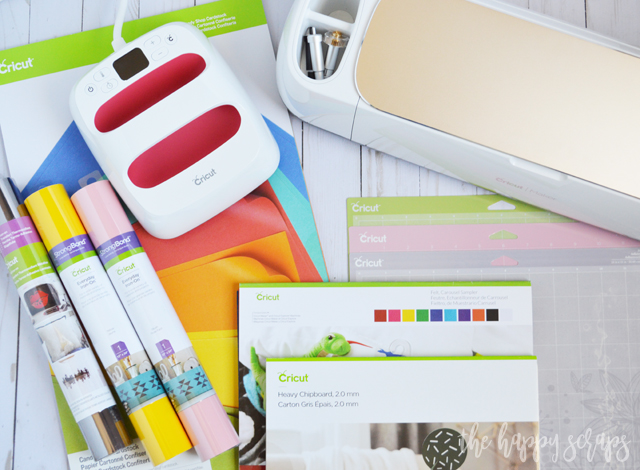
DIY Farmer and Animal Halloween Costumes with the Cricut Maker Supplies:
- Cricut Design Space Cut File
- Cricut Maker (Rotary Blade, Fine Point Blade)
- Cricut Maker Knife Blade
- Cricut Deep Cut Blade
- Cricut EasyPress 2
- Cricut EasyPress Mat
- Cricut Everyday Iron-on
- Cricut Chipboard
- Cricut StrongGrip Mat
- Cricut StandardGrip Mat
- Cricut FabricGrip Mat
- Cricut Candy Shop 12 x 24 Cardstock (green)
- Cricut Felt
- Cricut Fabric Scissors
- Cricut TrueControl Knife
- Cricut Cutting Ruler
- Cricut Self Healing Mat
- Crafting Felt
- Cereal Box
- Adhesive for Tractor
- Fabri-Tac for Chicken
- Headbands (2)
- Elastic Thread
- Shirts (Long sleeve plaid button up, long sleeved white tee, gray tee, pink tee)
- Pants (Overalls, tan or yellow, gray, pink or jean)
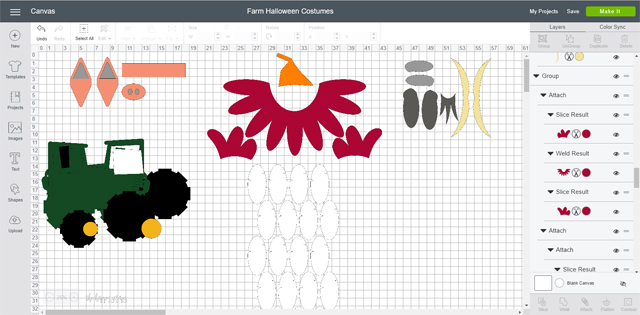
I started out by designing all of the different costumes in Cricut Design Space. I love that I can group, attach, change the color, weld, slice, etc. right in Design Space to make it easy to get exactly what I need. Once I had all the designs ready, I started cutting.
DIY Farmer Halloween Costume with the Cricut Maker
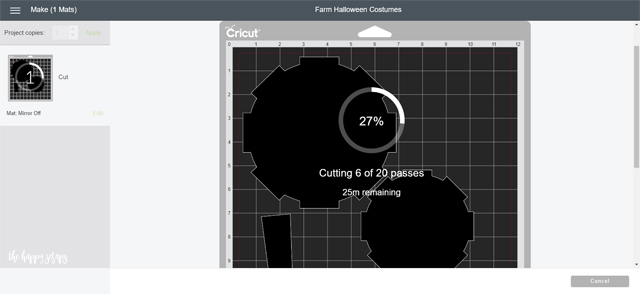
For the tractor, I cut all of the tractor pieces twice. Once with chipboard or cereal box, and once with the paper for the colors. I started with the wheels. I cut them out of the 2mm Cricut Chipboard with the Cricut Maker Knife Blade. The 4 kg of force that the Cricut Maker has, made this look so easy! Did you know that the Cricut Maker can cut anything that the Cricut Explore Machines can cut, plus more? It was so fun to be able to cut such a thick material with the Cricut Maker! To cut the chipboard, place it on the StrongGrip Mat in the top left corner. Use painter’s or masking tape to secure your chipboard to the mat. You do need to make sure to slide the white star wheels over all the way to the right, as to make sure that there is enough clearance for the chipboard. It does take a while for the chipboard to cut. I was so excited when it was finished to see the result!
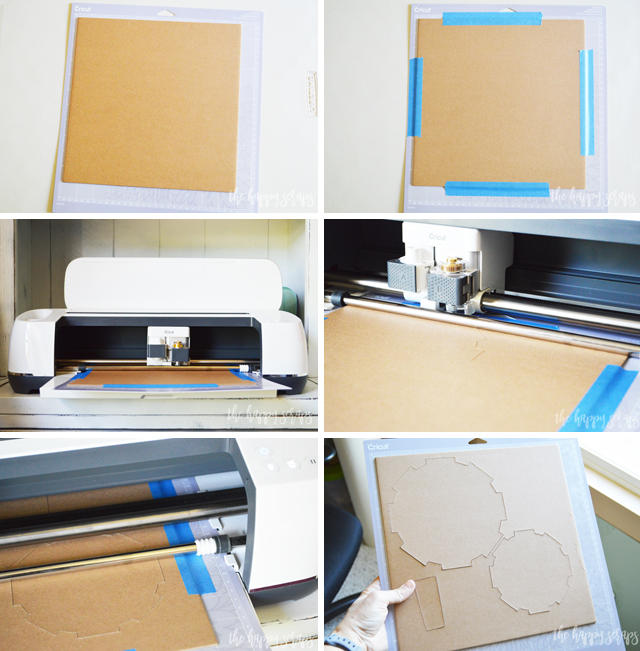
Design Space does keep you updated with how long it should take. I thought that was helpful.
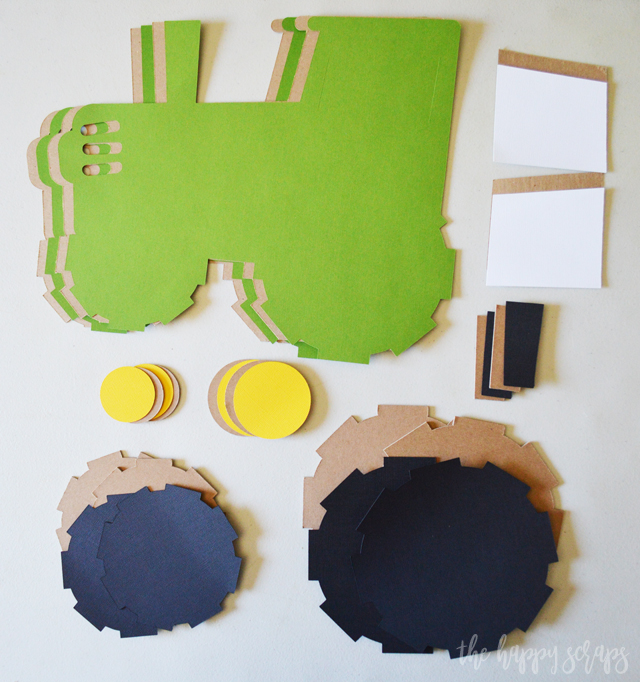
I cut the tractor backing and windows out of cereal box chipboard, using the deep cut blade, because it was larger than 11 x 11 (the size of the Cricut Chipboard). The wheels, wheel centers, and exhaust pipe were cut out of the 2mm Cricut Chipboard with the Cricut Knife Blade. Then I cut all of the shapes out of cardstock in the color I needed.
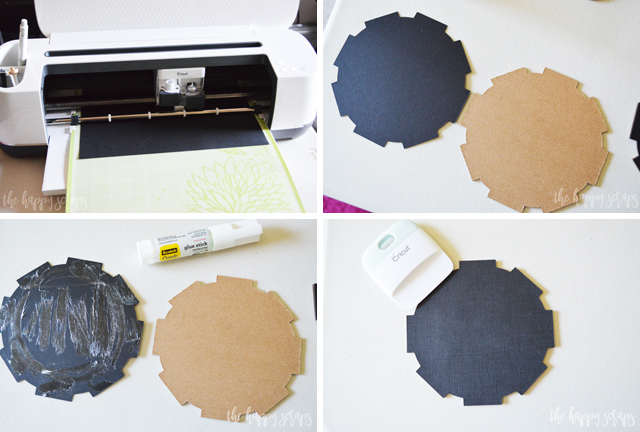
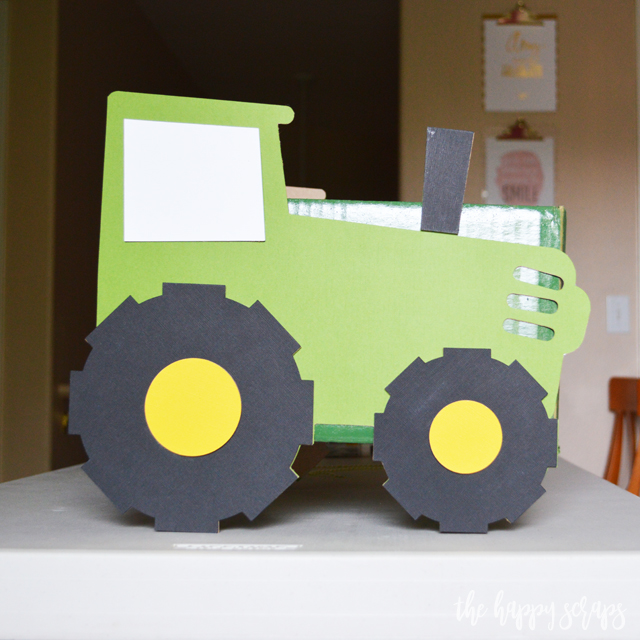
I used black to cut out the wheels. I lined up the chipboard with the cardstock, then applied glue to the back of the cardstock. I placed it onto the chipboard and then used my Cricut Scraper to smooth the cardstock out on the chipboard, and get the glue to adhere well.
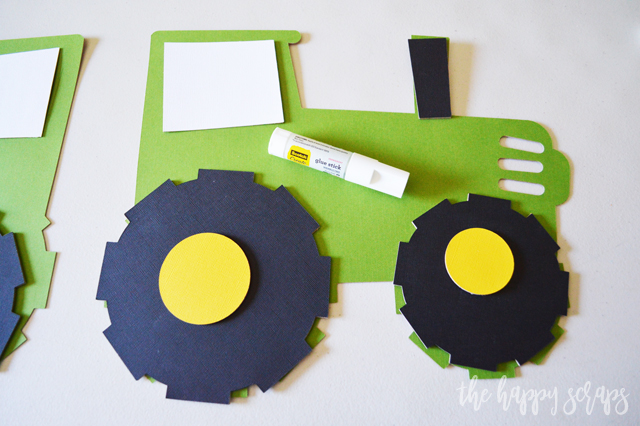
After all the cardstock was attached to the chipboard, I used the glue to adhere all of the tractor pieces together.
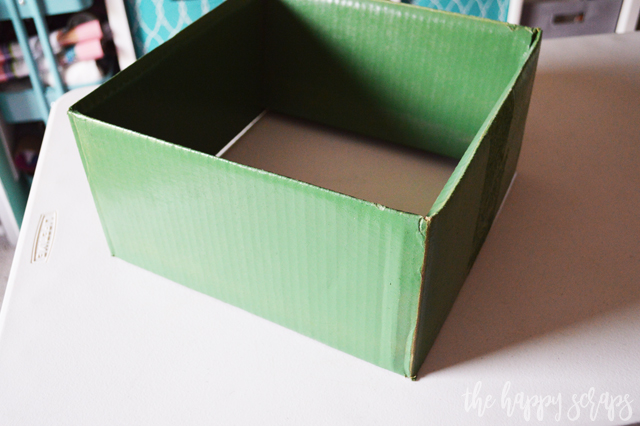
I found a box that would fit around my two year old, and I spray painted it green, then folded all the sides into the box.
I glued the tractors to the sides of the box. I attached some baker’s twine to the box as well, so that it could sit on my little ones shoulders.
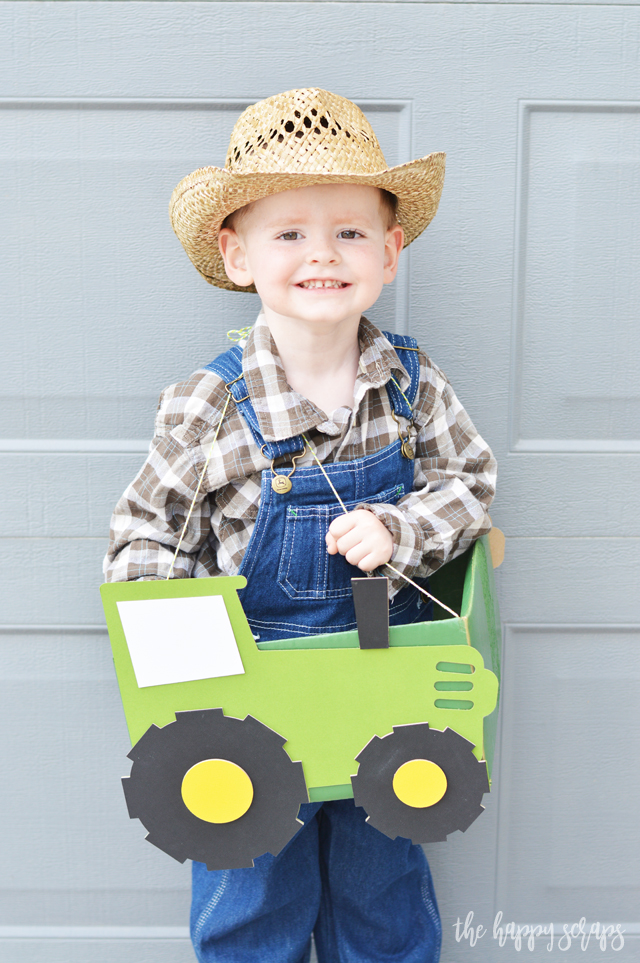
I found him a cowboy hat, boots, overalls, and a shirt and added his tractor and he is ready for Halloween! I think he is the cutest farmer I’ve ever seen, what do you think?

This DIY Farmer Halloween Costume would be super simple to adjust to work for any size child too!
DIY Chicken Halloween Costume with the Cricut Maker
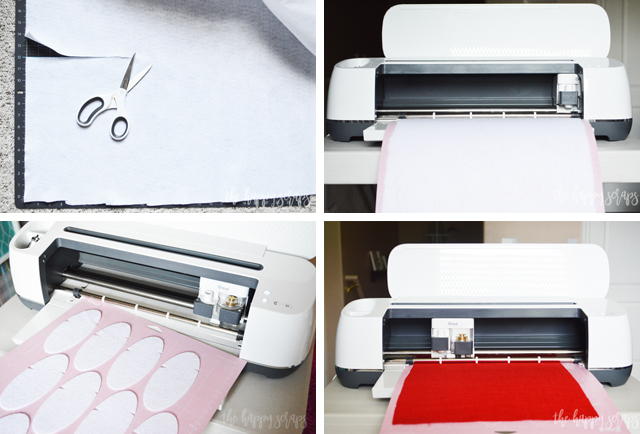
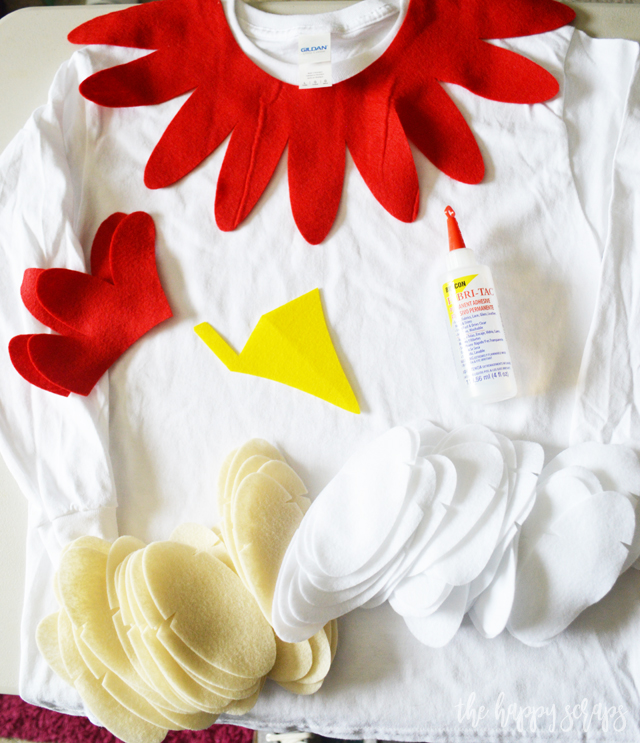
Now let’s make this fun Chicken costume! This one might have been my favorite to make! I picked up a yard each of white and cream felt. I used my Cricut Fabric Scissors to cut the felt into pieces that were 12″ x 24″. I cut six of each color. I placed it on the FabricGrip Mat and started cutting the feathers using the Rotary Blade. Once I had all the feathers cut out, I cut the red pieces for the collar and the hat. I also cut the beak out of yellow felt.
I had all my supplies together, so I was ready to start assembling the chicken. I folded the beak down the middle and then glued the piece across the back to the other side, creating the 3D look.
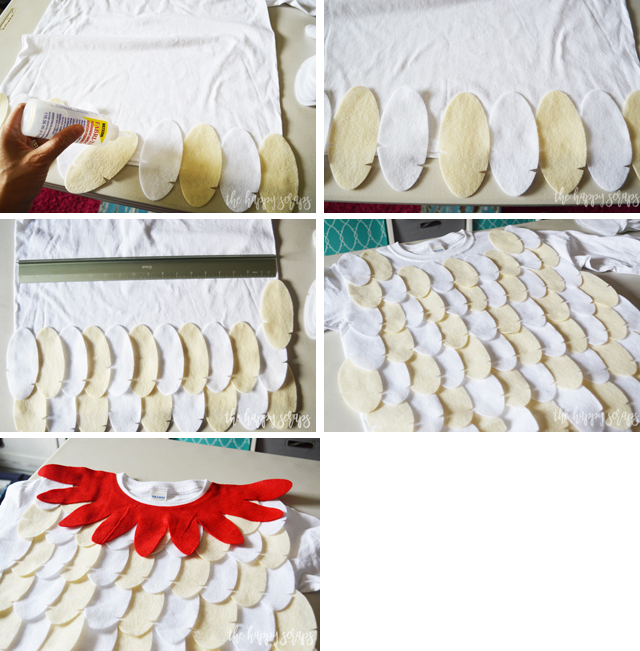
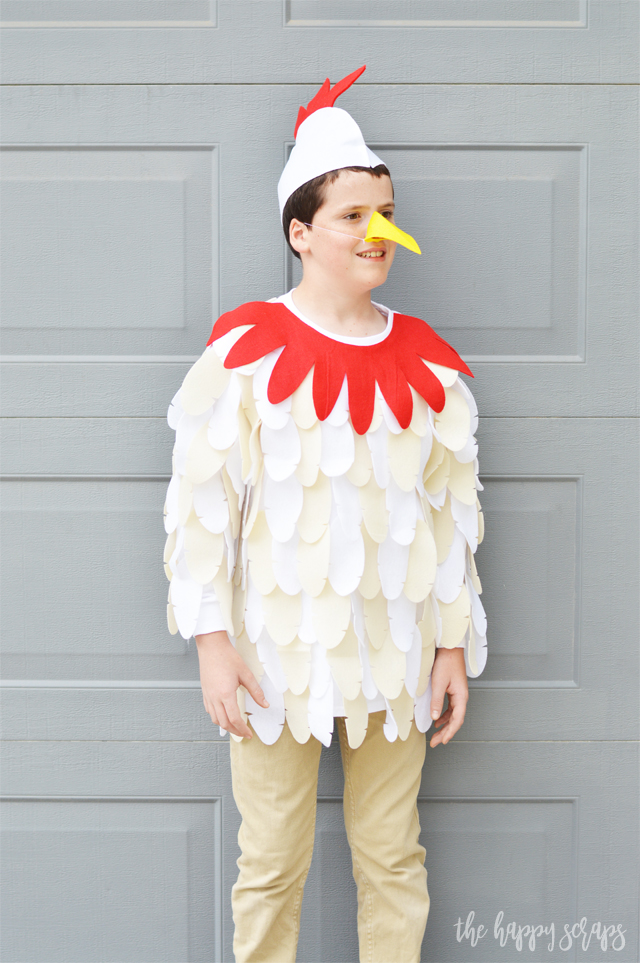
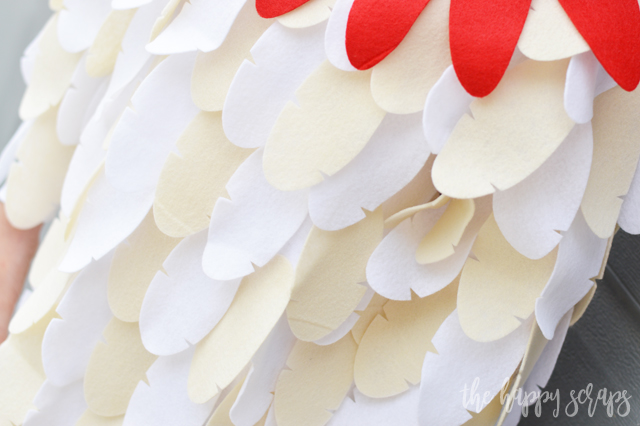
I laid the long sleeve white t-shirt on my table and lined up a row of feathers along the bottom. I used the fabri-tac to place a small amount of glue on the back at the top of each feather, then placed it where it needed to be. I worked my way up the shirt. I found that it was easier to keep the feathers in a straight line when I used a ruler for a guide. I filled the front of the shirt, then added the collar. Then I filled in the arm fronts, backs, and the back of the shirt with the feathers.
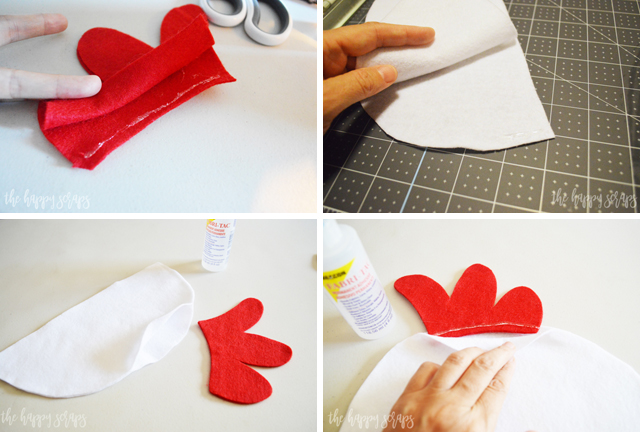
For the hat, using fabri-tac, I glued the two red pieces together. I hand cut two white pieces that were the shape I needed and started gluing them at the base of the had. I left a section open at the top for the red piece to be inserted. I placed the red piece where it needed to be and added glue to one side. Then I flipped it over and added glue to the other side, closing the hat.
This DIY Chicken Costume took the longest to put together, but it was so fun! I paired it with a tan pair of jeans I found at the thrift store.

The beak is the perfect touch to this chicken too, don’t you think?
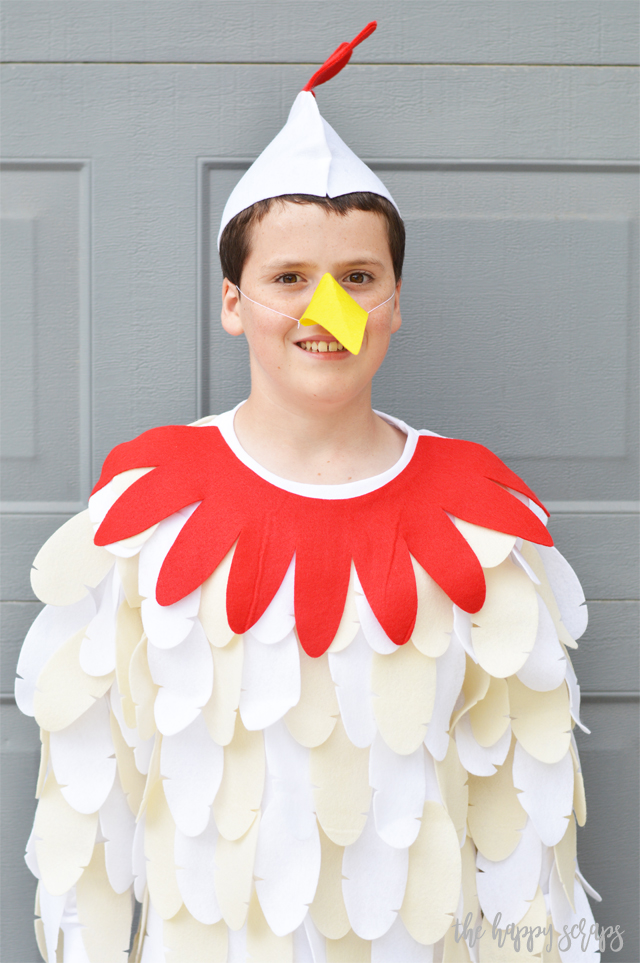
And the hat? It turned out better than I thought it would!
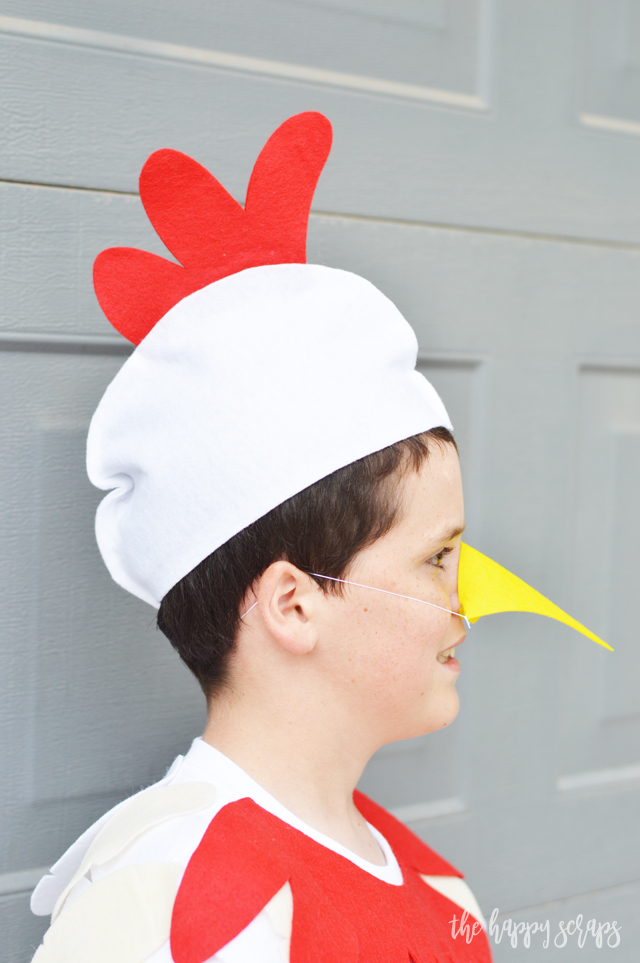
This DIY No-Sew Chicken Costume is fun and easy, although it is a little time consuming to put together, but using the Cricut Maker to cut all that felt cuts down on the time it takes, but a lot! I can’t imagine cutting 240 feathers by hand!
The texture of this costume is so fun!
DIY Pig and Goat Halloween Costume with the Cricut Maker
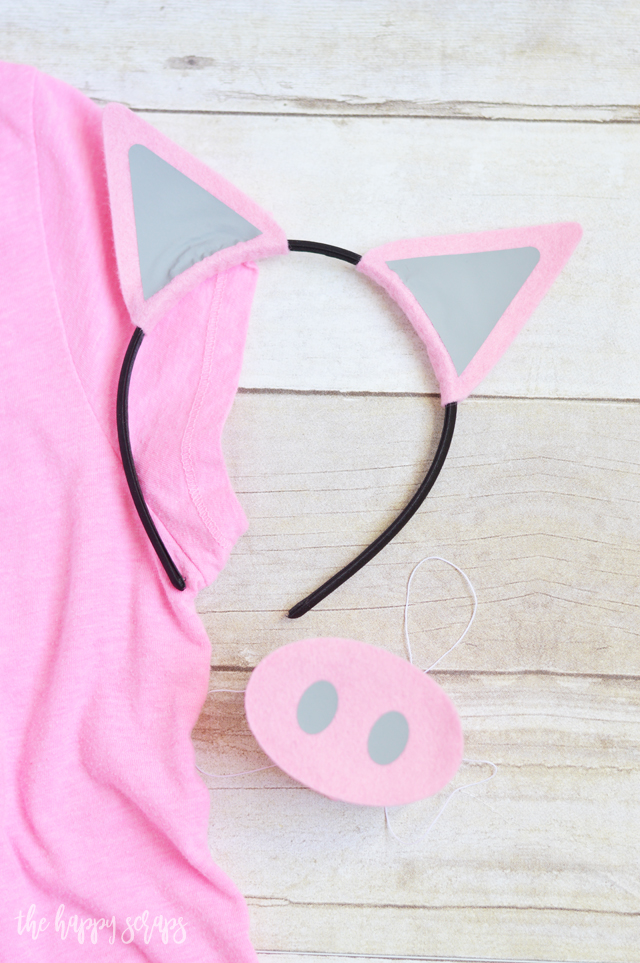
These two costumes are so easy! I started by cutting the felt and iron-on vinyl with the Cricut Maker that I needed for these. Every time I cut felt on the Cricut Maker I am surprised how amazingly it cuts! That rotary blade is amazing! I applied the iron-on vinyl using the EasyPress 2 (6 x 8). I used the fabri-tac again to glue the ears together, leaving space for them to slide. For the pig nose, I put a line of glue all the way around the edge of the oval and then put the rectangle piece around it on its edge, then I added elastic thread so it could fit on, around the head.
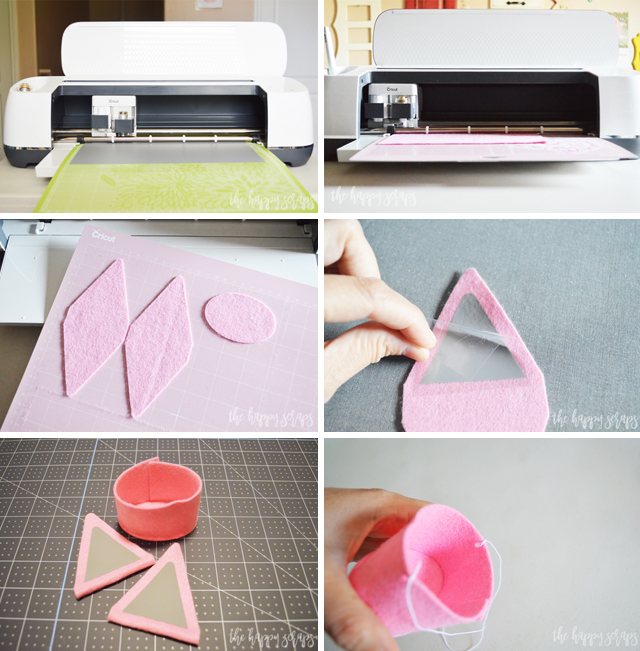
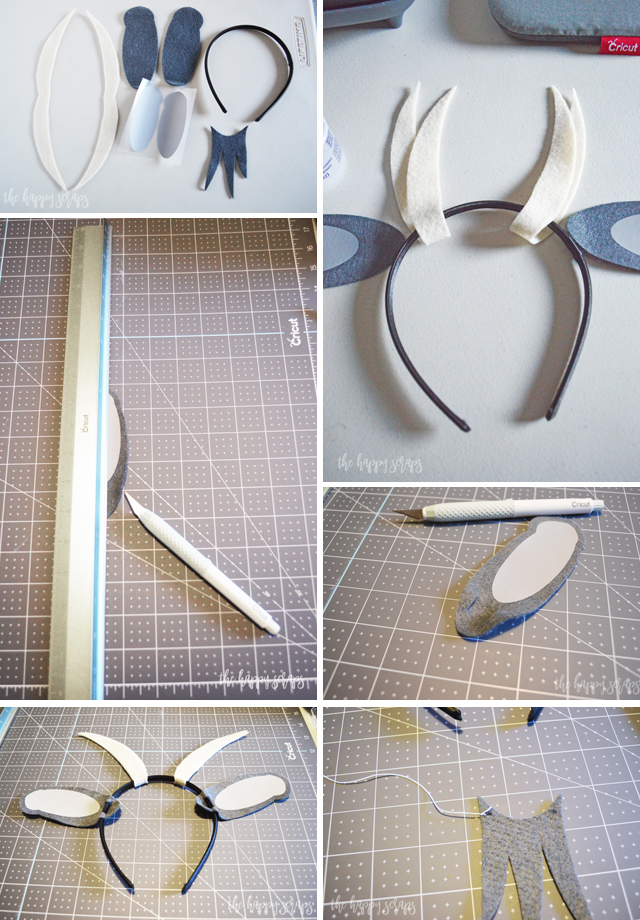
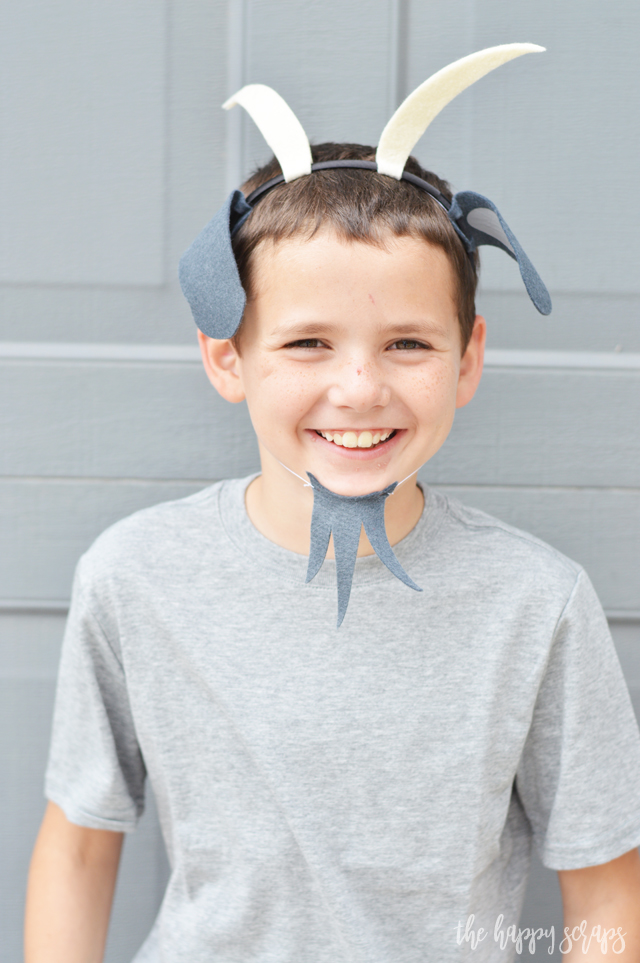
With the goat, I used the gray iron-on to add the two tone to the ears. I needed to cut a couple of slits in the ears so they could slide on to the headband. The Cricut TrueControl Knife and ruler made this so easy! Just make sure you protect your surface with a self-healing mat! I used the fabri-tac to glue the horns together, leaving enough space that they could slide on the headband. Once I had the horns on the headband I added the ears. Goats have floppy ears, and that is exactly how these turned out! For the beard on the goat, I attached some elastic thread so it could go up and over the head.
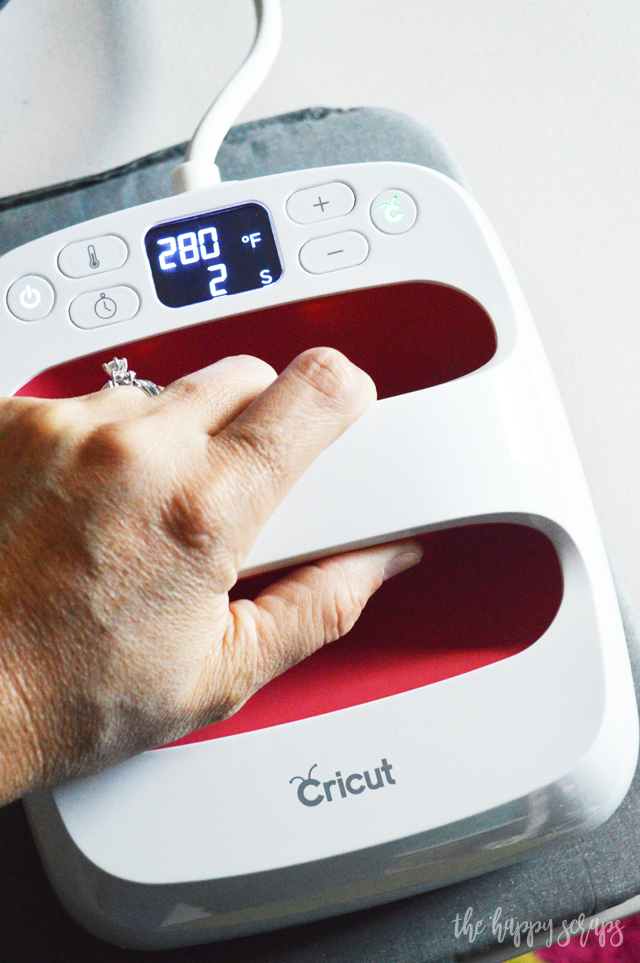
Using the Cricut EasyPress 2 to apply the vinyl to this felt was so easy! I love the new Cricut EasyPress Interactive Quick Reference Guide. You put in your iron-on material and what you are applying it to, and it tells you what settings you need to use! For Everyday Iron-on + Felt, I needed it set to 280° for 30 seconds.
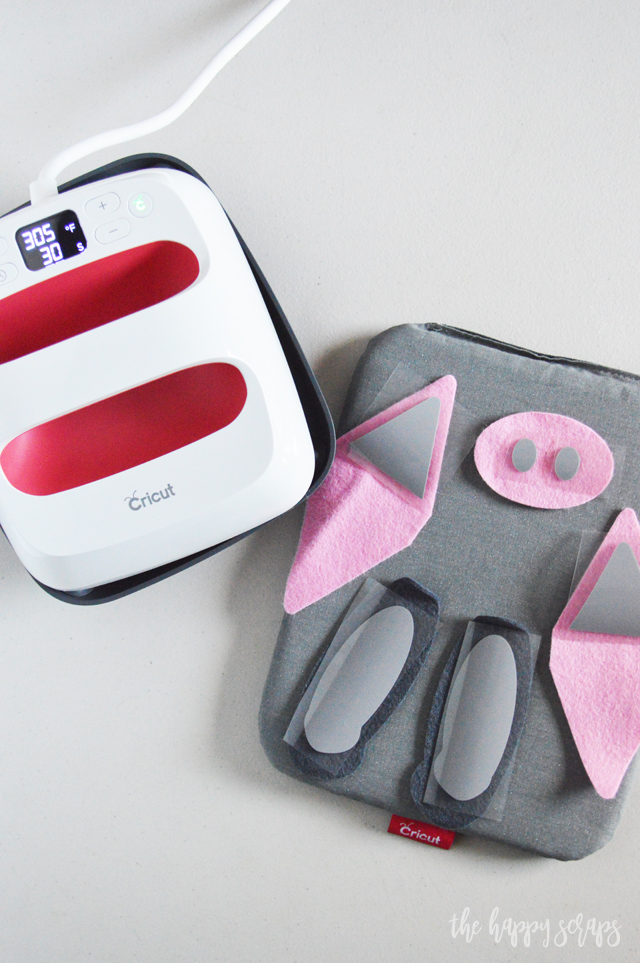
This was my first time using iron-on with felt, and it worked like a dream!
This DIY Pig Halloween Costume was super simple and quick to put together. It would be cute to add a pink tutu to it as well!

This DIY Goat Halloween Costume cracks me up! It was so simple too! I think the beard is so funny, and my son thinks so too!
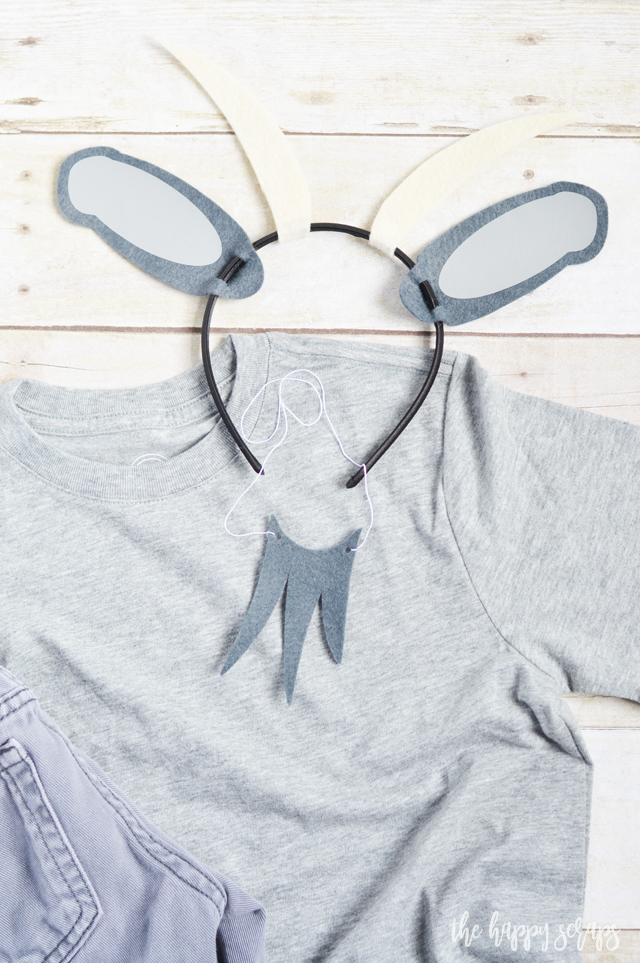
Do you have someone at your house that would want to dress up as a goat? You could have this DIY Goat Halloween Costume put together in no time!

The two tone gray ears along with the horns and beard make this a fun costume that any child would be excited about dressing up as.
I don’t know about you, but I think this Farmer and his animals are pretty cute! You could also create some other fun animals to go along with this DIY Farmer and Animal Halloween Costumes with the Cricut Maker.The Cricut Maker would make it so easy to create a horse, cow, dog, etc. They would all be fun to add to these costumes!
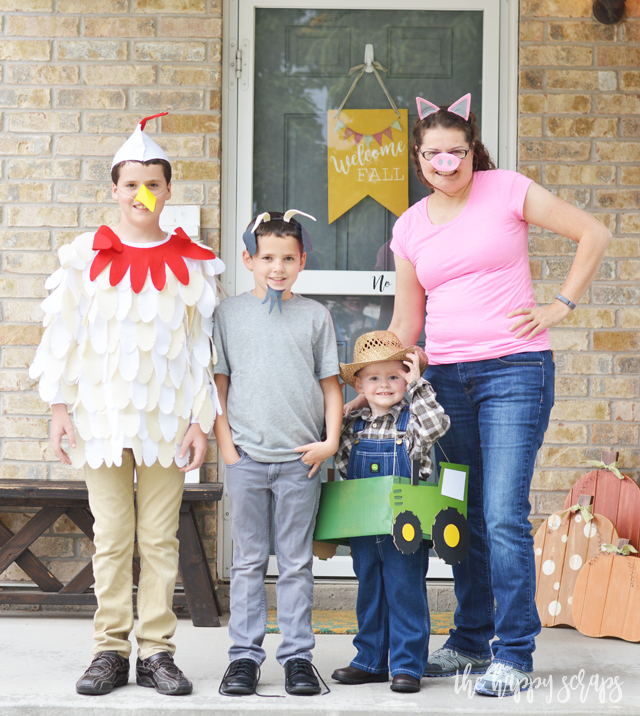
So tell me, which of these DIY Farmer and Animal Halloween Costumes with the Cricut Maker is your favorite? If you’re looking for other costume ideas, I’ve shared a couple before. You can find them here.
This is a sponsored conversation written by me on behalf of Cricut. The opinions and text are all mine.

Leave a Reply