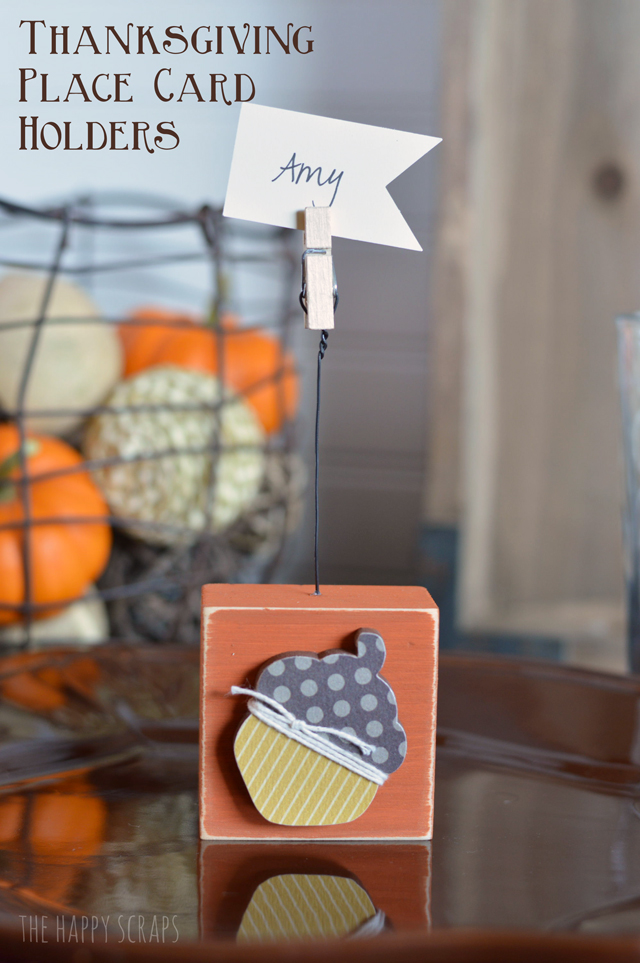
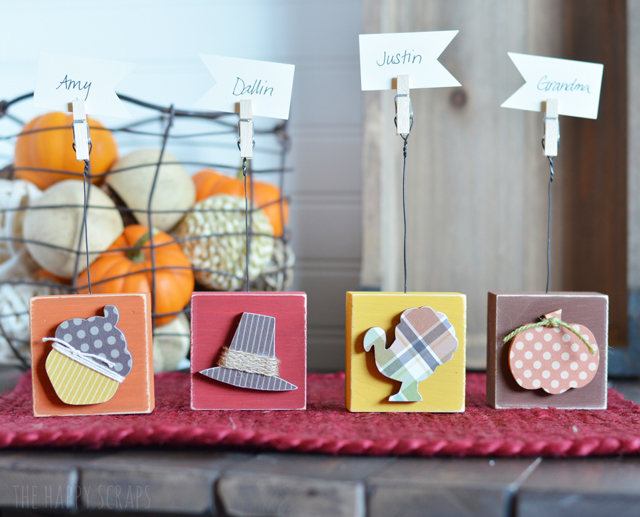
Is anyone else having a hard time believing that it’s already November? I know I am! But on the other hand, I’m so excited that it’s the month of Thanksgiving! I love Thanksgiving. I love spending time with family, and enjoying good food too. Also, I think I have an obsession with creating Thanksgiving Place Cards. They are just so fun! Today, I’m going to show you how to make these Thanksgiving Place Card Holders that you can use year after year. I shared this tutorial over on The Wood Connection blog last week.
This post contains affiliate links.
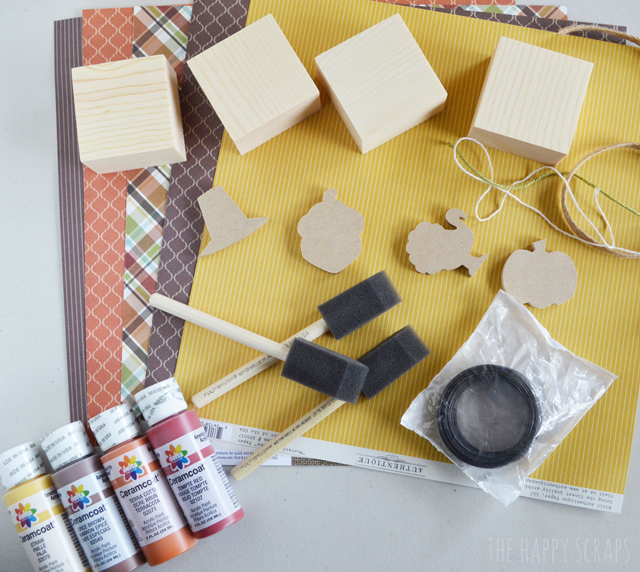
Supply List:
- Small 2.5″ Square Blocks
- Small Cut Shapes
- Paint
- Paper
- Wood Glue
- Ribbon
- Wire
- Paint Brushes
- Sand Paper
- Mini Clothes Pins
- Drill/Screwdriver
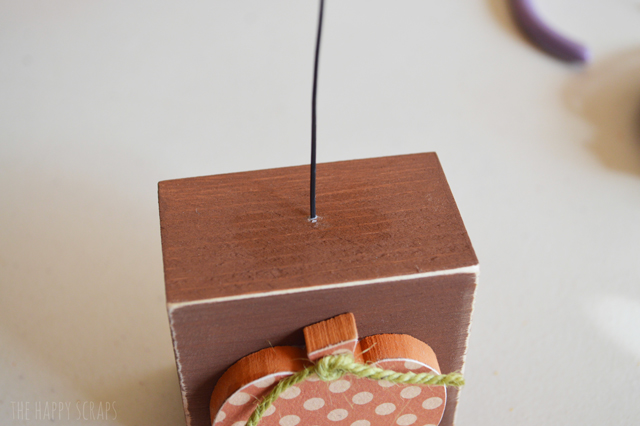
I started by measuring to about the center of the top of the block, and using my Martix Black & Decker Drill, I drilled a really small hole in each block. I seriously love this drill. I love that I can change the front part of it into a sander, router, saw, or drill, among other things.

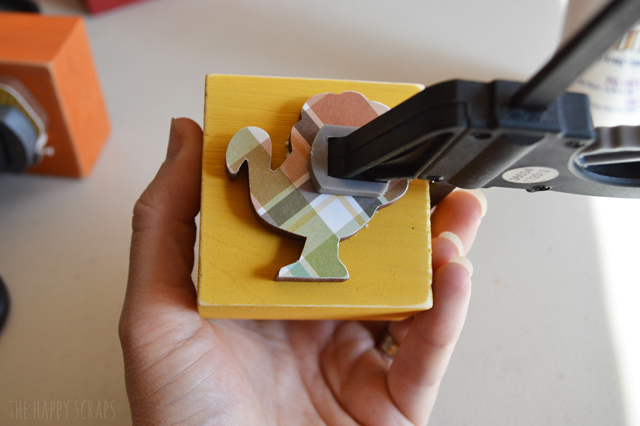
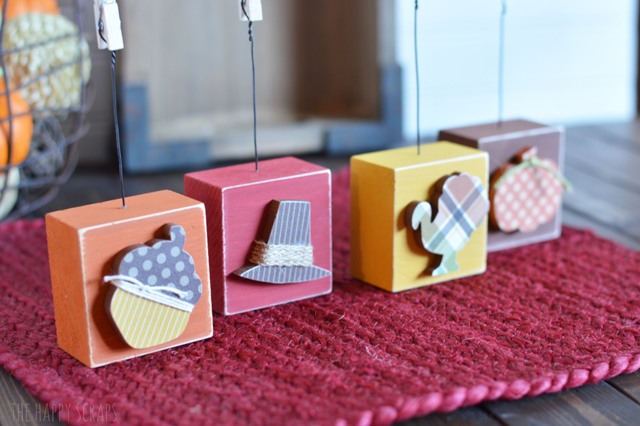
Paint your blocks. I used four different colors to paint mine.

Once the paint is dry, lightly sand the edges of the blocks.

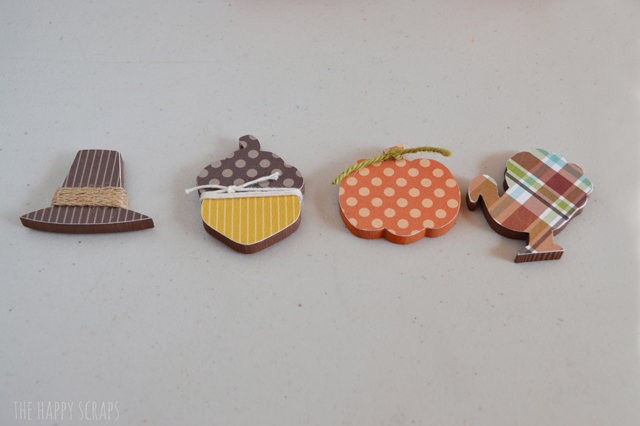
Paint the edges of the shapes. I painted the hats, turkeys, and acorns brown, and the pumpkins orange.

Trace your shape onto the paper you’ll be using. (I normally do this before I paint the wood, but I forgot this time.)
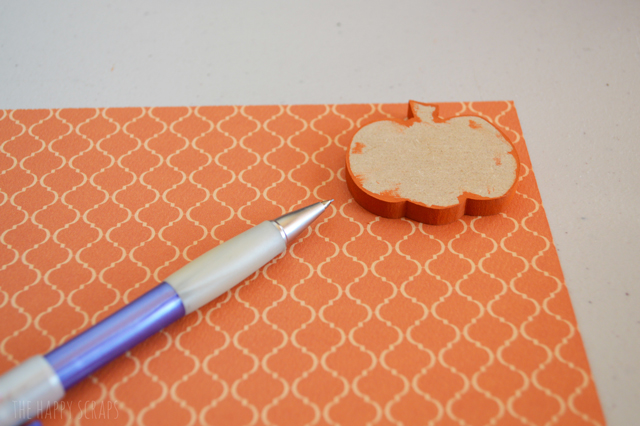
Cut out your paper.
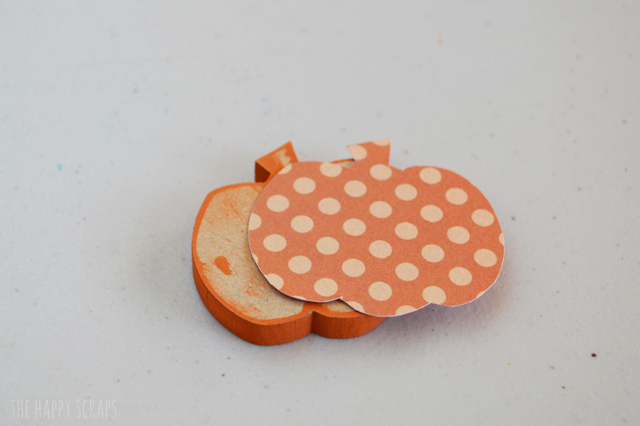
Use wood glue to adhere the paper. Use a paint brush to spread out the wood glue, and then smooth out the paper over the wood glue using a vinyl squeegee or something similar. I love using this wood glue to adhere paper to projects. It only takes a really thin layer, dries quickly, and I’ve never had any trouble with paper rippling.

Once all your shapes are papered, add the ribbon for embellishments.
Use the wood glue to glue your shape to the front of the blocks. I used clamps to hold them in place while the glue dried.
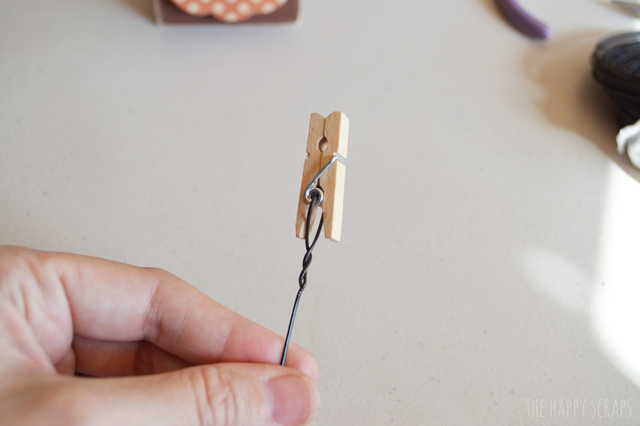
Take your mini clothes pins and put wire through the spring hole. Twist the wire together under the spring. Cut the wire to the length that you want.
Using wood glue, glue the end of the wire in the hole that you drilled in the top of the block.
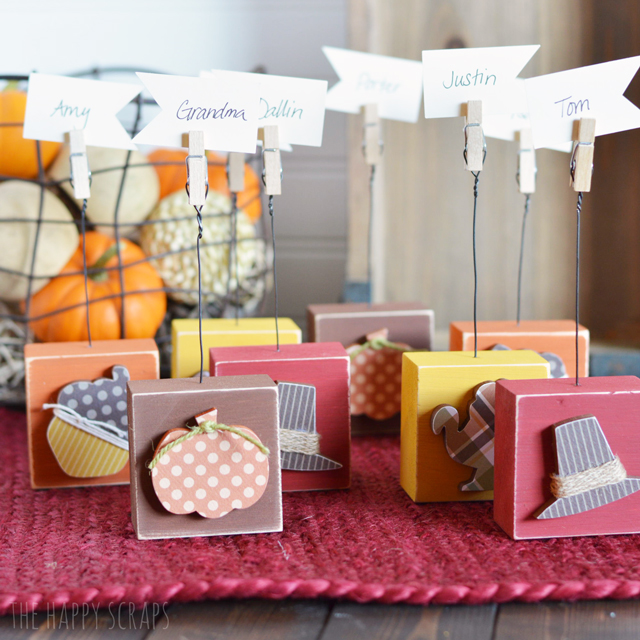
Cut or punch out some tags and write names to use to clip into the clothes pins.

The best part about these is that you can use them every year, and add whatever names you need.
Aren’t these little tiny papered shapes the cutest?! I love the dimension that the ribbon adds to these.
These are easy enough to make that you can make them for families big or small.
What are you waiting for? Grab the supplies and make some for yourself.
If you enjoyed this post you might also enjoy these other Thanksgiving posts.
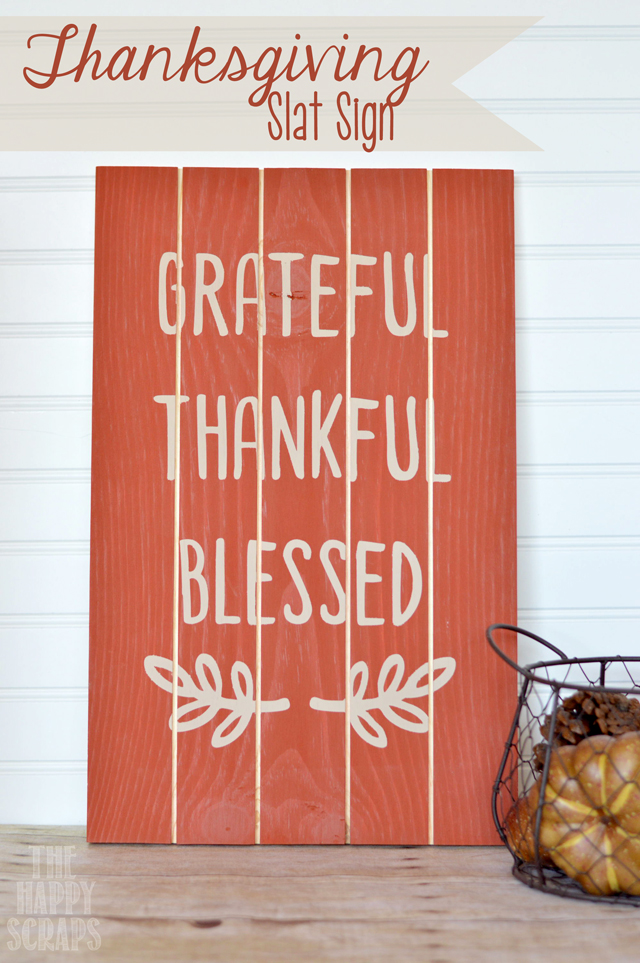
Grateful, Thankful, Blessed, Thanksgiving Slat Sign
Thanksgiving Turkey Place Cards


Leave a Reply