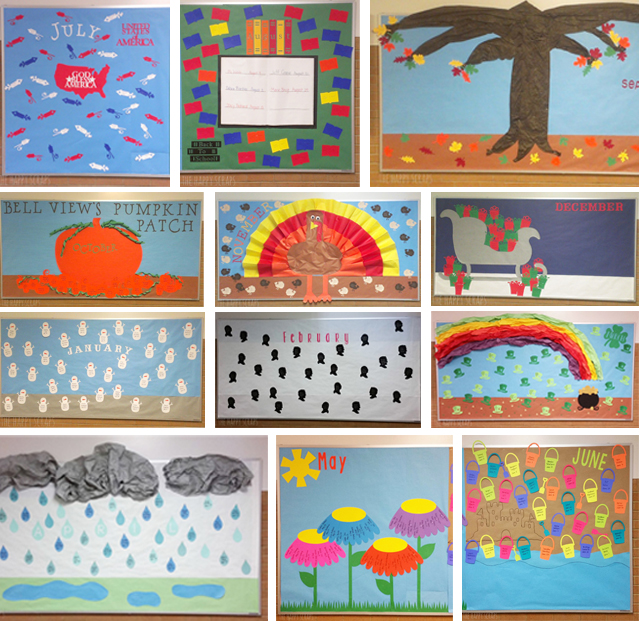
During the last school year, I was in charge of putting together the birthday bulletin board each month. When I first started, I looked online for ideas of what to put on the bulletin board, but I didn’t have a lot of luck finding very much. Every month when I would finish putting the board together, I would snap a picture with my phone, so these pictures aren’t the best, but you get the idea from them. I decided since I hadn’t seen very many ideas for bulletin boards that I would share the ideas that I put together.
This post contains affiliate links.
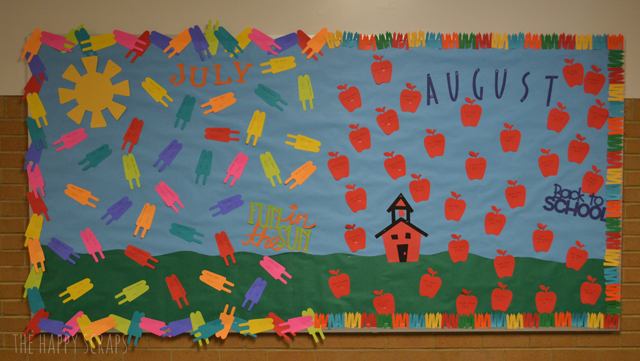
School starts in mid-August for us, so the July and August birthdays are both celebrated during August at school. So the bulletin board was split in half. When I think of July, I think of summer time and the 4th of July. I decided to go with bright summer colors like I used on this Hello Summer Board. Since August is when the kids go back to school, I thought I’d stick with the apple theme. I cut out the popsicles and apples with die-cuts at the district office. I cut the sun, school, “fun in the sun”, “back to school”, and the July and August letters out using the Cricut Explore. (I think every teacher needs on of these machines! They are so great, and now that you can use them with your computer and cut the fonts that you have, the uses are endless!) The students and teachers names and birthdays are written on the popsicles and apples.
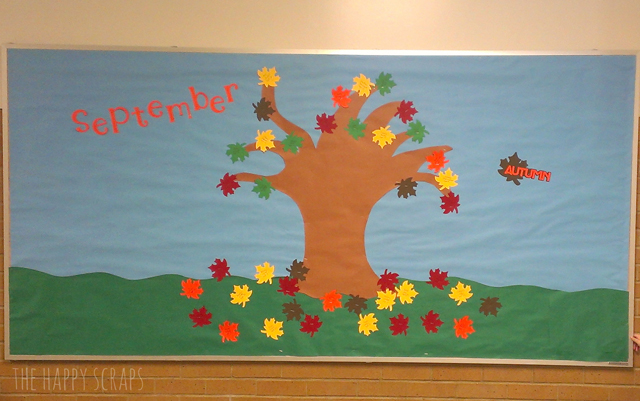
For the September board, I hand cut the tree, used the district die-cuts to cut all the leaves and then used the Cricut Explore to cut the September letters and the “Autumn”. I love the colors that come in the Autumn time each year. You can see a few other projects using beautiful Autumn colors here. Every month it seemed like I thought I had enough stuff to cover the board when I would head to the school and then after I got it put together, I always felt like I didn’t have enough on it. It did get better as the months went by.
In October I decided to cut everything out with the Cricut Explore rather than going to the district office again. It was so fun being able to come up with it all at home. Ghosts and Pumpkins are some of my favorite things to decorate with during October, so it seemed only natural that I used those on the bulletin board.
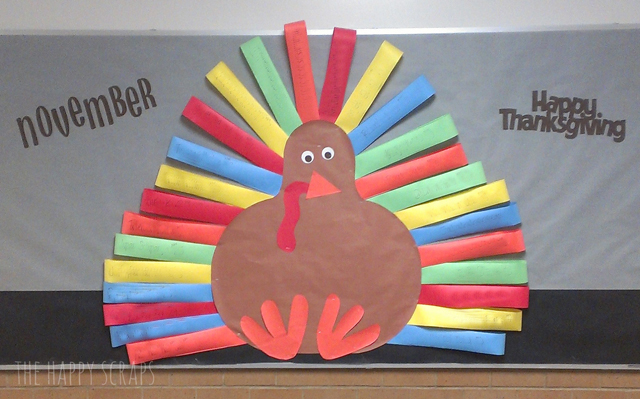
For November I used the Cricut Explore to cut the “Happy Thanksgiving” and the November letters. I hand cut everything else for the turkey using the butcher paper at the school. I wanted to make a turkey similar to the paper feathered turkey that I shared a couple of years ago. I put the names on the “feathers” (blurred out). This was one of my favorites for the year.
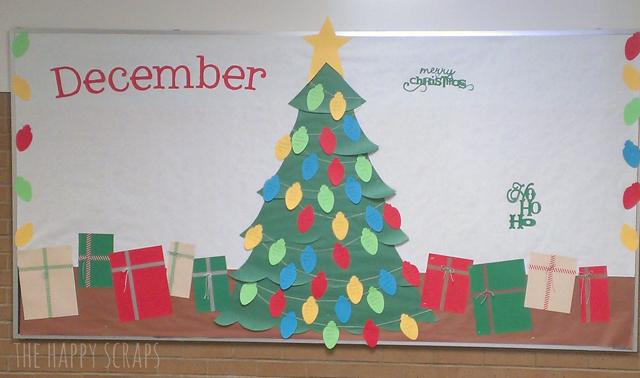
December was a fun one to put together too. For the tree, I got some green butcher paper and I had drawn out the tree pieces on it and cut them out. I cut the letters, light bulbs, and star with the Cricut Explore. When I assembled the tree, I worked from the bottom up, so I could have the bottom of each piece flair out. I also added baker’s twine (for the light cord) as I put up each layer. This was one of the harder ones to assemble, but it was worth it! I put the lights on, once I had the tree up. When I got done with this one, I thought it needed something else. So, using washi tape, plain cardstock, and some baker’s twine bows, I made some gifts and easily added them to the board.
Once Christmas time was over, it was still plenty cold here in Utah, so I made a snowman. I know a few people at the school called him Olaf, but I was just going for a snowman. 🙂 I hand cut the large white circles for the snowman, and then used the Cricut Explore to cut out the arms, carrot nose, eyes, mouth, buttons, January letters, and snowflakes. This snowman kind of reminds me of my Stackable Winter Snowman I put together.
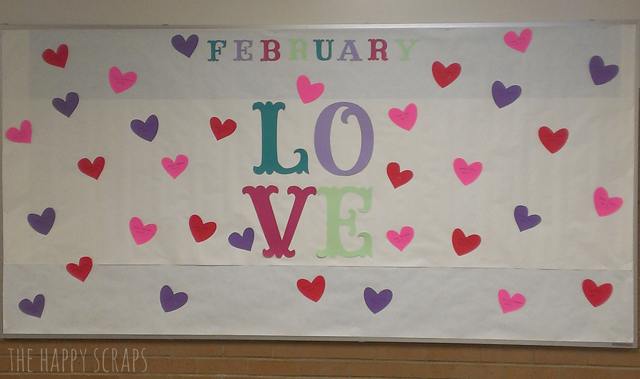
Oh February. The month of love. For most of the paper that I used all year, I picked it up at the district office, or used butcher paper from the school. Well, the paper I used for the hearts, I had previously picked up from the district office, but I didn’t have enough for the the LOVE or February letters. I got the idea for making the LOVE look stacked from these Stacking LOVE Letters I made for Valentine’s Day. So I went through my stash of paper and pulled out the other colors. I’m still not sure that they were all good choices, but once it was done, I wasn’t going to change it. I cut everything for February using the Cricut Explore.
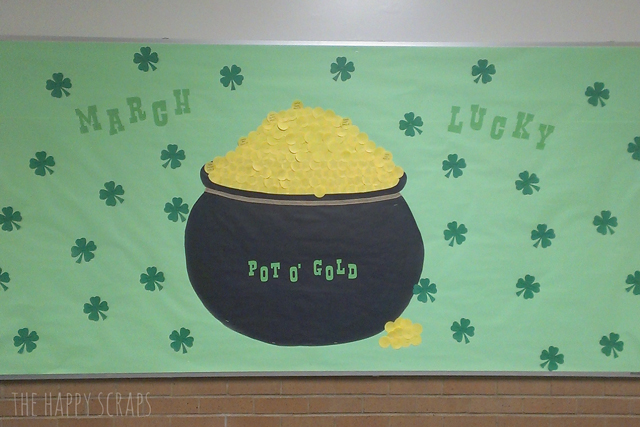
I thought March was a fun one. I had fun making that big pot of gold. If only it was real! 😉 The shamrocks and letters were cut with the Cricut Explore, and the pot was hand cut out of butcher paper. I stapled some ribbon under the rim to make it look more like a pot, and then I filled it with gold coins. I used a 1 3/4″ circle punch and yellow butcher paper for those. This pot of gold reminds me of these fun Leprechaun Feet that I put together.
April was fun too. I love creating Easter projects, so this was a fun one. I didn’t realized the green eggs and the green background were so close in color. Had I realized I wouldn’t have cut anything out of the green. After I got to the school I ended up cutting the yellow background for the work “April” because you couldn’t see it well. I was going to make a large egg for the center of this one, and when I sat down to cut it out, I ended up making a basket. I thought it was SO fun! I love how you can use plain paper to make almost anything. The letters, eggs, and grass were cut with the Cricut Explore, and everything else was hand cut.
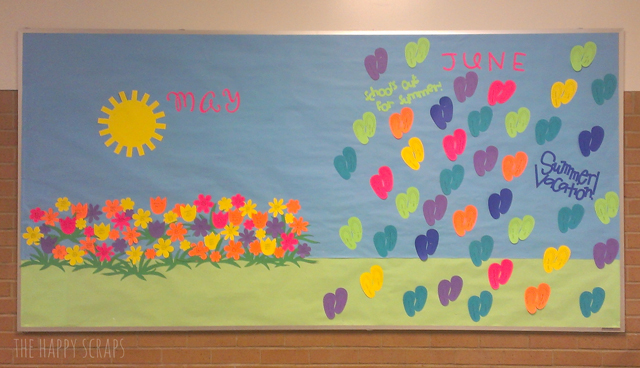
And now we are to May and June. School gets out the first week of June, so May and June were done together. Since the weather was warming up, I decided to make flowers for May (aren’t flowers so fun?! You should see this Paper Flower Centerpiece!) and since school was getting out in June, was could be more fun than Flip Flops. These paper flip flops remind of this Flip Flop Door Hang I made. I love the bright colors from this board. Everything on this board was also cut with the Cricut Explore. The flip flops even had the straps drawn on them, using the draw and cut feature on the Cricut Explore.
A couple of other tips I learned this year from doing the bulletin boards are: Don’t throw away/take down your butcher paper every month. Layer the paper, you never know when you might need that color again, and then you will already have it. At one point I probably had 4 layers of butcher paper on the board. When putting the paper up, keep it rolled up, staple the top corner to the board, and then unroll and staple it across the top as you unroll it. It keeps it straight, and it is much easier to work with. A good stapler is key to making bulletin boards easy. I got me a stapler that I liked when I first started doing the board, but one month I forgot my stapler, so I borrowed the one out of the office, and it is THE BEST for bulletin boards! Also, you don’t always have to use a border. I think I only did a border once.
For 12 MORE Bulletin Board Ideas, check these out!
So tell me, what are your favorite bulletin boards that you’ve seen or put together? I’d love to hear your ideas! Also, please share if you have any tips or tricks of making bulletin boards come together smoothly! I get to do the bulletin board for the PTA birthdays again this coming school year, and I’m looking for new ideas!




Leave a Reply