This Lucky St. Patrick’s Day Banner post is a sponsored conversation written by me on behalf of Cricut. The opinions and text are all mine.
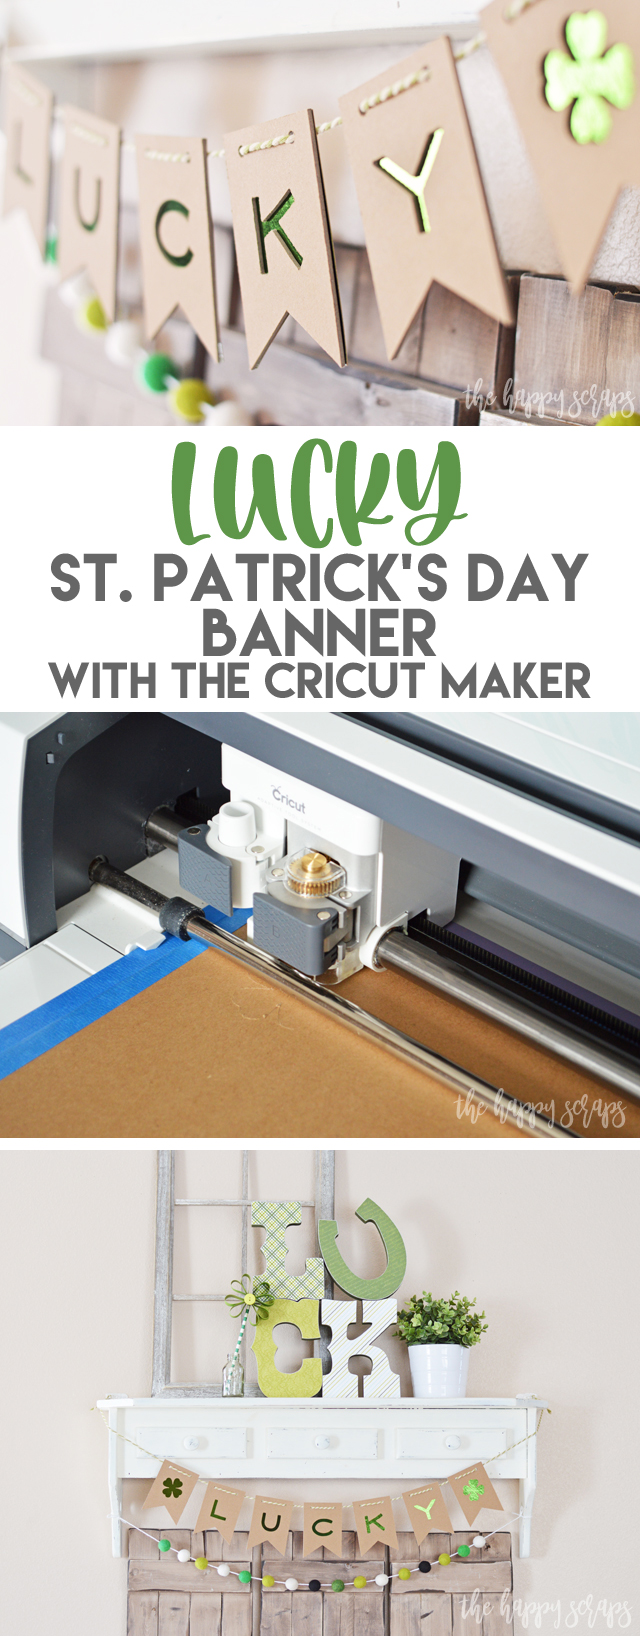
Do you enjoy decorating for all of the different holidays and seasons? I have a tote (or two. Some big, some small.) for each holiday or season. I love to pull them out and get all the decorations out for the next holiday or season. Every year I find myself wanting to create some new decor no matter the season. Sometimes I go crazy and create all new (did that last year for summer) and sometimes I keep most things from prior years and create one or two new things. I feel like this keeps my decor looking fresh + I love being creative. It feeds my soul! Anyone else? Another thing I love? When I get the chance to create something I’ve got pictured in my head and it turns out even better than I pictured it! This Lucky St. Patrick’s Day Banner with the Cricut Maker is one of those projects! I adore the way this project turned out and you can make one too. It’s and easy one, I’ll show you how to make your own. 🙂
This Lucky St. Patrick’s Day Banner with the Cricut Maker post is a sponsored content written on behalf of Cricut. I received compensation and product in exchange for this post. This post contains affiliate links. If you click on an affiliate link and purchase something, you won’t pay anything extra, but it will help support this blog. All ideas and opinions are my own.
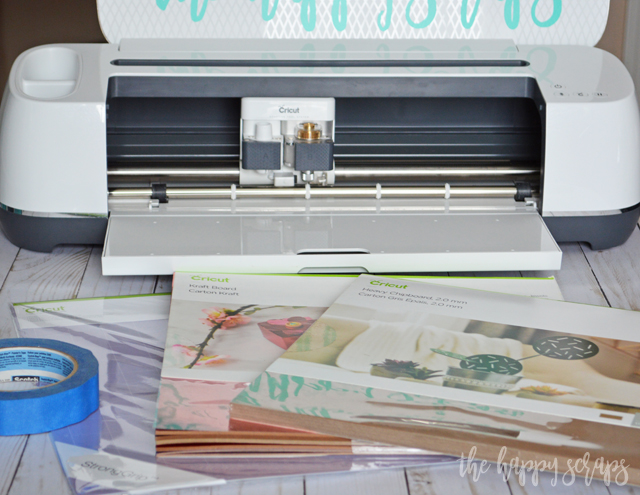
Lucky St. Patrick’s Day Banner with the Cricut Maker Supplies:
- Cricut Maker
- Cricut Maker Knife Blade
- Cricut 2mm Chipboard
- Cricut Kraft Board Foil Sampler, Jewels
- Cricut StrongGrip Cutting Mat
- Masking Tape
- Twine or Ribbon
- Cricut Design Space Cut File (all images included if you have Cricut Access)
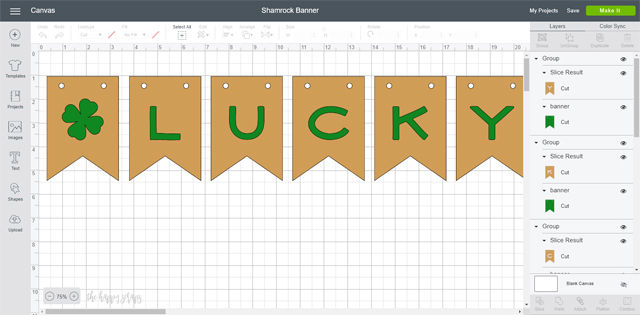
Click the Design Space Cut File in the supply list above and Design Space will open. It should look similar to this. If you’d like to resize it, you can do that here, otherwise, send it to your Cricut Maker to be cut.
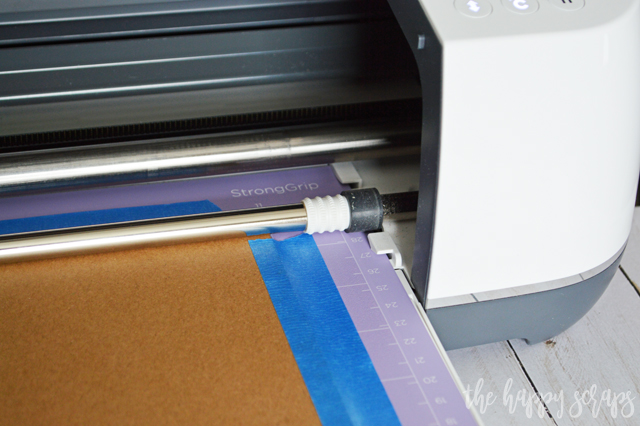
Get your StrongGrip Mat ready by placing a piece of the Cricut Chipboard on the mat. Secure the chipboard to the mat by using masking tape on all sides.
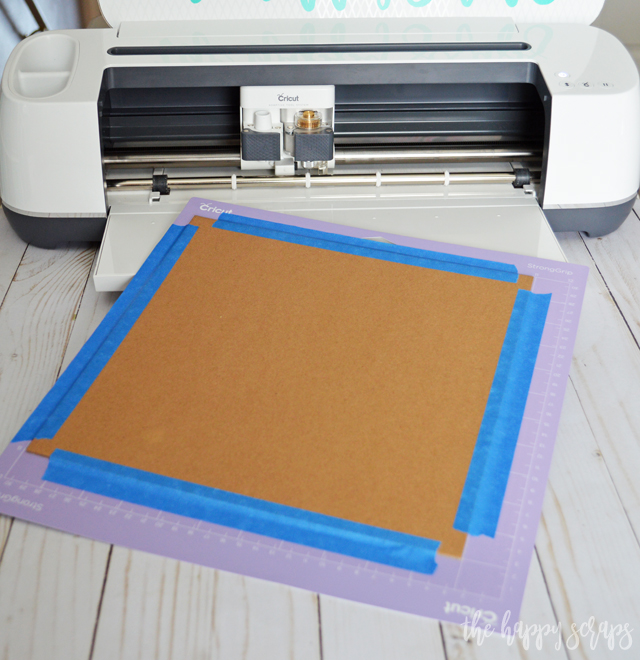
Prepare your Cricut Maker machine to cut the chipboard by moving each of the white star wheels to the right hand side of the machine.
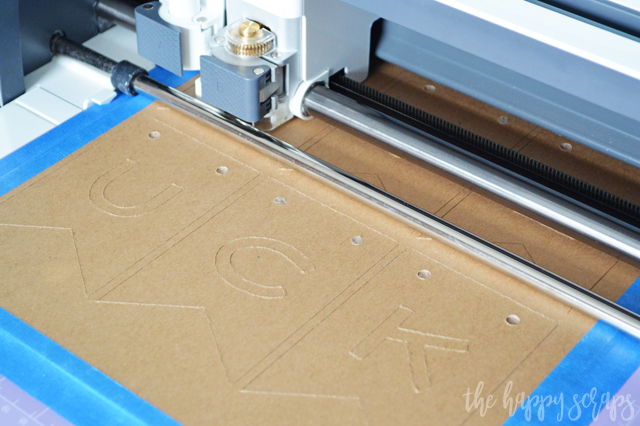
If your knife blade isn’t already in your Cricut Maker, you’ll be prompted to put it in when you select Chipboard from the material cut list. (How to change your Cricut Blade.) Cut out your chipboard pieces with the knife blade. This will take about 10 – 15 minutes. I love watching the knife blade cut. Whether it is cutting wood or cutting chipboard, it is just so cool! I love that the Cricut Maker machine can cut with such force + what isn’t there to love about the scoring wheels and rotary blade! They are amazing as well! Another thing? I love the variety of supplies that can be cut with the Cricut Maker! The kraft board is awesome!
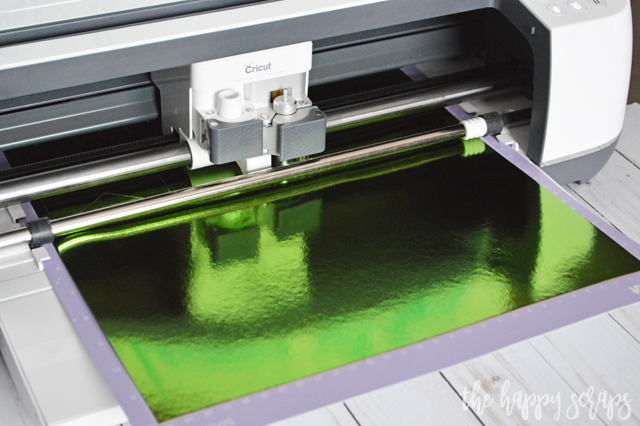
Next, using the fine point blade, cut the green foil kraft board.
Assembling your Lucky St. Patrick’s Day Banner
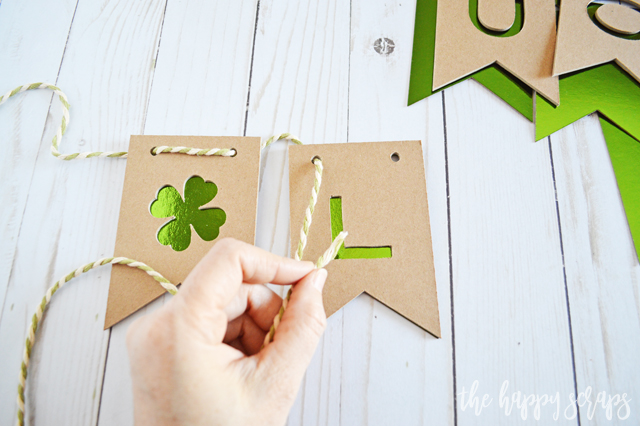
When you get all of your pieces cut, this is what you should have. Grab your twine or ribbon, whatever you prefer to string your banner together with.
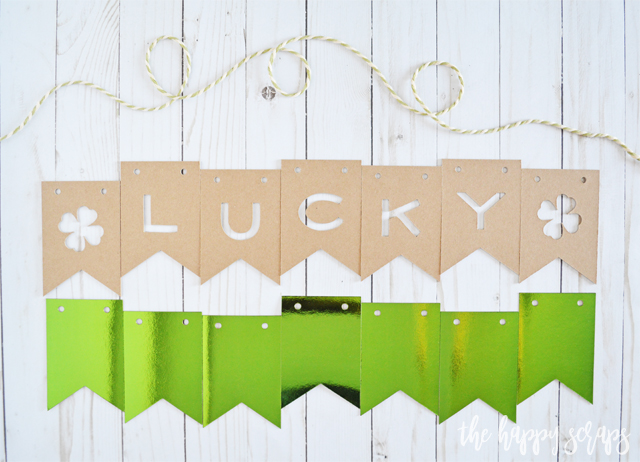
Place a piece of green foil kraft board behind the piece of chipboard for each banner piece.

Start stringing your pieces together. I did not attach the green foil kraft board to the back of the chipboard, I just used the twine to attach them. If you want them attached, simply take a glue dot or two and place them toward the bottom of each green foil kraft board piece and secure it to the back of the chipboard. The twine will hold the top together.
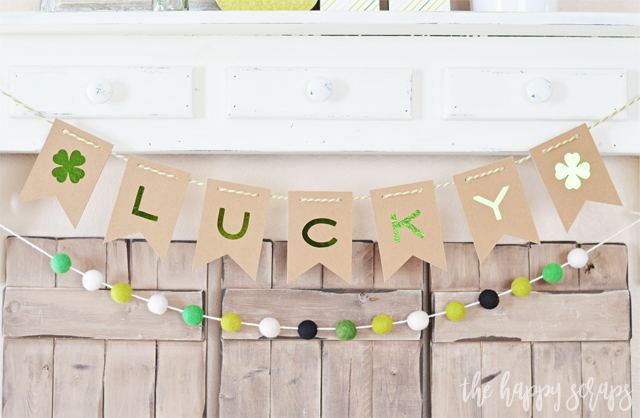
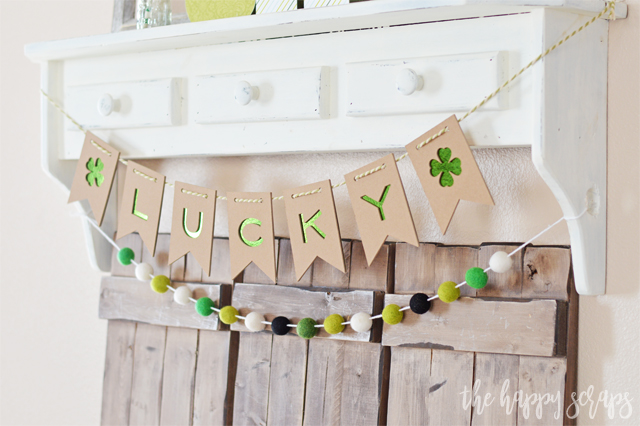
Once you get it all strung together, you’re ready to display this fun Lucky St. Patrick’s Day Banner in your home.
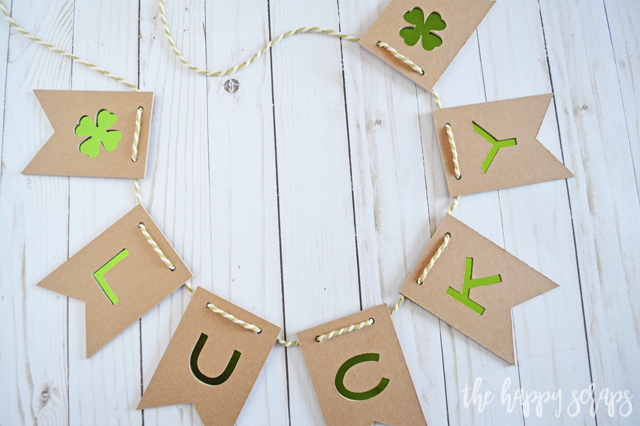
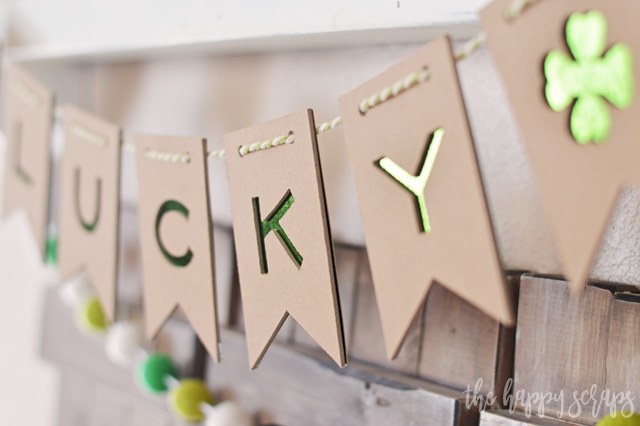
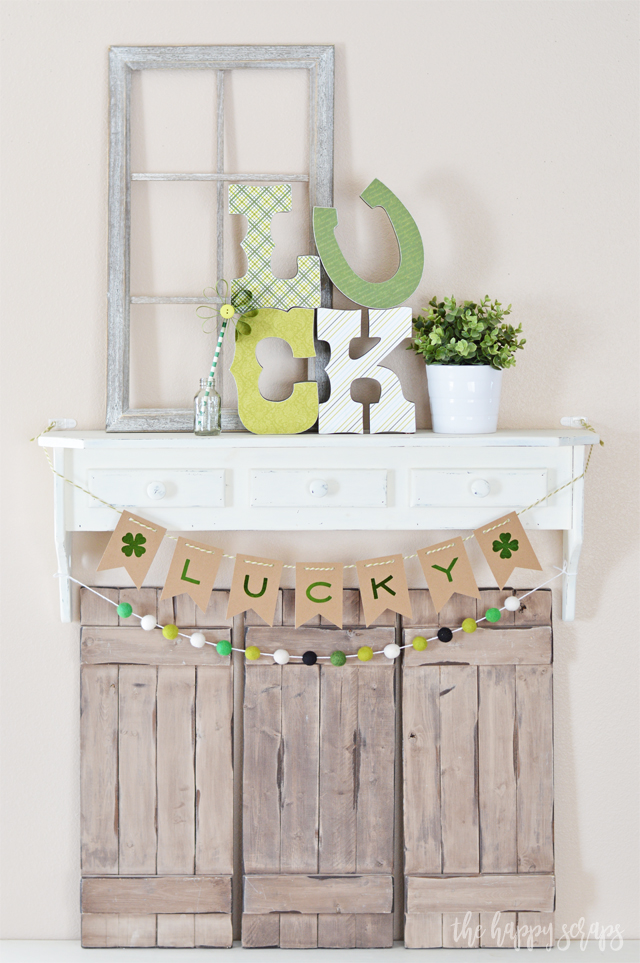
Pulling out all the green decor this time of year is so fun! I really love what this Lucky St. Patrick’s Day Banner adds to my display. The shimmer from the foil is so fun!

But I think my favorite part would have to be the dimension added from using the chipboard like this! Isn’t it amazing that the Cricut Maker can cut through that?! <3
After creating this Lucky St. Patrick’s Day Banner with the Cricut Maker, I want to create banners like this for each and every holiday and season! Wouldn’t a spring banner with a flower and umbrella on each end be so cute?
The Cricut Maker can help you create so many fun projects! I use mine a few times a week! The other day I was thinking about just how amazing it is that I can create a digital image and then send it to my Maker and just cut it out! It has really brought crafting to a whole new level. 🙂 If you’re looking for more fun ideas of how to use your Cricut Maker, then be sure to check out my Cricut gallery!
This is a sponsored conversation written by me on behalf of Cricut. The opinions and text are all mine.
This is a sponsored conversation written by me on behalf of Cricut. The opinions and text are all mine.

Leave a Reply